- About
- Basic Features
- Introduction
- Platform Tenant Management
- Platform User Management
- TOTP Certification
- Basic Data Definition
- Media Management
- Command Management
- Mail Server Configuration
- Job Center
- Platform Host Resource Pool
- Platform Database Pool
- Platform Proxy Nodes Management
- Platform Components Management
- Additional Information Management
- Operation Log
- Connection Concurrency Configuration
- Customization of Platform Styles
- Parameter Templates
- License
- Monitor Large Screen
- Overview Display
- Tenant User Management
- Tenant Host Resource Pool
- Tenant Proxy Nodes Management
- Menu Management
- Report Center
- MogDB/openGauss
- Backup Recovery Center
- Monitoring
- Alert Center
- Inspect Center
Database Creation
Function Entrance
MogDB/openGauss Instance List --> Create
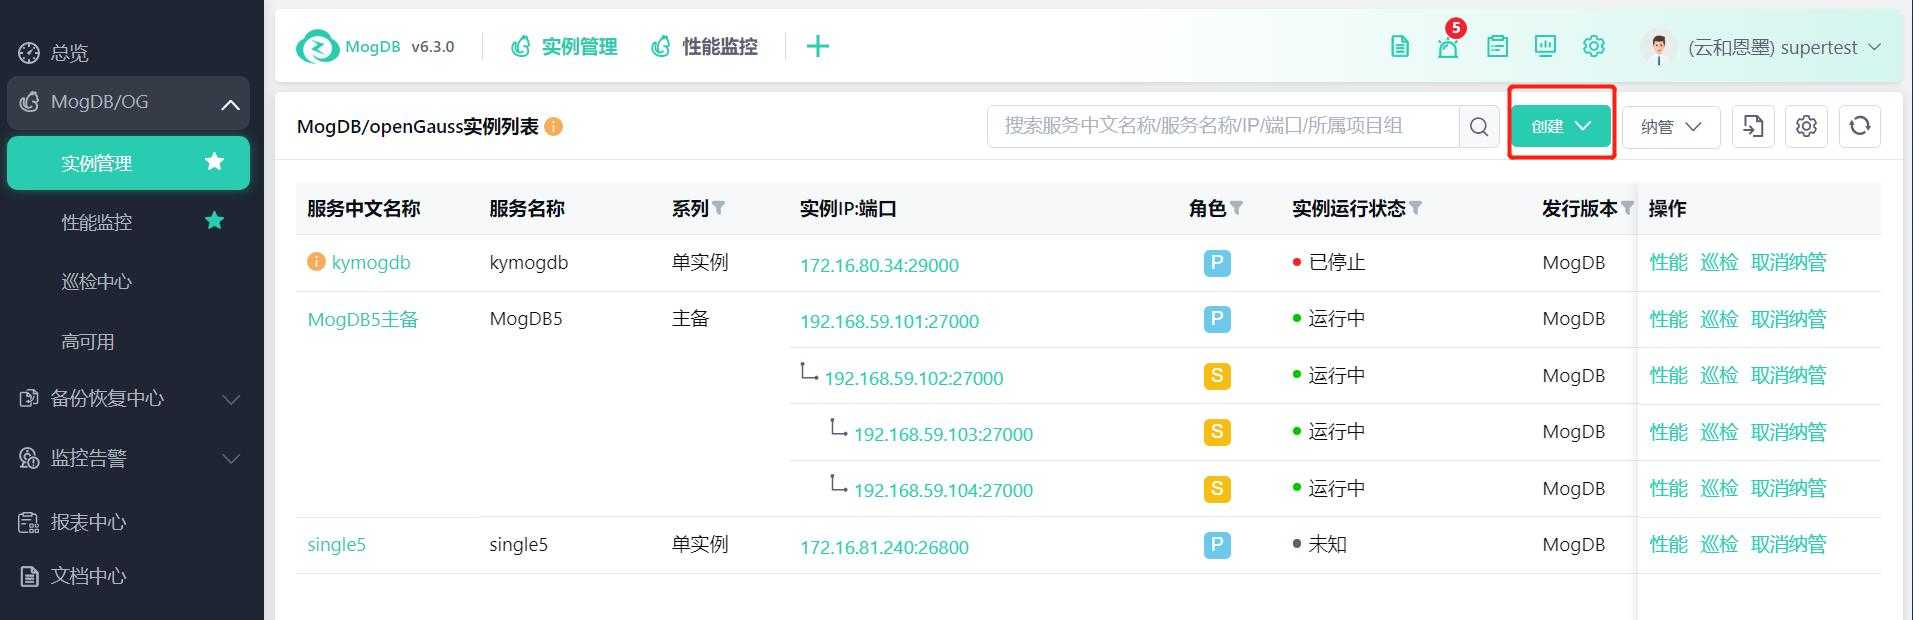
Function Description
Automated deployment of databases, supporting the installation of MogDB/openGauss databases on clean environments, as well as on environments where MogDB/openGauss databases are already installed.
| Scenario | Supported Features |
|---|---|
| Target environment has no MogDB/openGauss database installed | Automatically install MogDB/openGauss database |
| Target environment has MogDB/openGauss database installed | Automatically install MogDB/openGauss database |
The prerequisite for installing the database is that the platform has managed the target host and it can be found in the host resource pool. Required installation media need to be uploaded, including: ptk tools, MogDB/openGauss installation packages, python. Basic data should be maintained in advance, including: project groups, database pools, parameter templates, to ensure normal network between nodes for the deployment of one primary and multiple standby nodes.
The currently supported database list is as follows:
| Deployment Architecture | Database Version |
|---|---|
| Single instance | 5.0 |
| primary-standby (up to 1 primary and 8 standbys) | 5.0 |
| Cascade (the total number of standby database and cascade database is less than 9, cascade database do not support connecting to cascade database) | 5.0 |
Operating Instructions
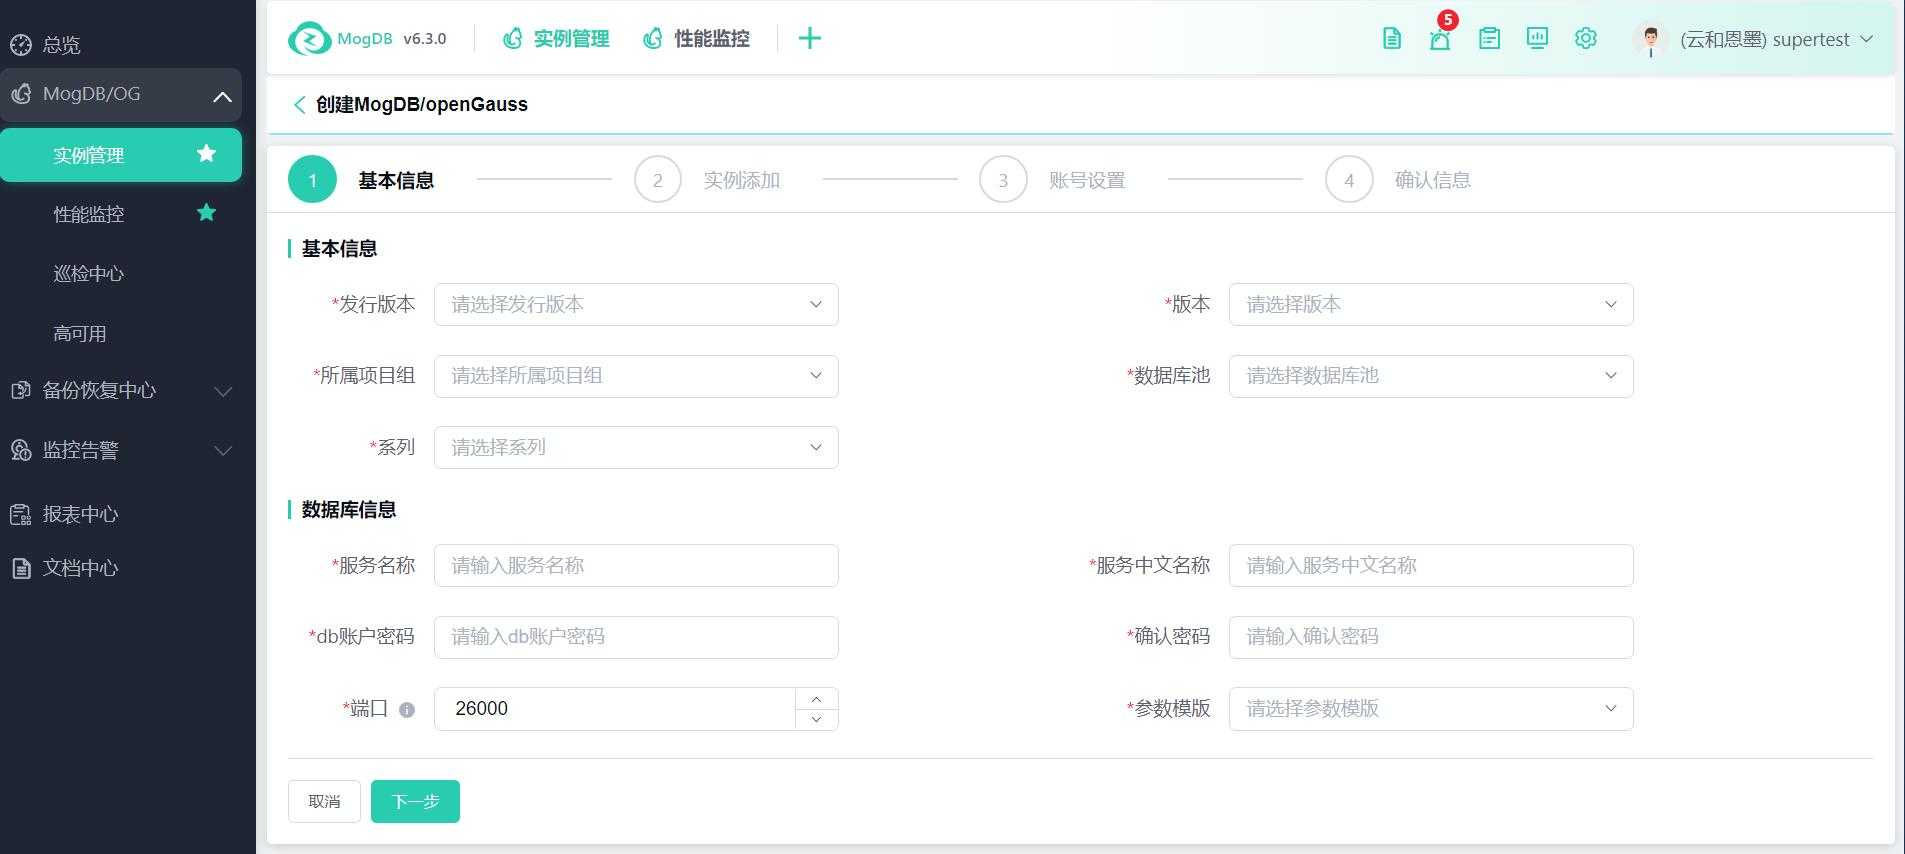
Step 1: Set Database Basic Information
If the series is chosen as primary-standby, at least one primary and one standby instance must be created in the second step; if a single instance is chosen, only one instance can be created in the second step and cannot be added;
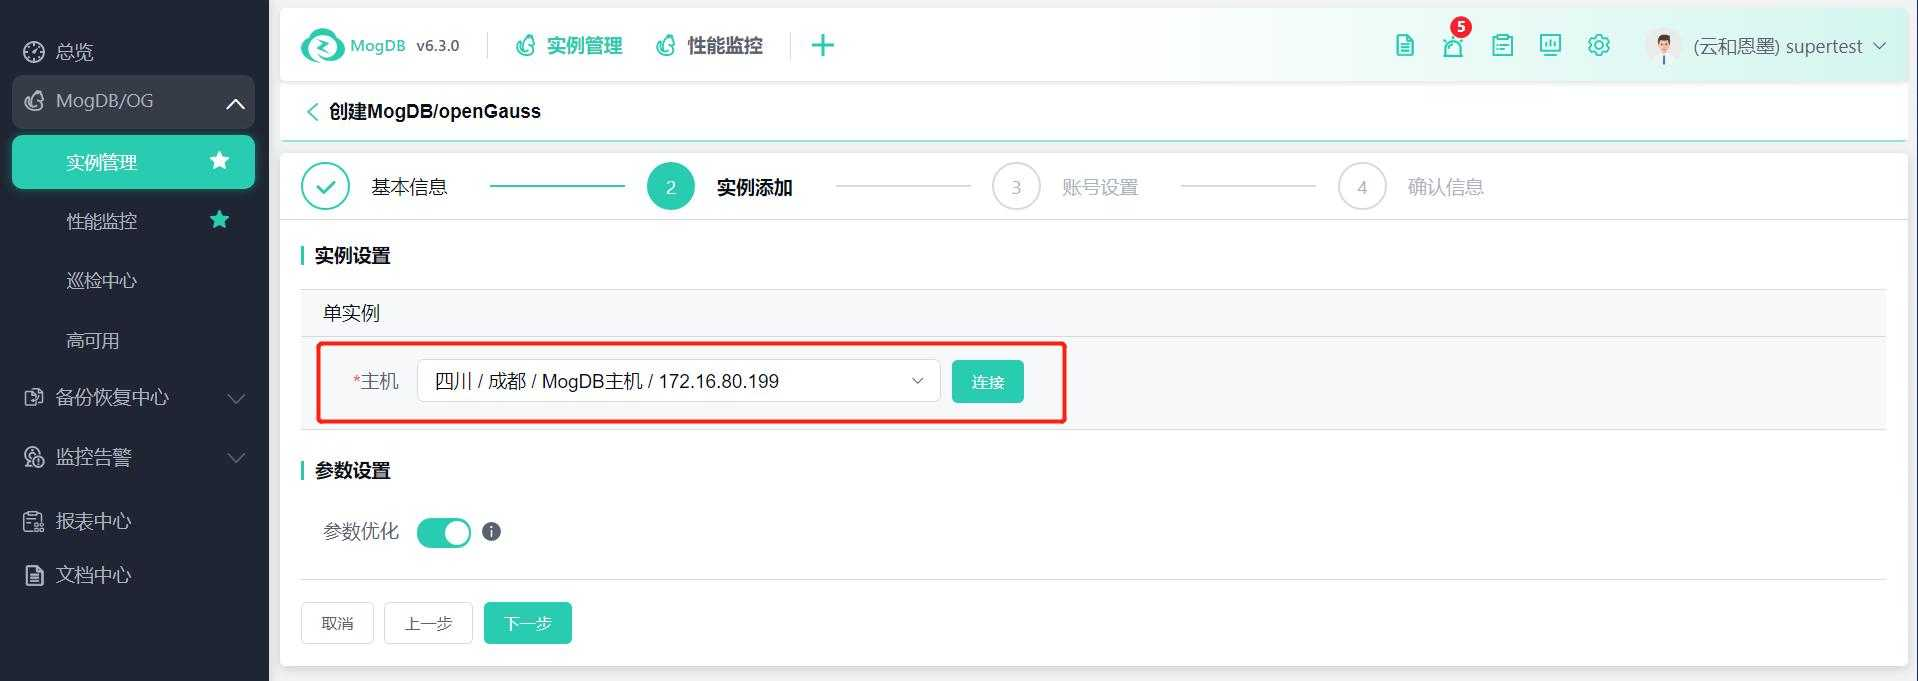
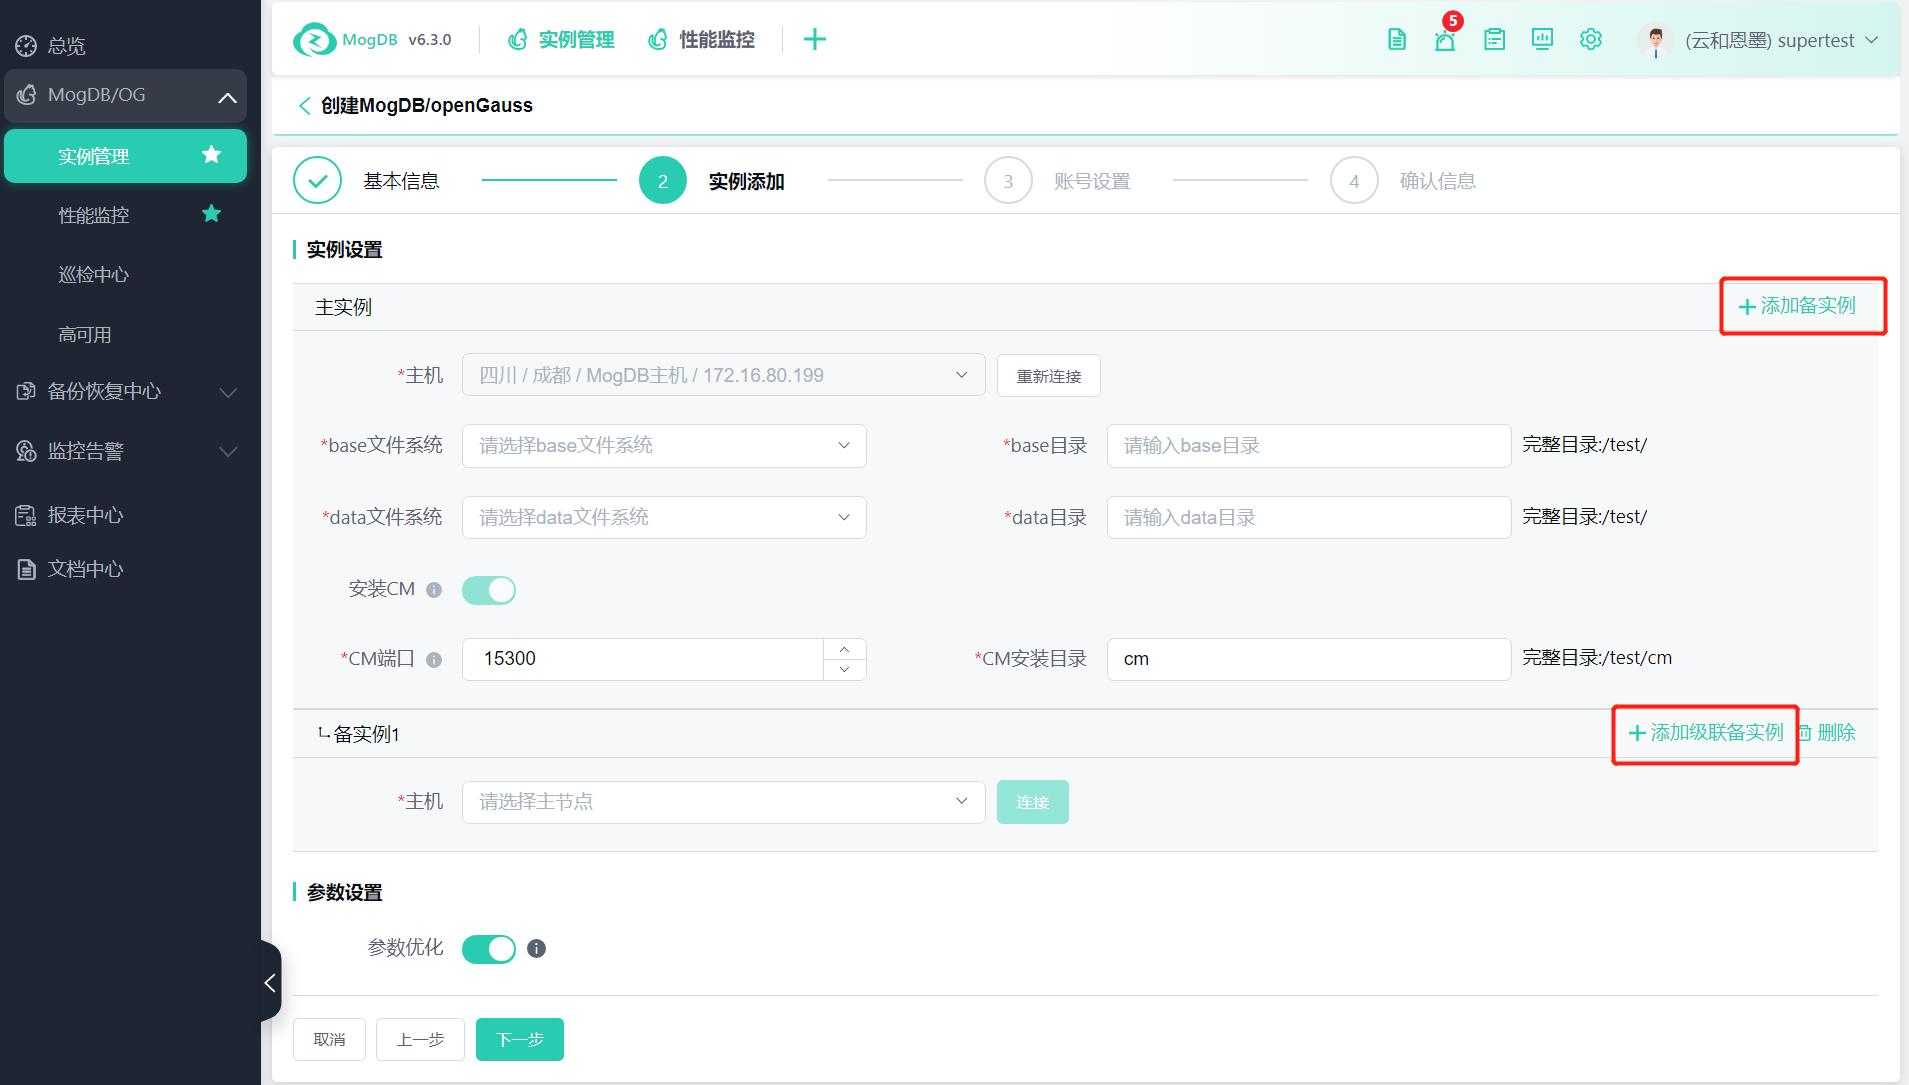
Step 2: Instance Addition
Select the host of the primary instance and connect successfully before proceeding to subsequent settings;
After the host connection is successful, continue to set the base file system and directory, data file system directory;
For primary-standby type instances, the primary instance must install CM; CM will be installed on the same host as the instance by default, only the port and installation directory need to be set;
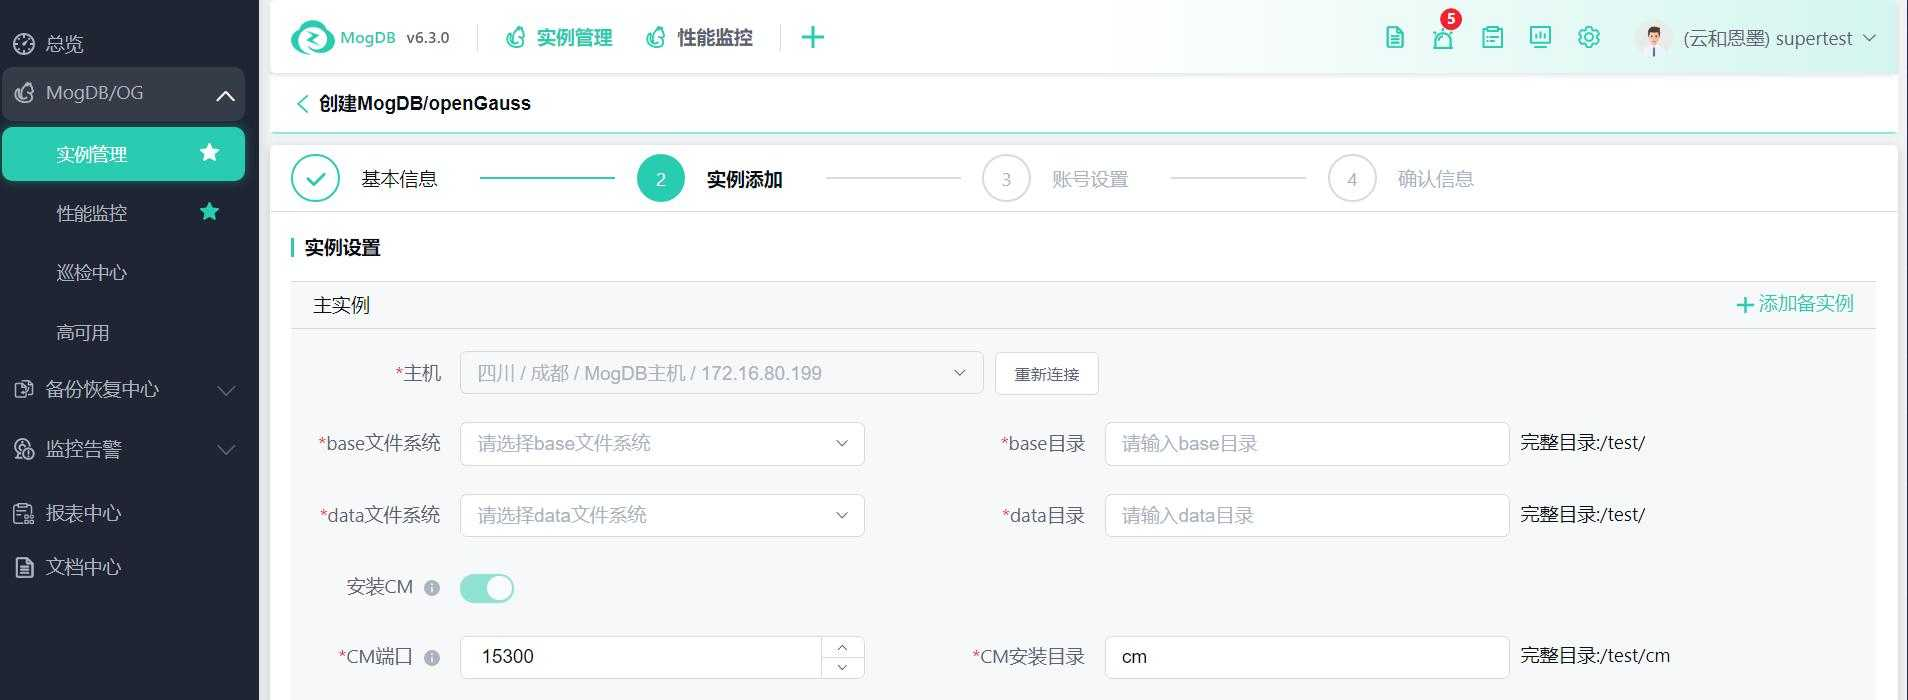
You can click the button in the upper right corner to add a standby instance to the current instance;
After the standby instance host is selected successfully, only the installation of CM, base file system, data file system, and CM installation directory need to be set, which will be consistent with the primary instance;
Note: For one primary and one standby, two CMs need to be installed, that is, both primary and standby instances need to enable installation of CM;
For one primary and multiple standby, it supports the installation of 3/5/7/9 odd numbers of CMs, please reasonably choose whether to enable the instance's CM installation;
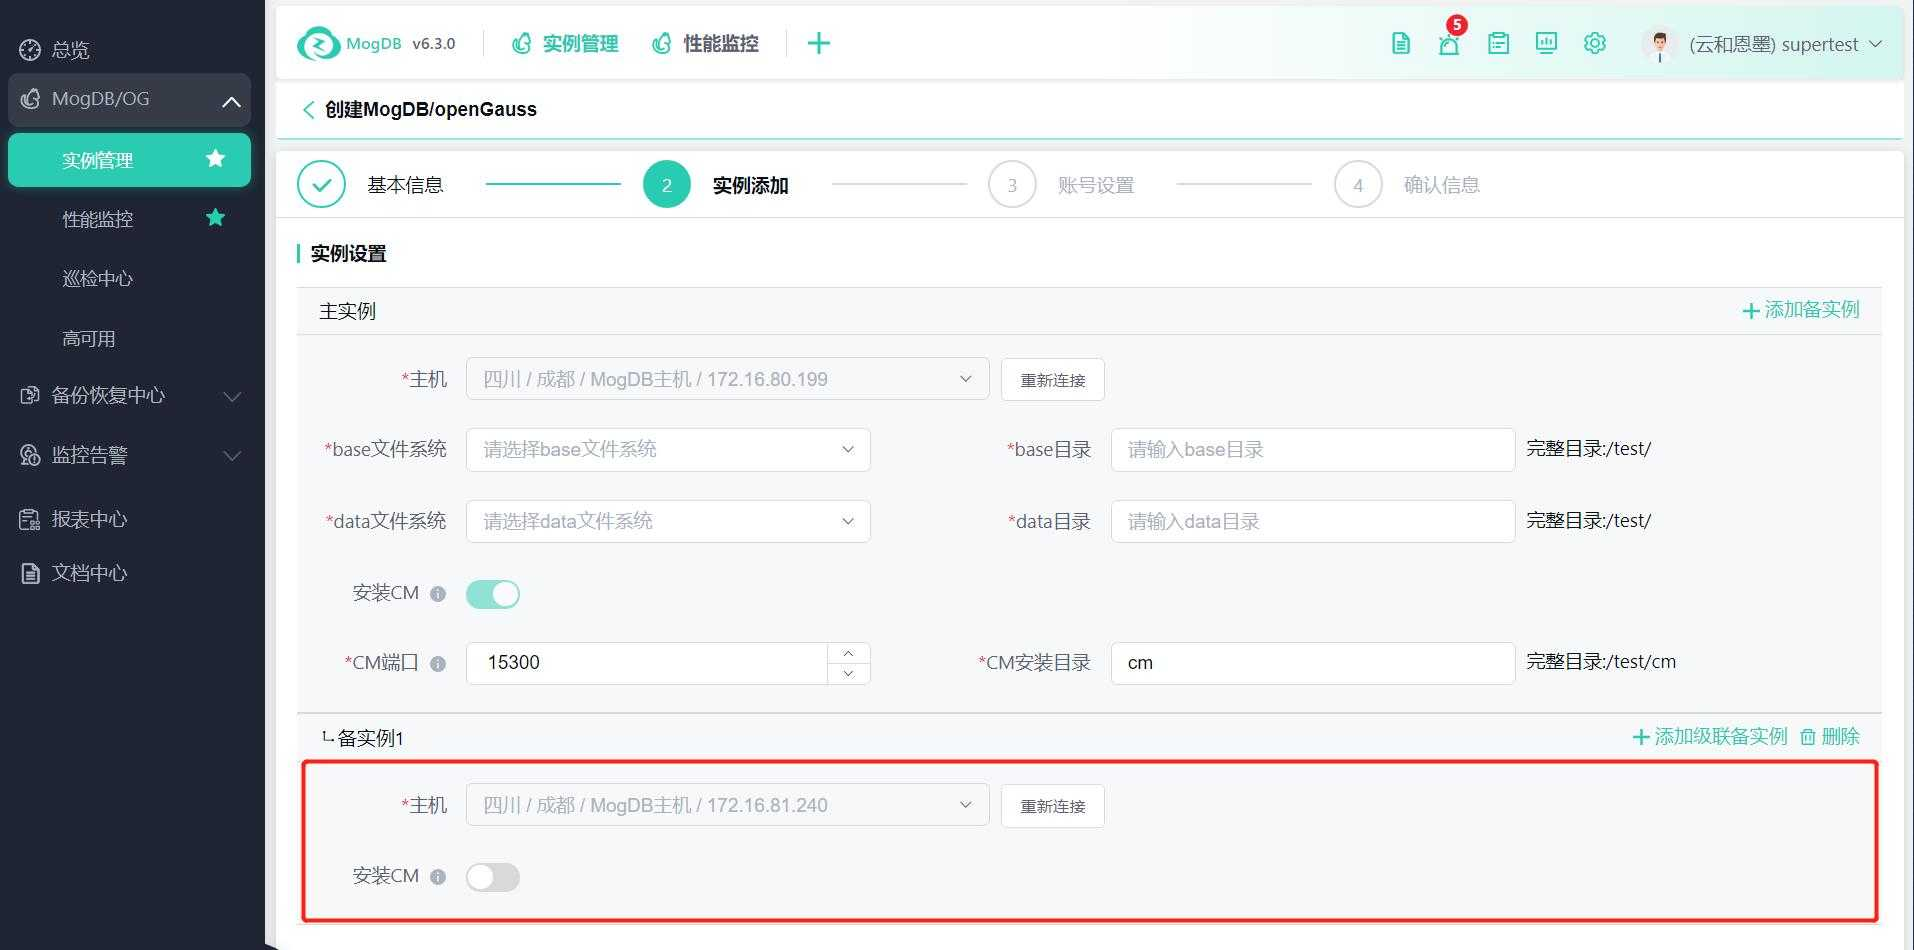
You can click the button in the upper right corner to continue adding instances, up to 9 instances are supported for a single database;
Step 3: Account Settings
Set up the host account and create a maintenance user;

Step 4: Confirm Information
Confirm the information before installation is correct, click the [Confirm] button to start installation;
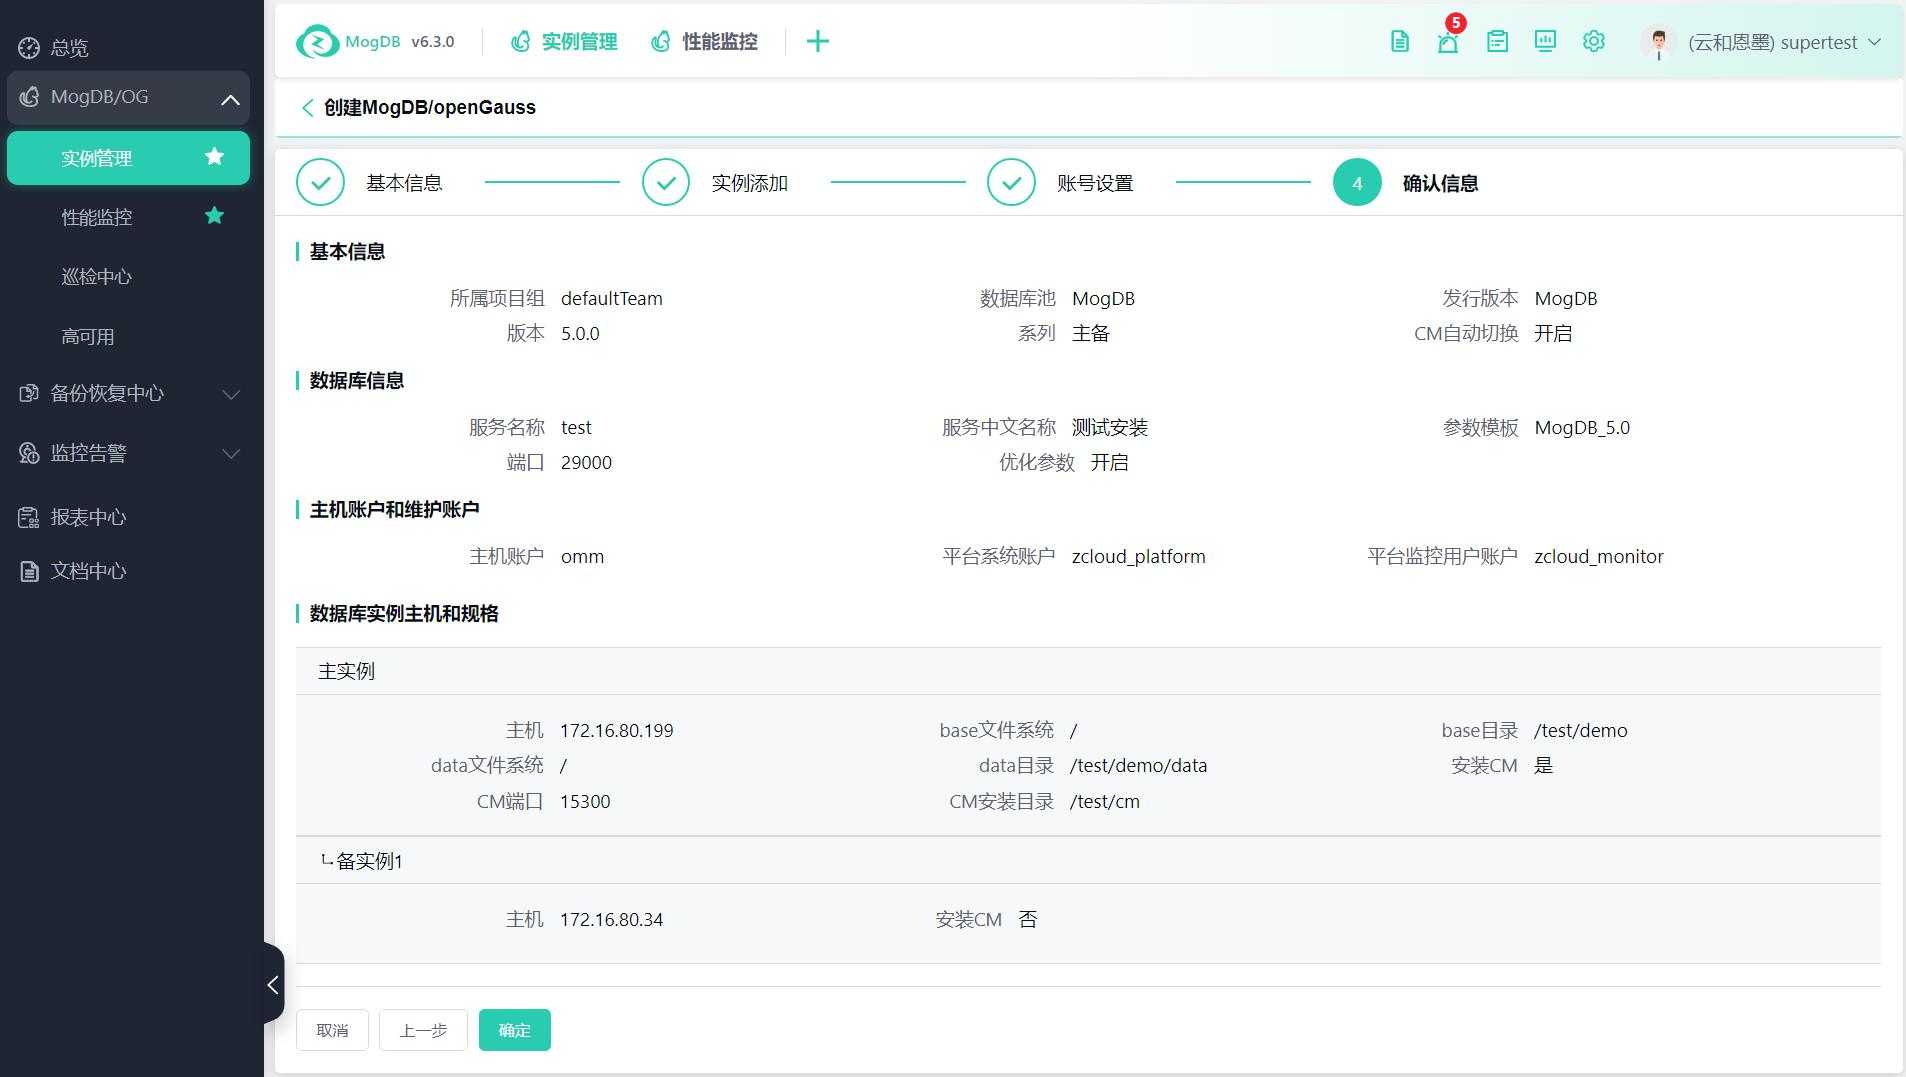
After the installation starts, you can check the installation progress in the task center or the database list.