- About
- Basic Features
- Introduction
- Platform Tenant Management
- Platform User Management
- TOTP Certification
- Basic Data Definition
- Media Management
- Command Management
- Mail Server Configuration
- Job Center
- Platform Host Resource Pool
- Platform Database Pool
- Platform Proxy Nodes Management
- Platform Components Management
- Additional Information Management
- Operation Log
- Connection Concurrency Configuration
- Customization of Platform Styles
- Parameter Templates
- License
- Monitor Large Screen
- Overview Display
- Tenant User Management
- Tenant Host Resource Pool
- Tenant Proxy Nodes Management
- Menu Management
- Report Center
- MogDB/openGauss
- Backup Recovery Center
- Monitoring
- Alert Center
- Inspect Center
Alert Message Sending Channel
Function Entrance
Monitoring Alerts --> Alert Message Sending Channels --> Create
Note: The alert channel supports email, WeCom, Zabbix, multi-protocol standard message bodies, and other methods.
Function Description
The alert message sending channel refers to the method by which alert messages are sent to those who need to be informed. Based on specific circumstances, the platform comes with built-in alert message sending channels such as email, WeCom, Zabbix, and multi-protocol standard message bodies.
Operating Instructions
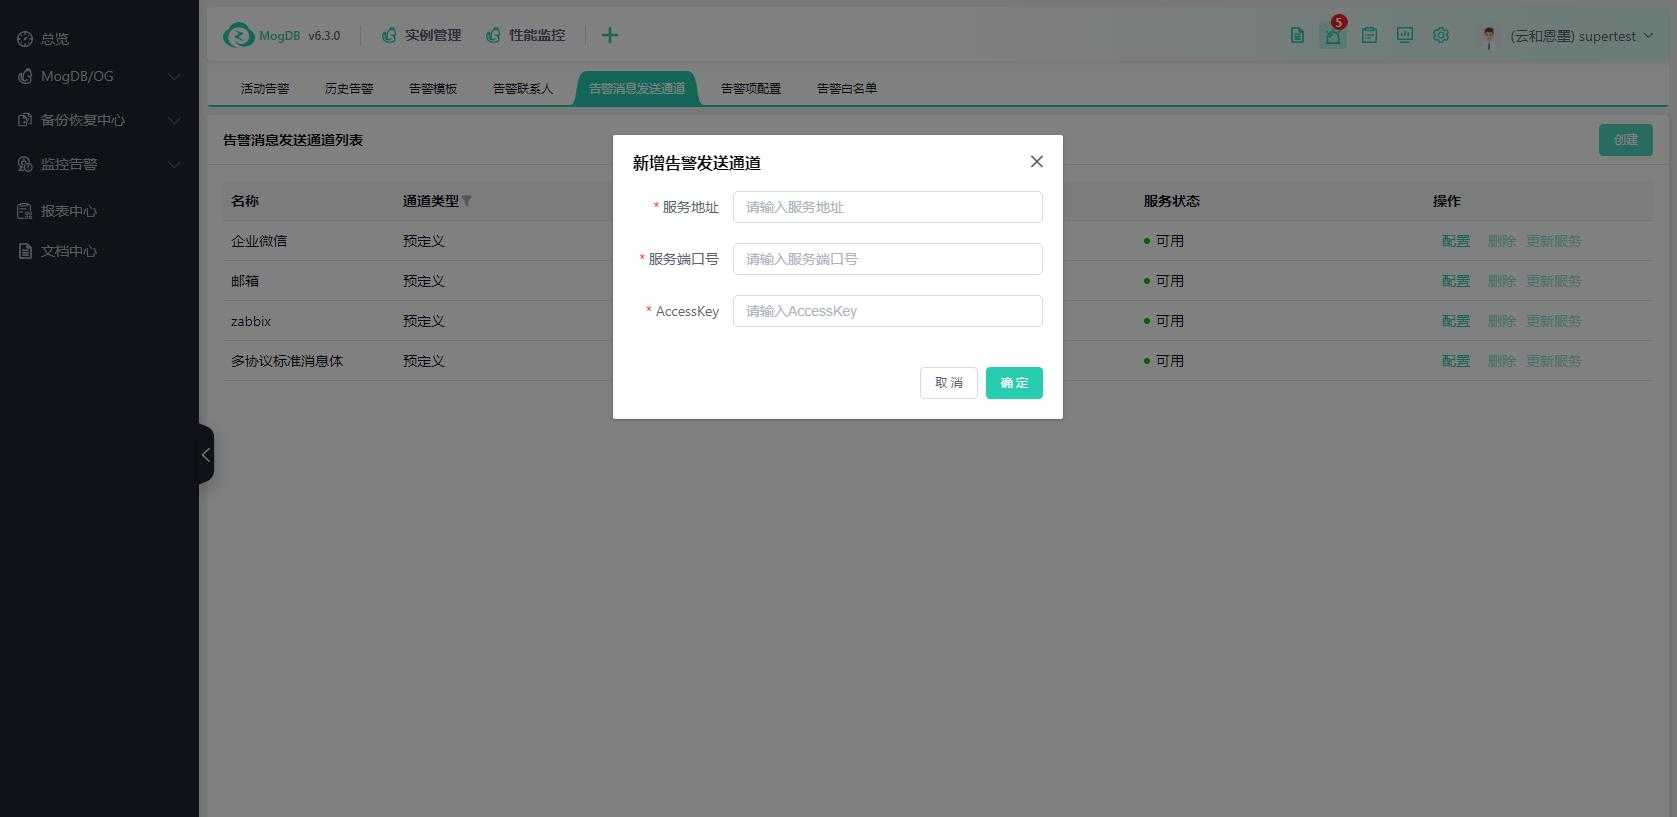
Parameter Configuration
Click the Create button and enter the IP address, port, and tenant accessKey for the platform's email alert microservice zcloud_mail_sender.service. The accessKey should be configured in the accessKey.properties file, corresponding to the tenant's accessKey. For specific configuration details, please refer to the document "Yunhe Enmo Data Cloud Management Platform zCloud Email Alert Deployment Configuration Documentation.docx". The platform's built-in email alert channel service port is 8206. If you have any questions during the configuration, please contact the product service personnel for support.

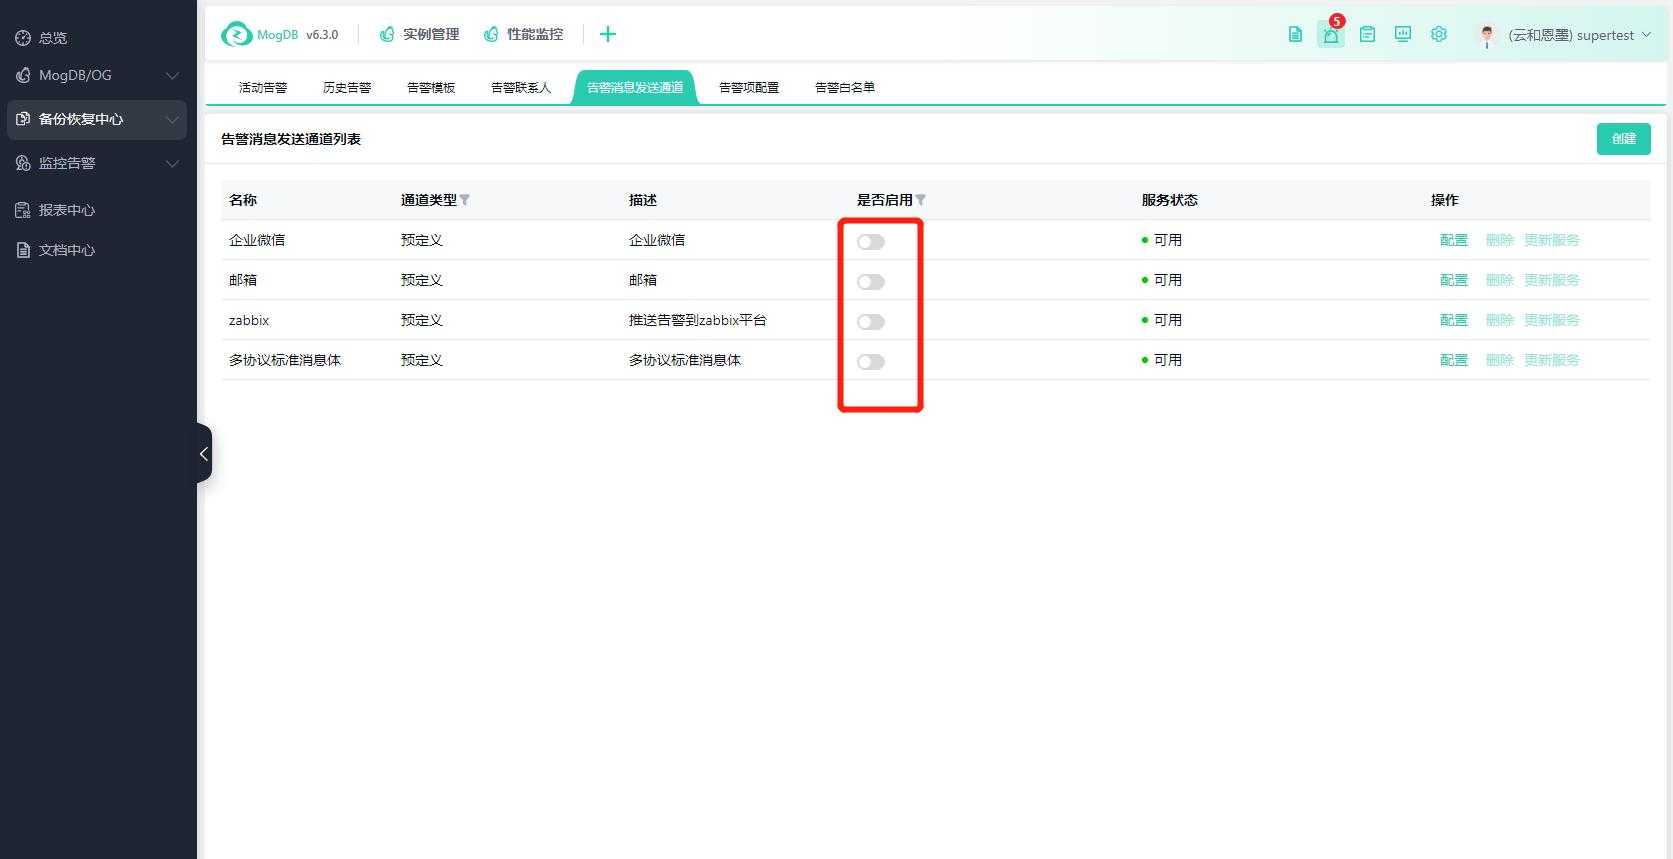
Click "Confirm", once the service validation is successful, the email alert channel will be displayed on the page. Click the "Enable" switch to control whether to enable or disable this channel.
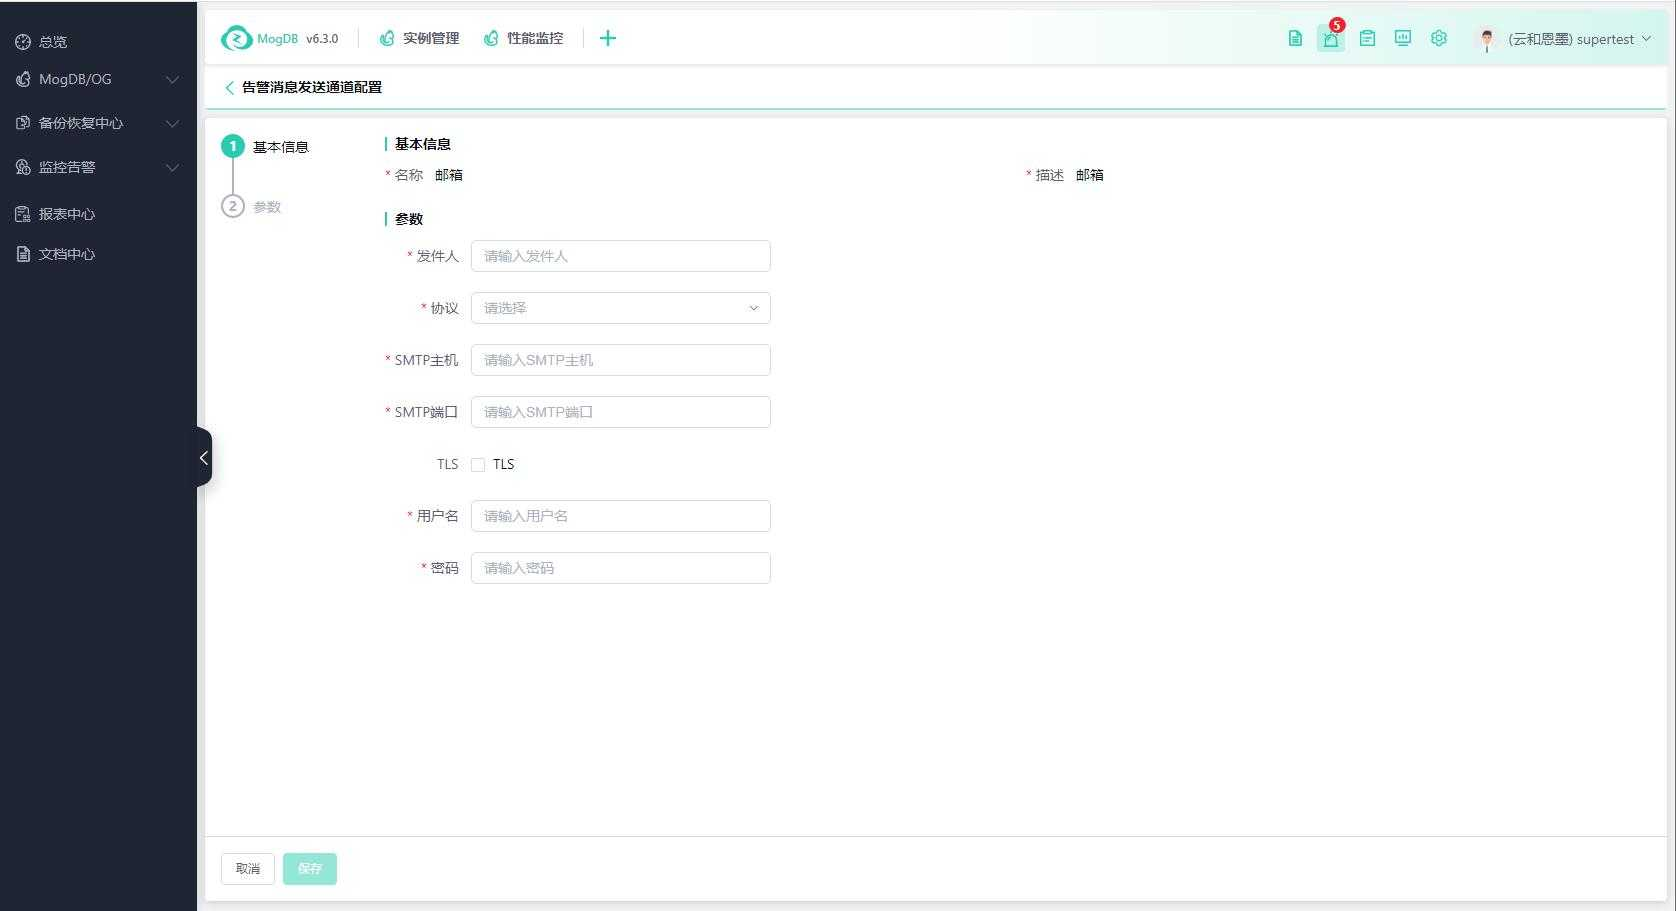
Click "Configure" to enter the email server information and the username and password of the email sender. After clicking "Confirm" and the validation is successful, save the settings to make them effective.
Notification Message Format
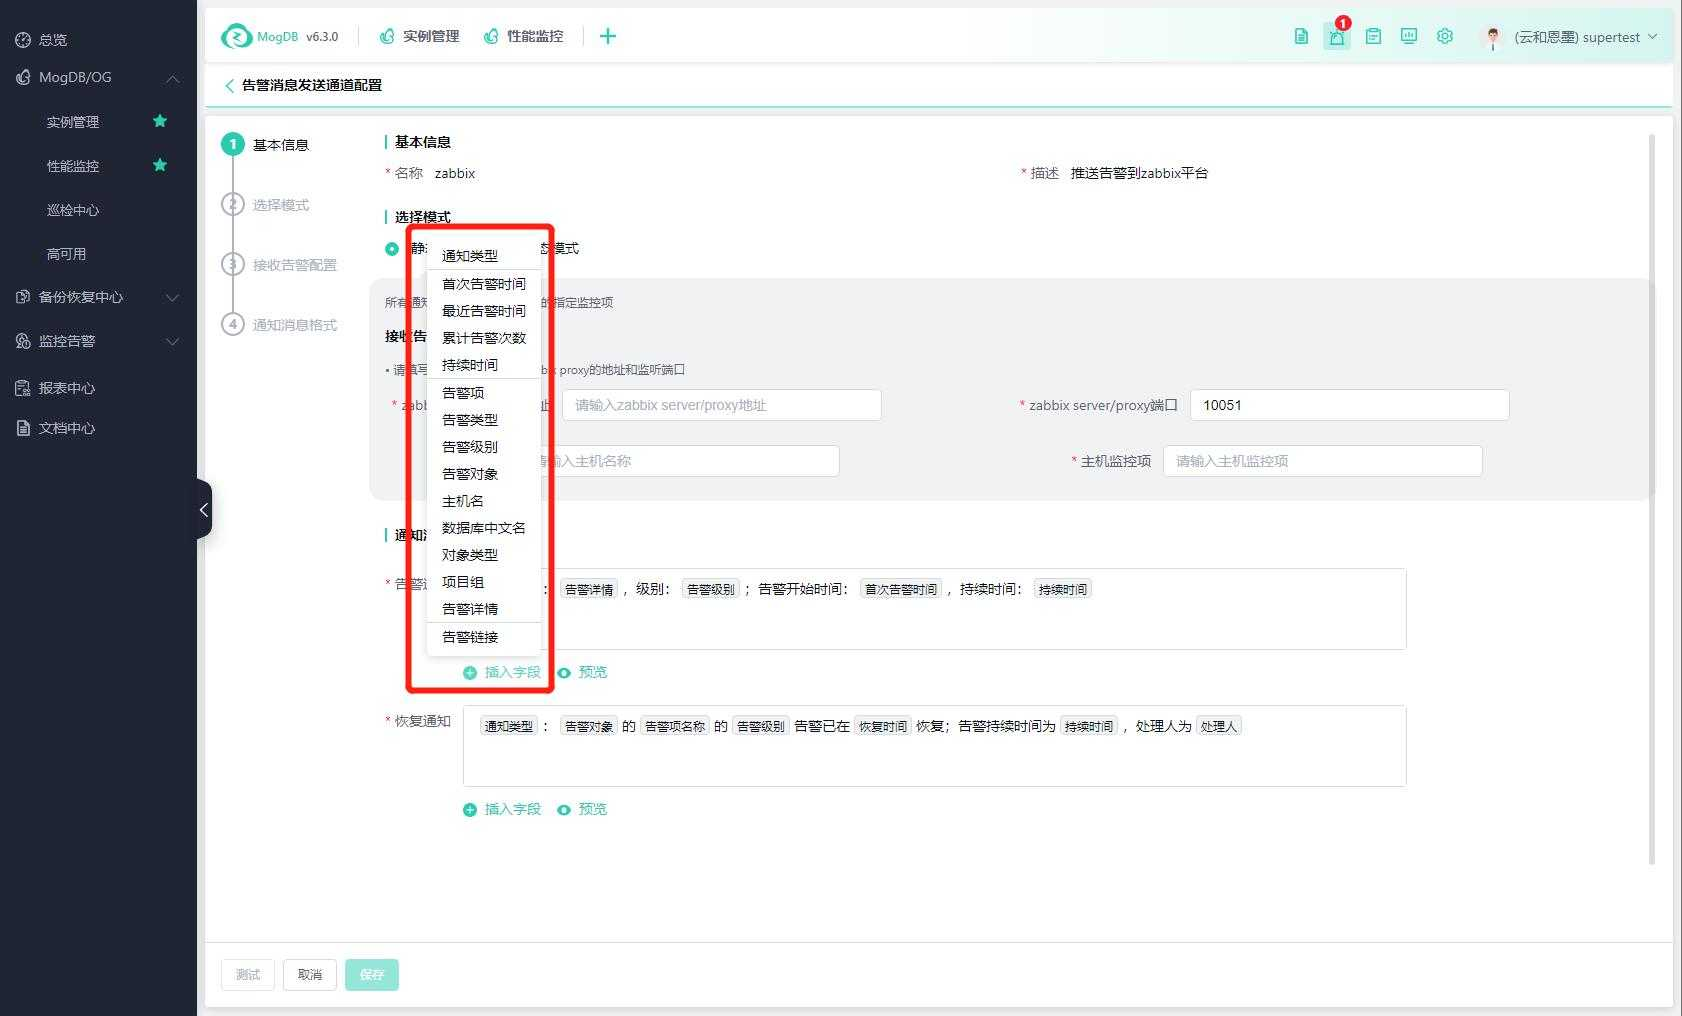
You can customize the format of the notification message:
-
You can directly enter fields in the input box;
-
You can click "Insert Field" to select common fields from zCloud and insert them into the notification message;
-
You can click "Preview" to replace the inserted fields with preset values, making it easy to view the preview style of the alert message format.
Configuring the WeCom Channel
The alert notifications can be sent to individual WeCom accounts and WeCom group chats.
Function Entrance
Alert Center --> Alert Contacts
Alert Center --> Alert Templates
Alert Center --> Alert Message Sending Channels
Prerequisites
-
If the target type is an individual WeCom account, the customer's WeCom administrator needs to provide the application information for receiving alert notifications (including the Corporation ID, Application AgentId, and Application Secret).
-
If the target type is an individual WeCom account, it is necessary to configure the WeCom email, phone number, and personal email in the alert contact and add it to the corresponding alert template.
-
If the target type is a WeCom group chat, a group chat robot needs to be created within the chat to obtain the Webhook URL.
-
If the target type is a WeCom group chat, an alert contact group of the WeCom group chat type needs to be configured within the alert contact group and added to the corresponding alert template.
Individual WeCom Alerts
Step Overview:
On the Alert Contact page: Configure personal information such as WeCom email. --> On the Alert Template page: Select the alert contacts. --> On the Alert Message Sending Channel page: Configure the strategy and set up application information.
Detailed Steps:
-
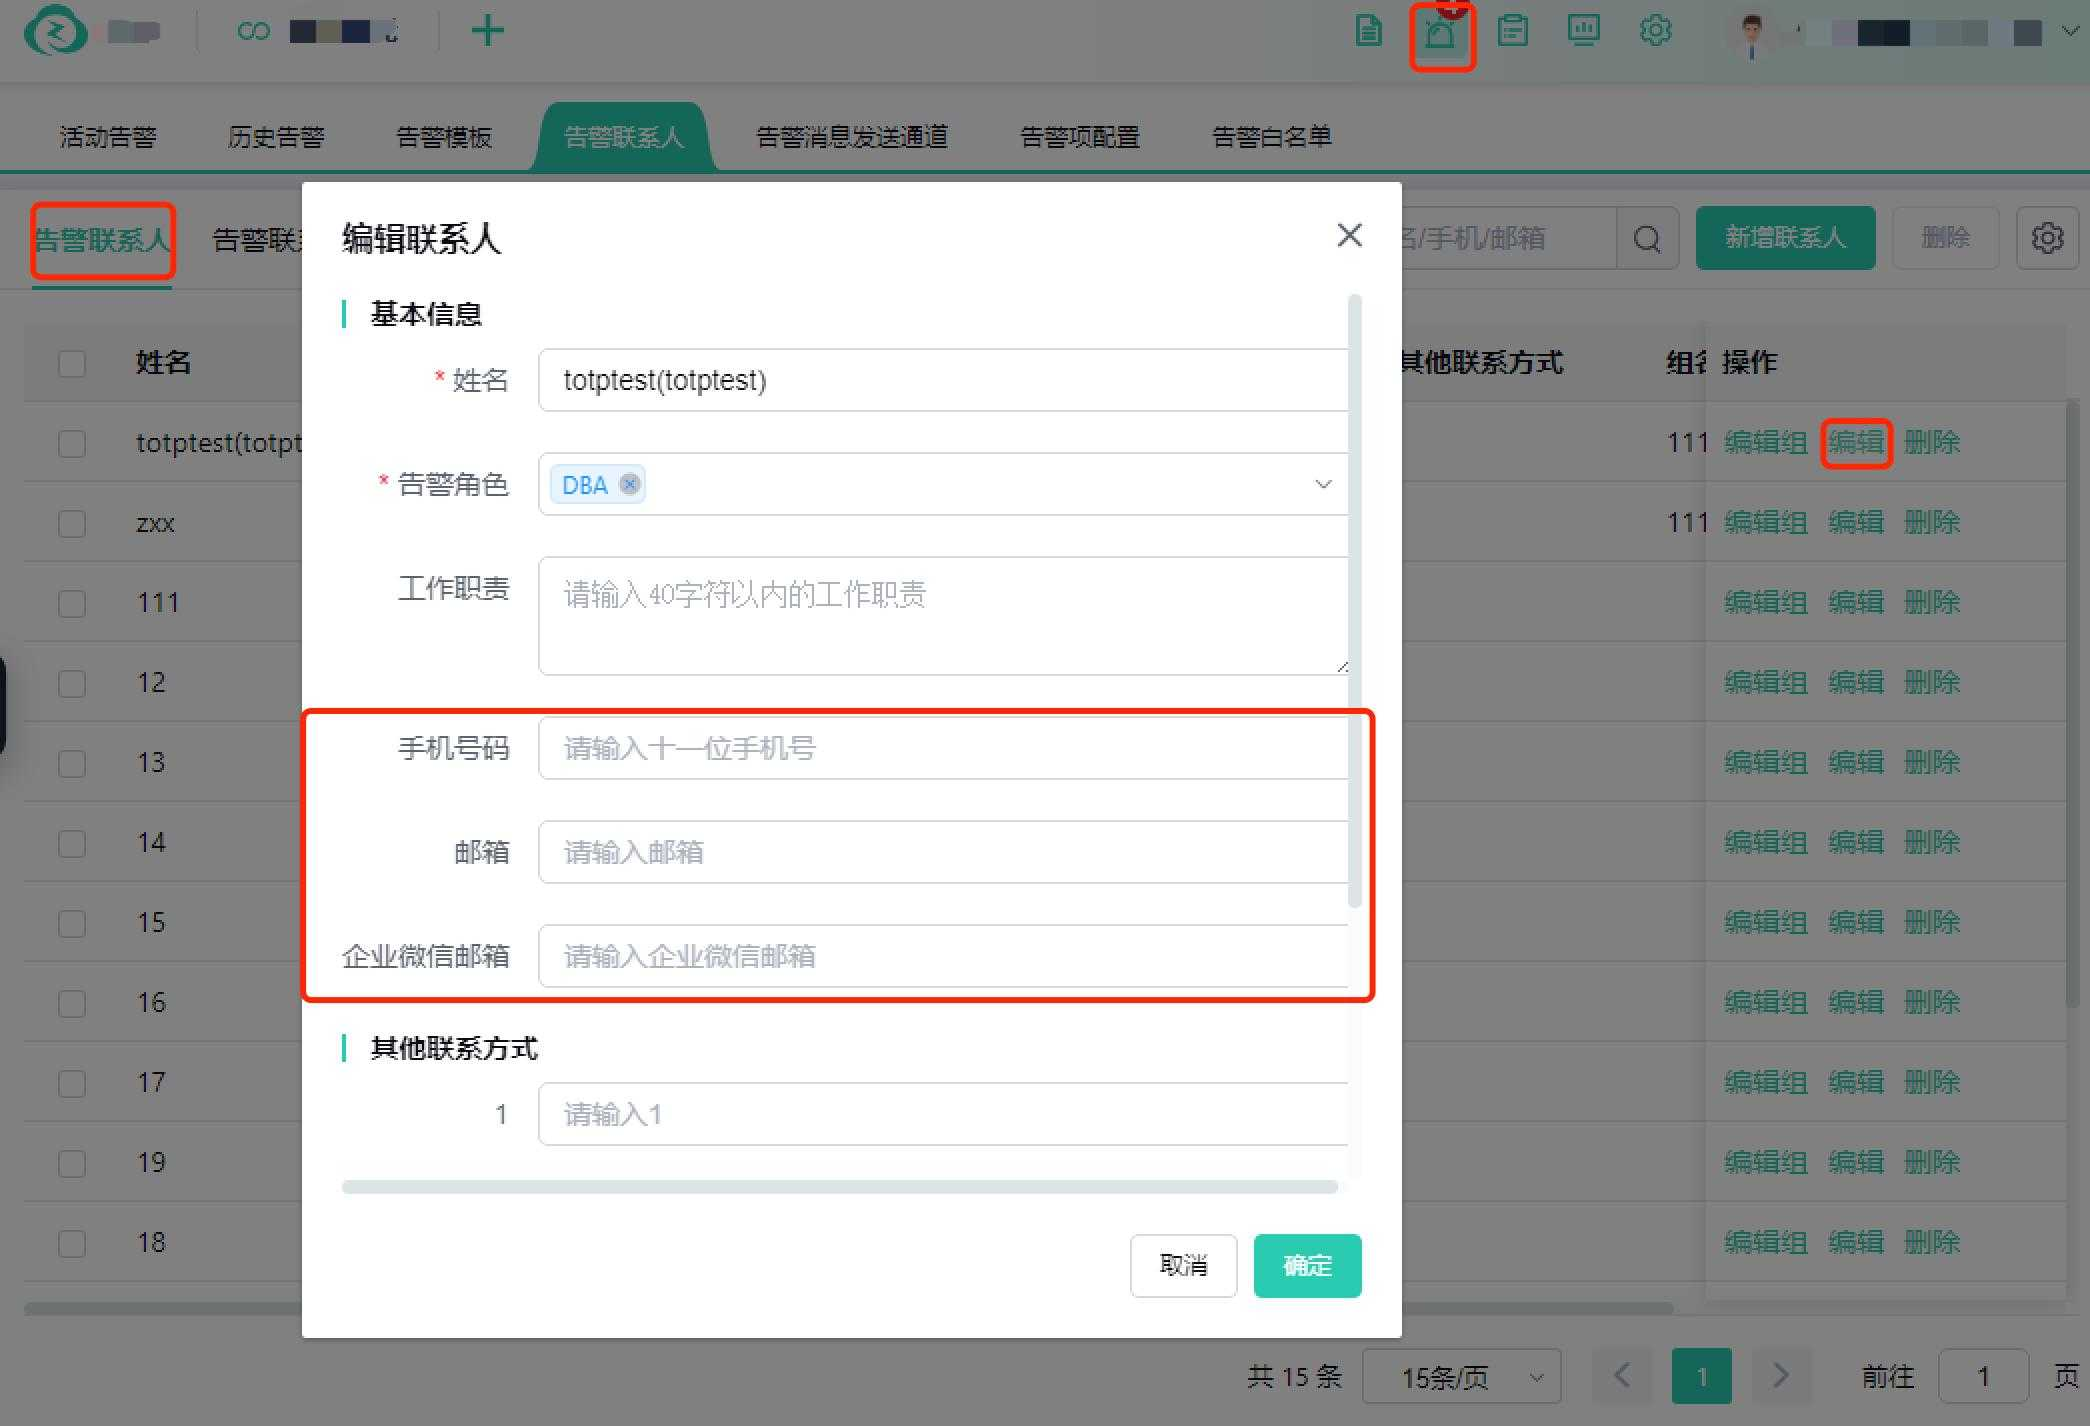
Configure the mobile number and WeCom email, personal email for the alert contact.
You need to set up the WeCom email, personal email, and mobile phone number within the Alert Center --> Alert Contacts --> Edit page;
At least one of the corporate email, personal email, or mobile phone number must be filled in to be associated with the WeCom ID; The association priority is: WeCom email first, then personal email, and finally mobile phone number.
-
Selecting Alert Contacts in the Alert Template
2.1. After creating the template, click the edit button.
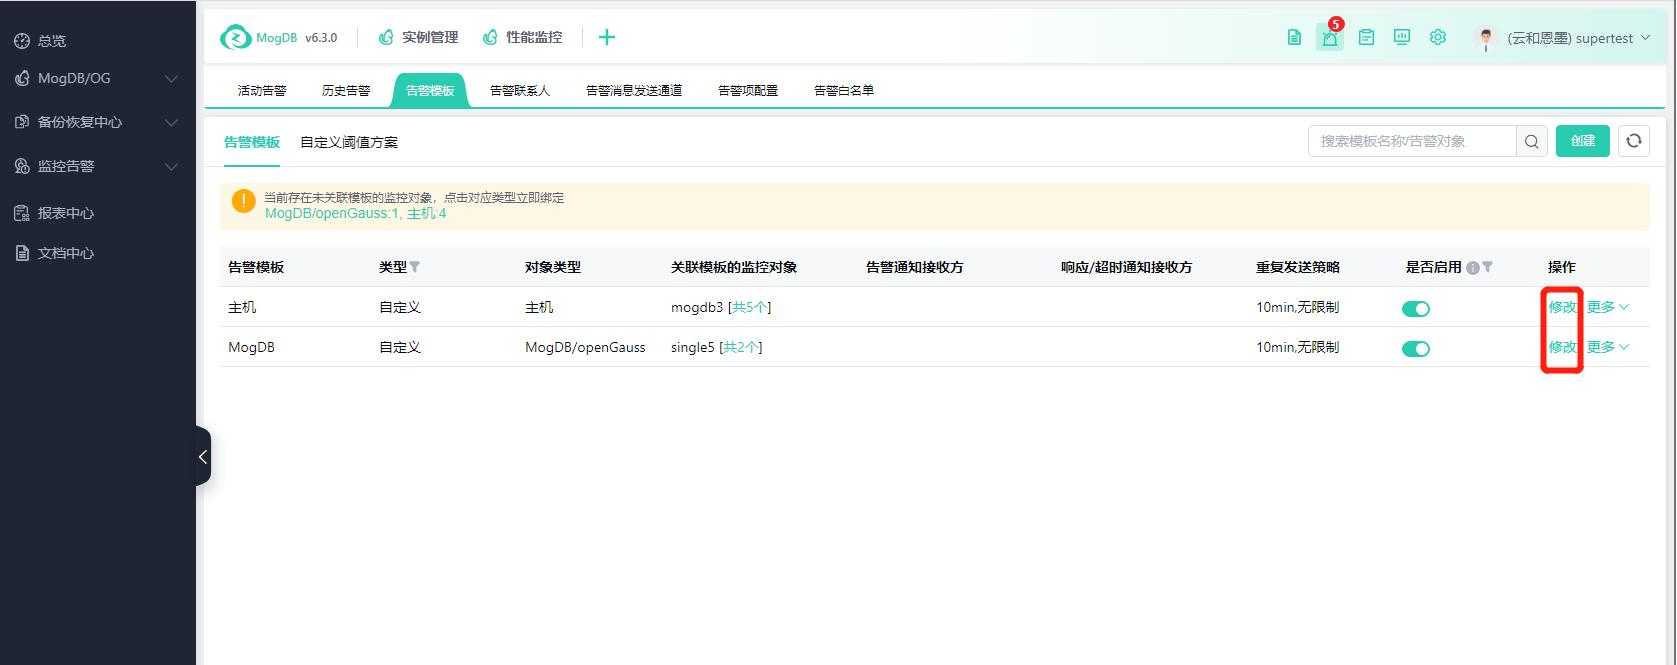
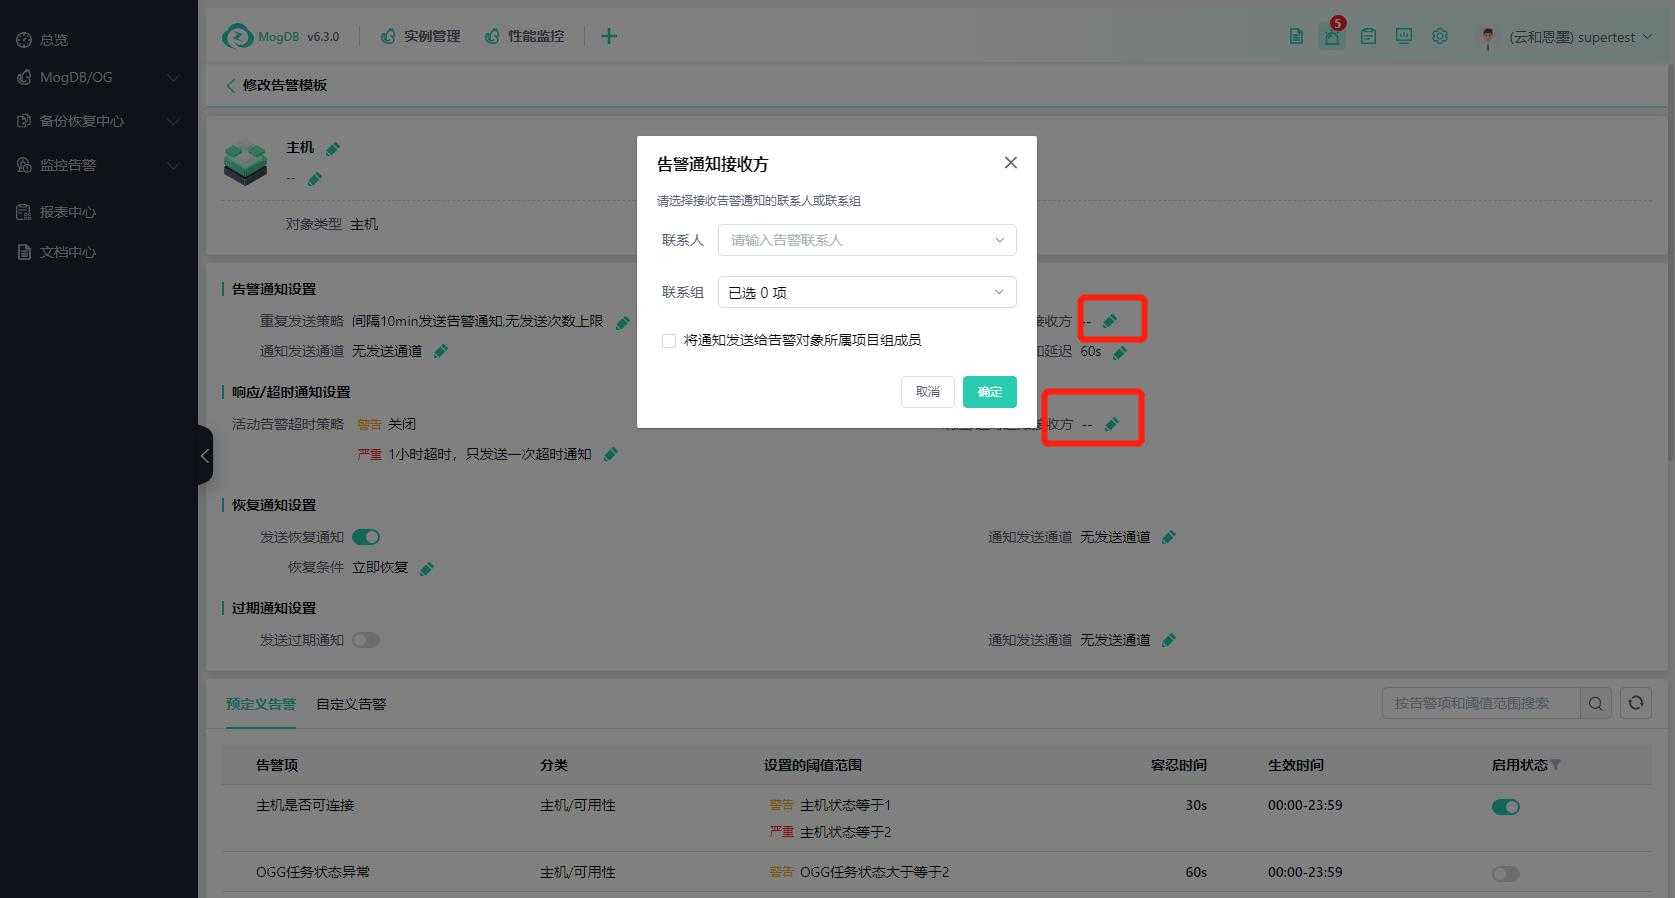
Click the edit icon to configure the alert notification recipients by selecting alert contacts;
Click the edit icon again to configure the response/timeout notification recipients by selecting alert contacts.
-
Configure WeCom channel: push to personal WeCom Account
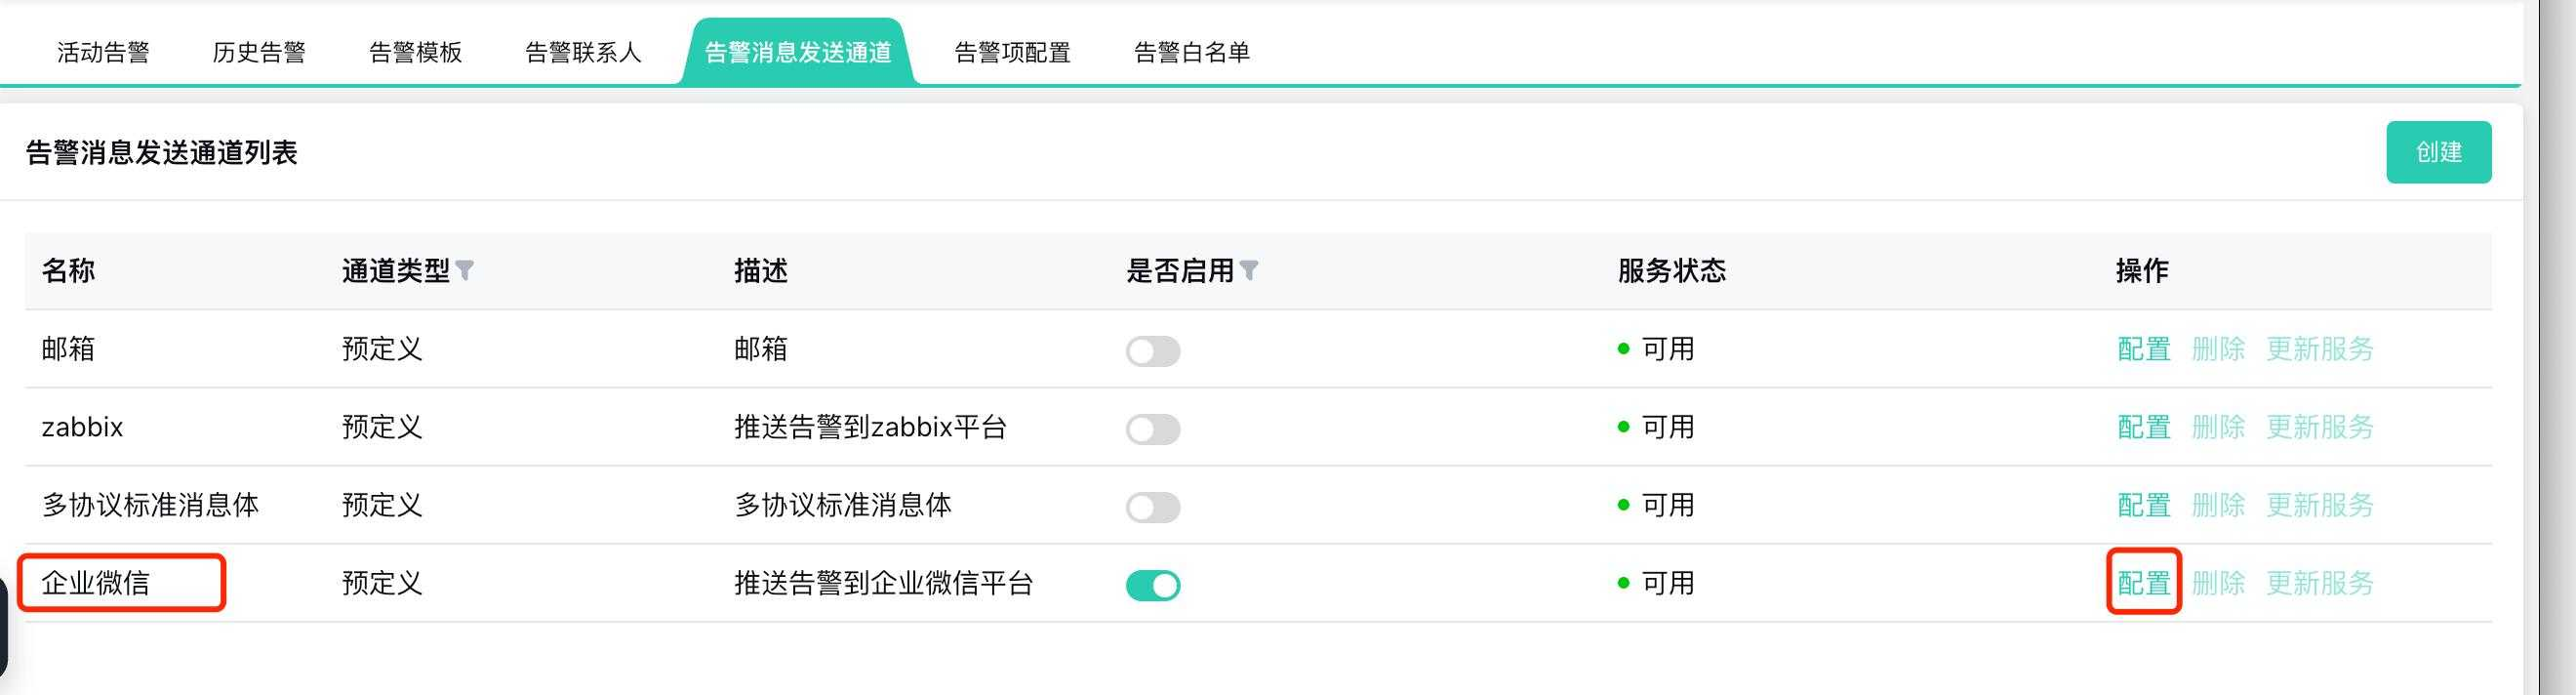
3.1. Navigate to the Alert Center --> Alert Message Sending Channels --> Select the channel named "WeCom" --> Configure.

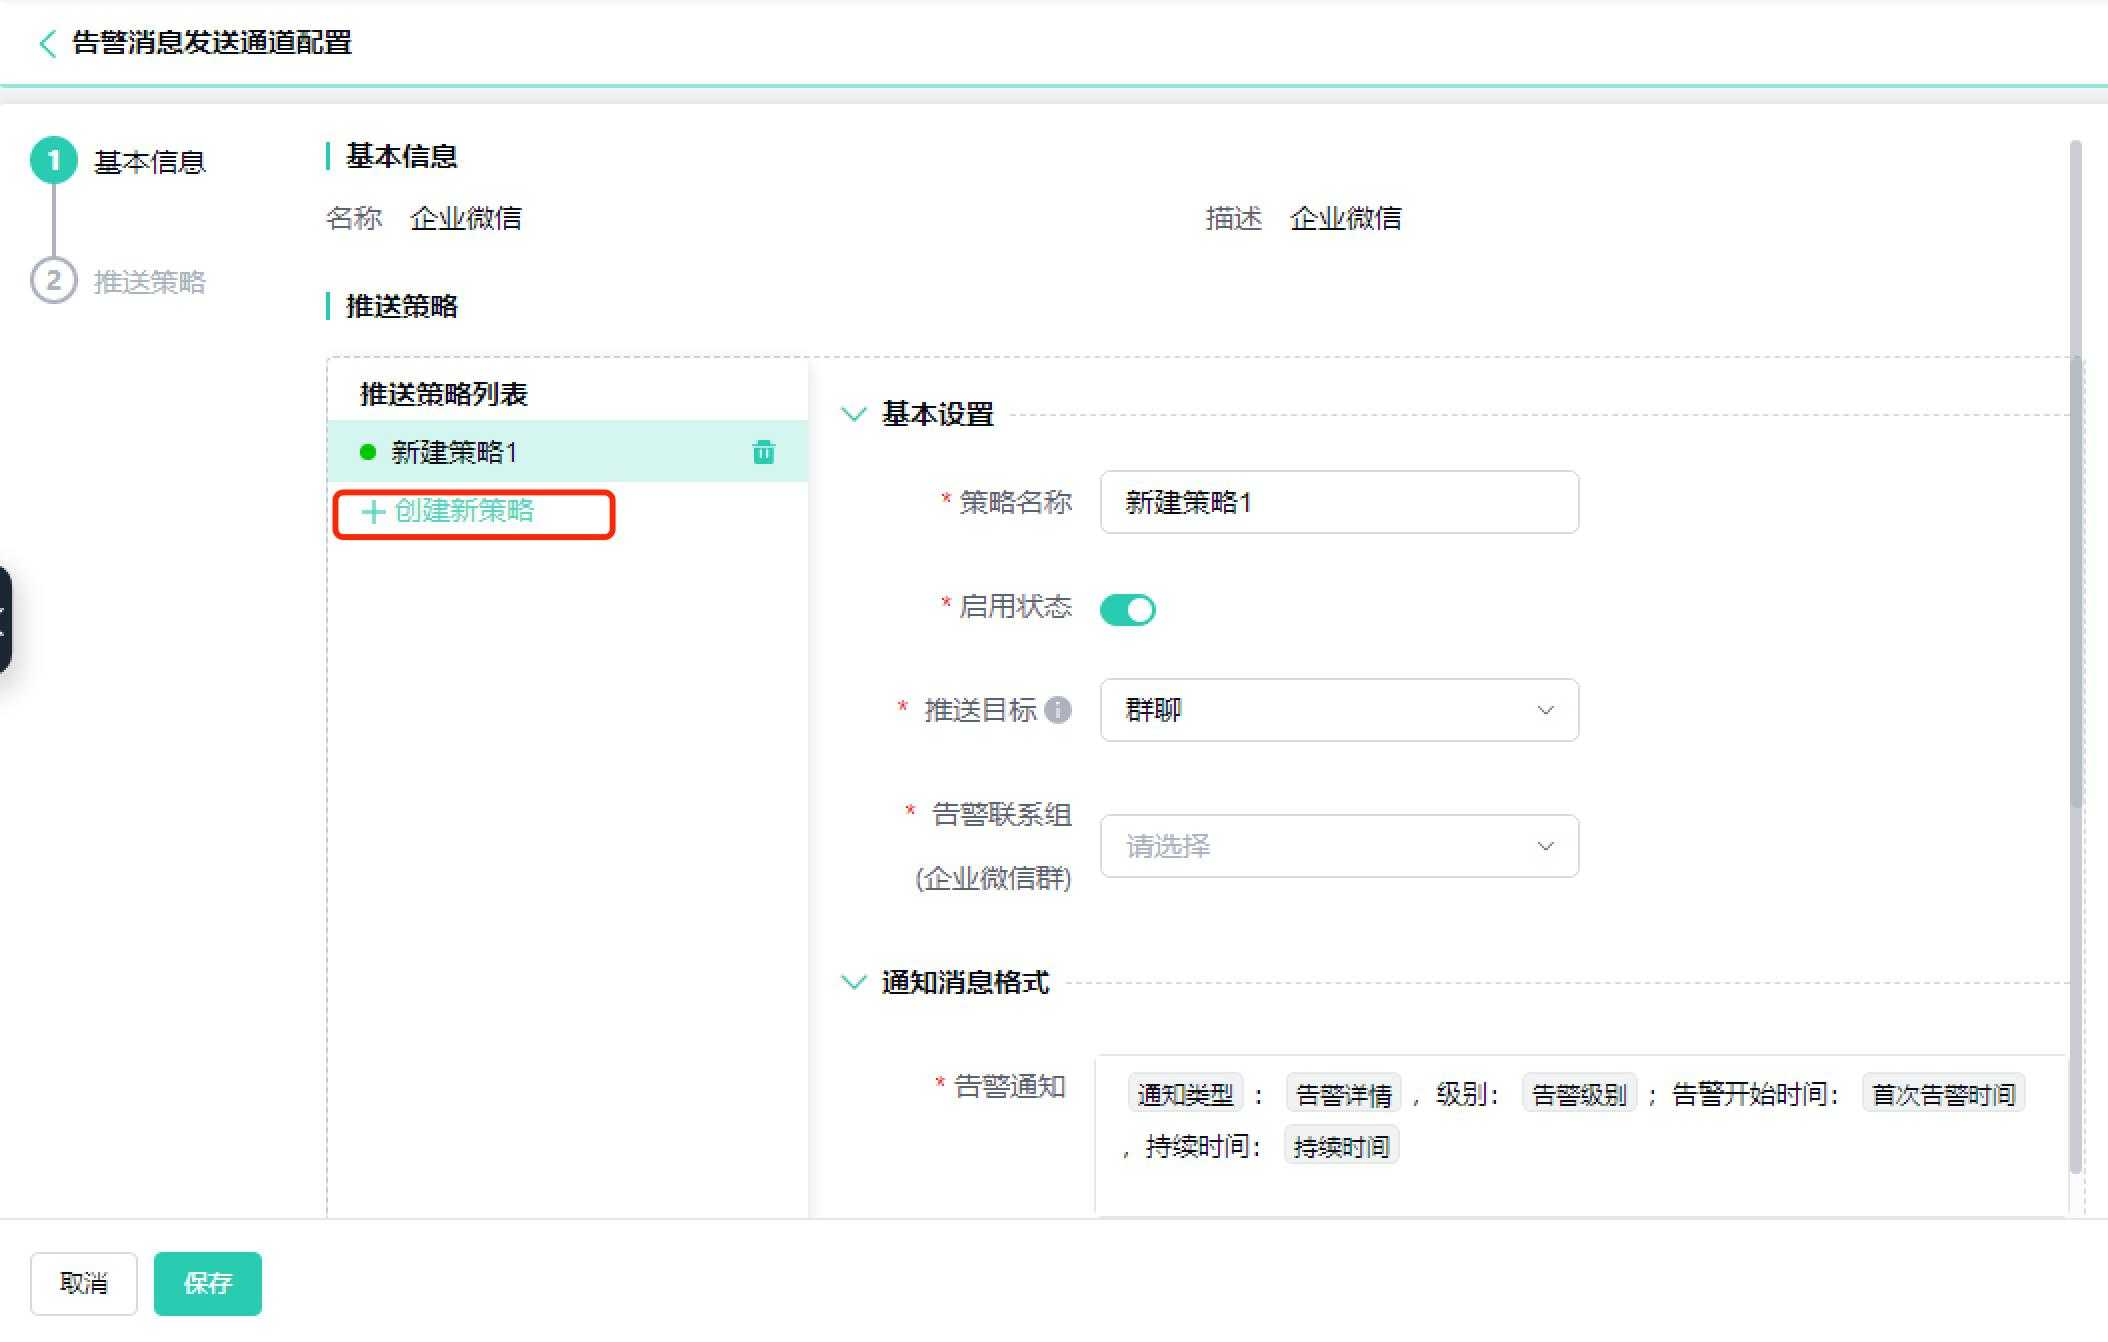
3.2. On the left side, you will find the list of push strategies, and on the right side, you will see the strategy settings. Click on the strategy name, and the detailed settings for that strategy will be displayed on the right.
Click "Create New Strategy" to add a new strategy to the list.
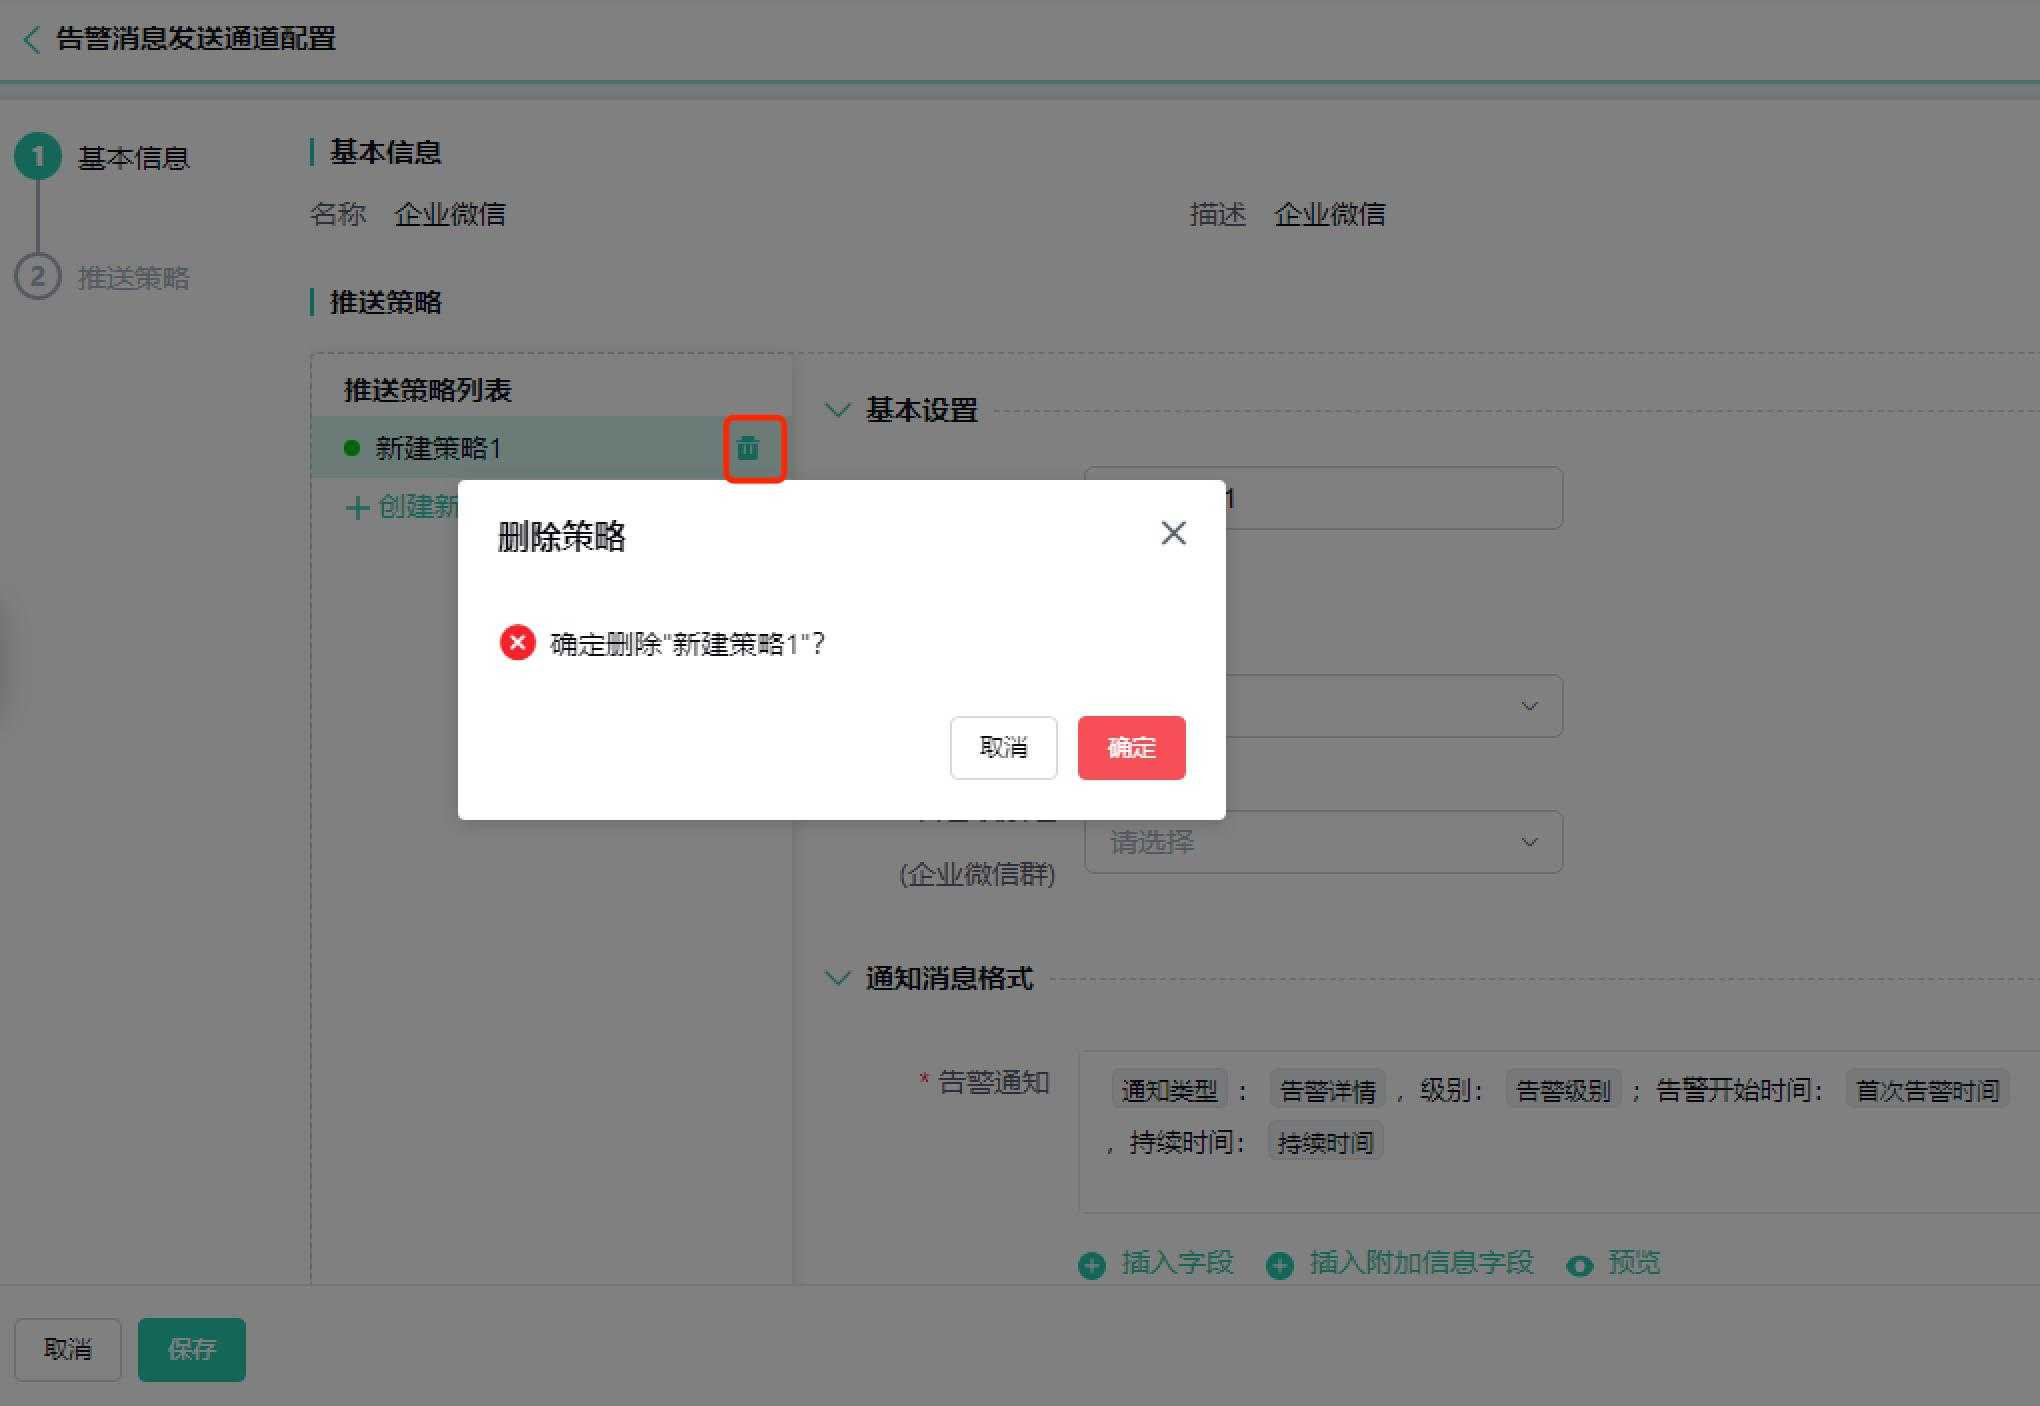
If you need to delete a strategy, hover your mouse over the strategy name to reveal the delete button. Clicking on it will bring up a delete confirmation dialog box.
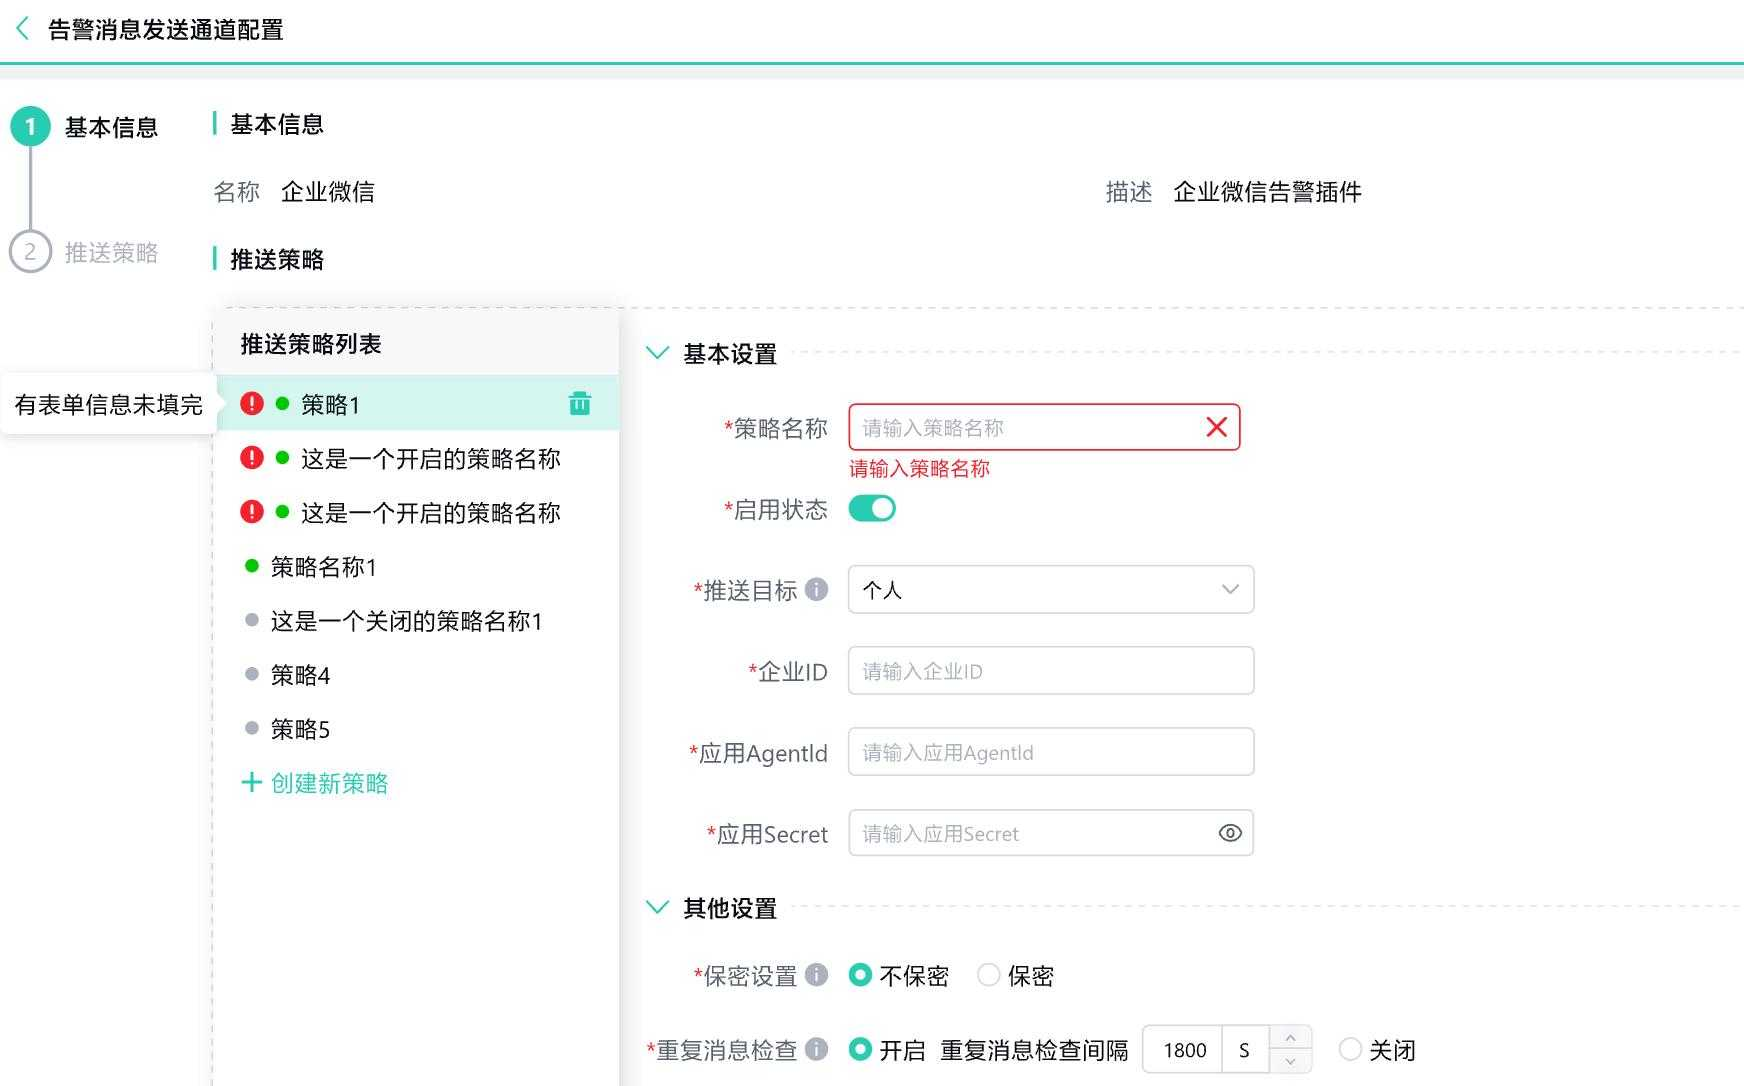
3.3. Enter the strategy name and keep the default activation status turned on (if you turn off the activation status, the corresponding strategy status in the left list will be displayed in gray).
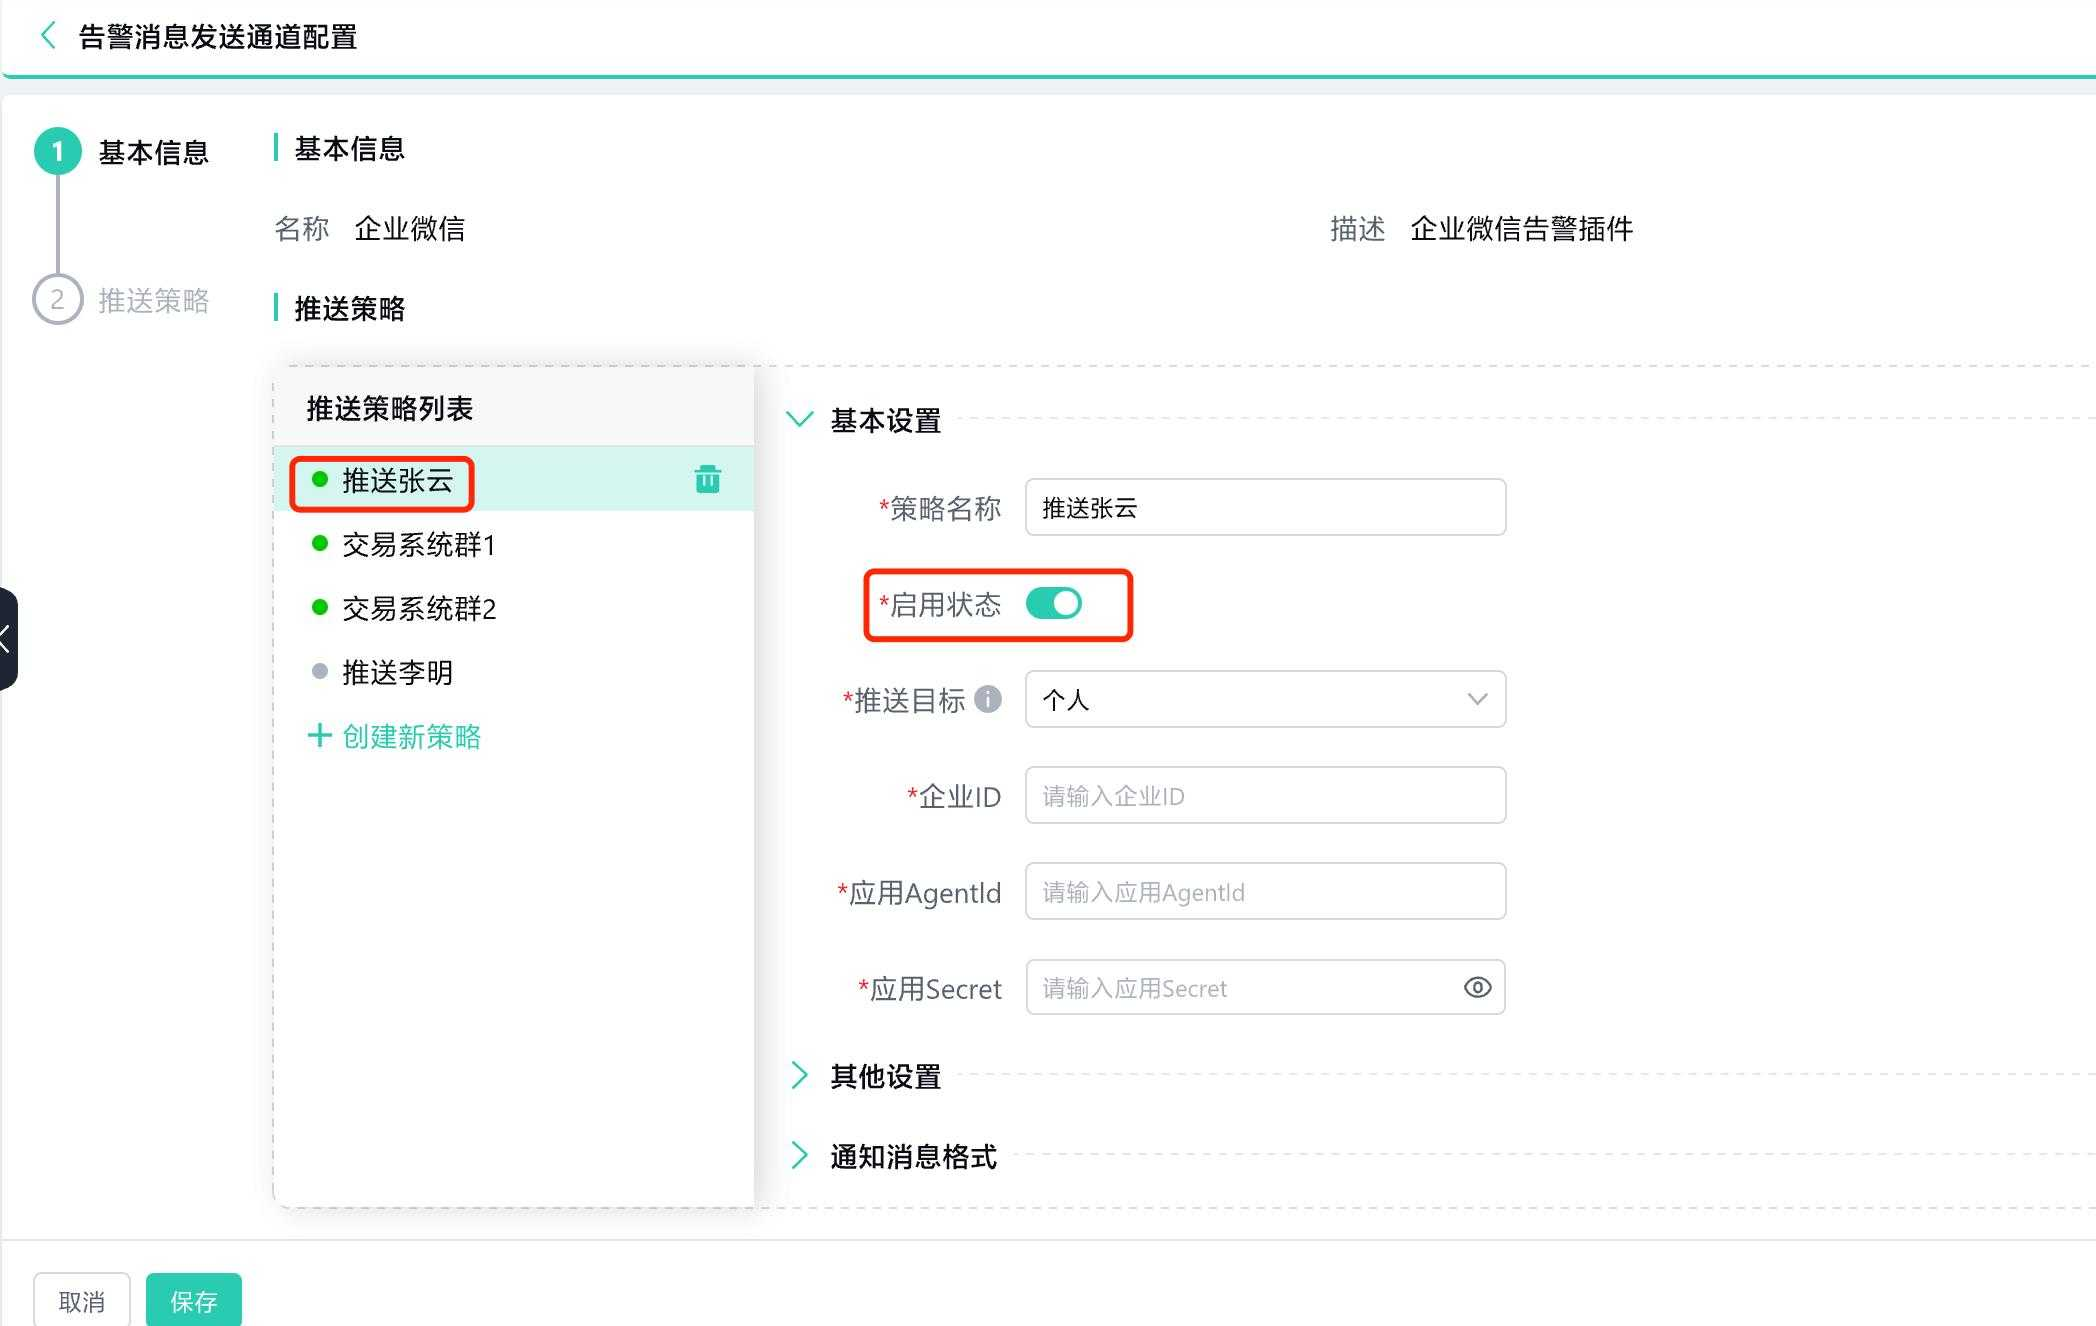
Select the push target as an individual:
Enter the Corporation ID, Application AgentId, and Application Secret (the Application AgentId and Application Secret will be displayed encrypted).
Different strategies cannot have duplicate combinations of "Corporation ID" and "Application AgentId".
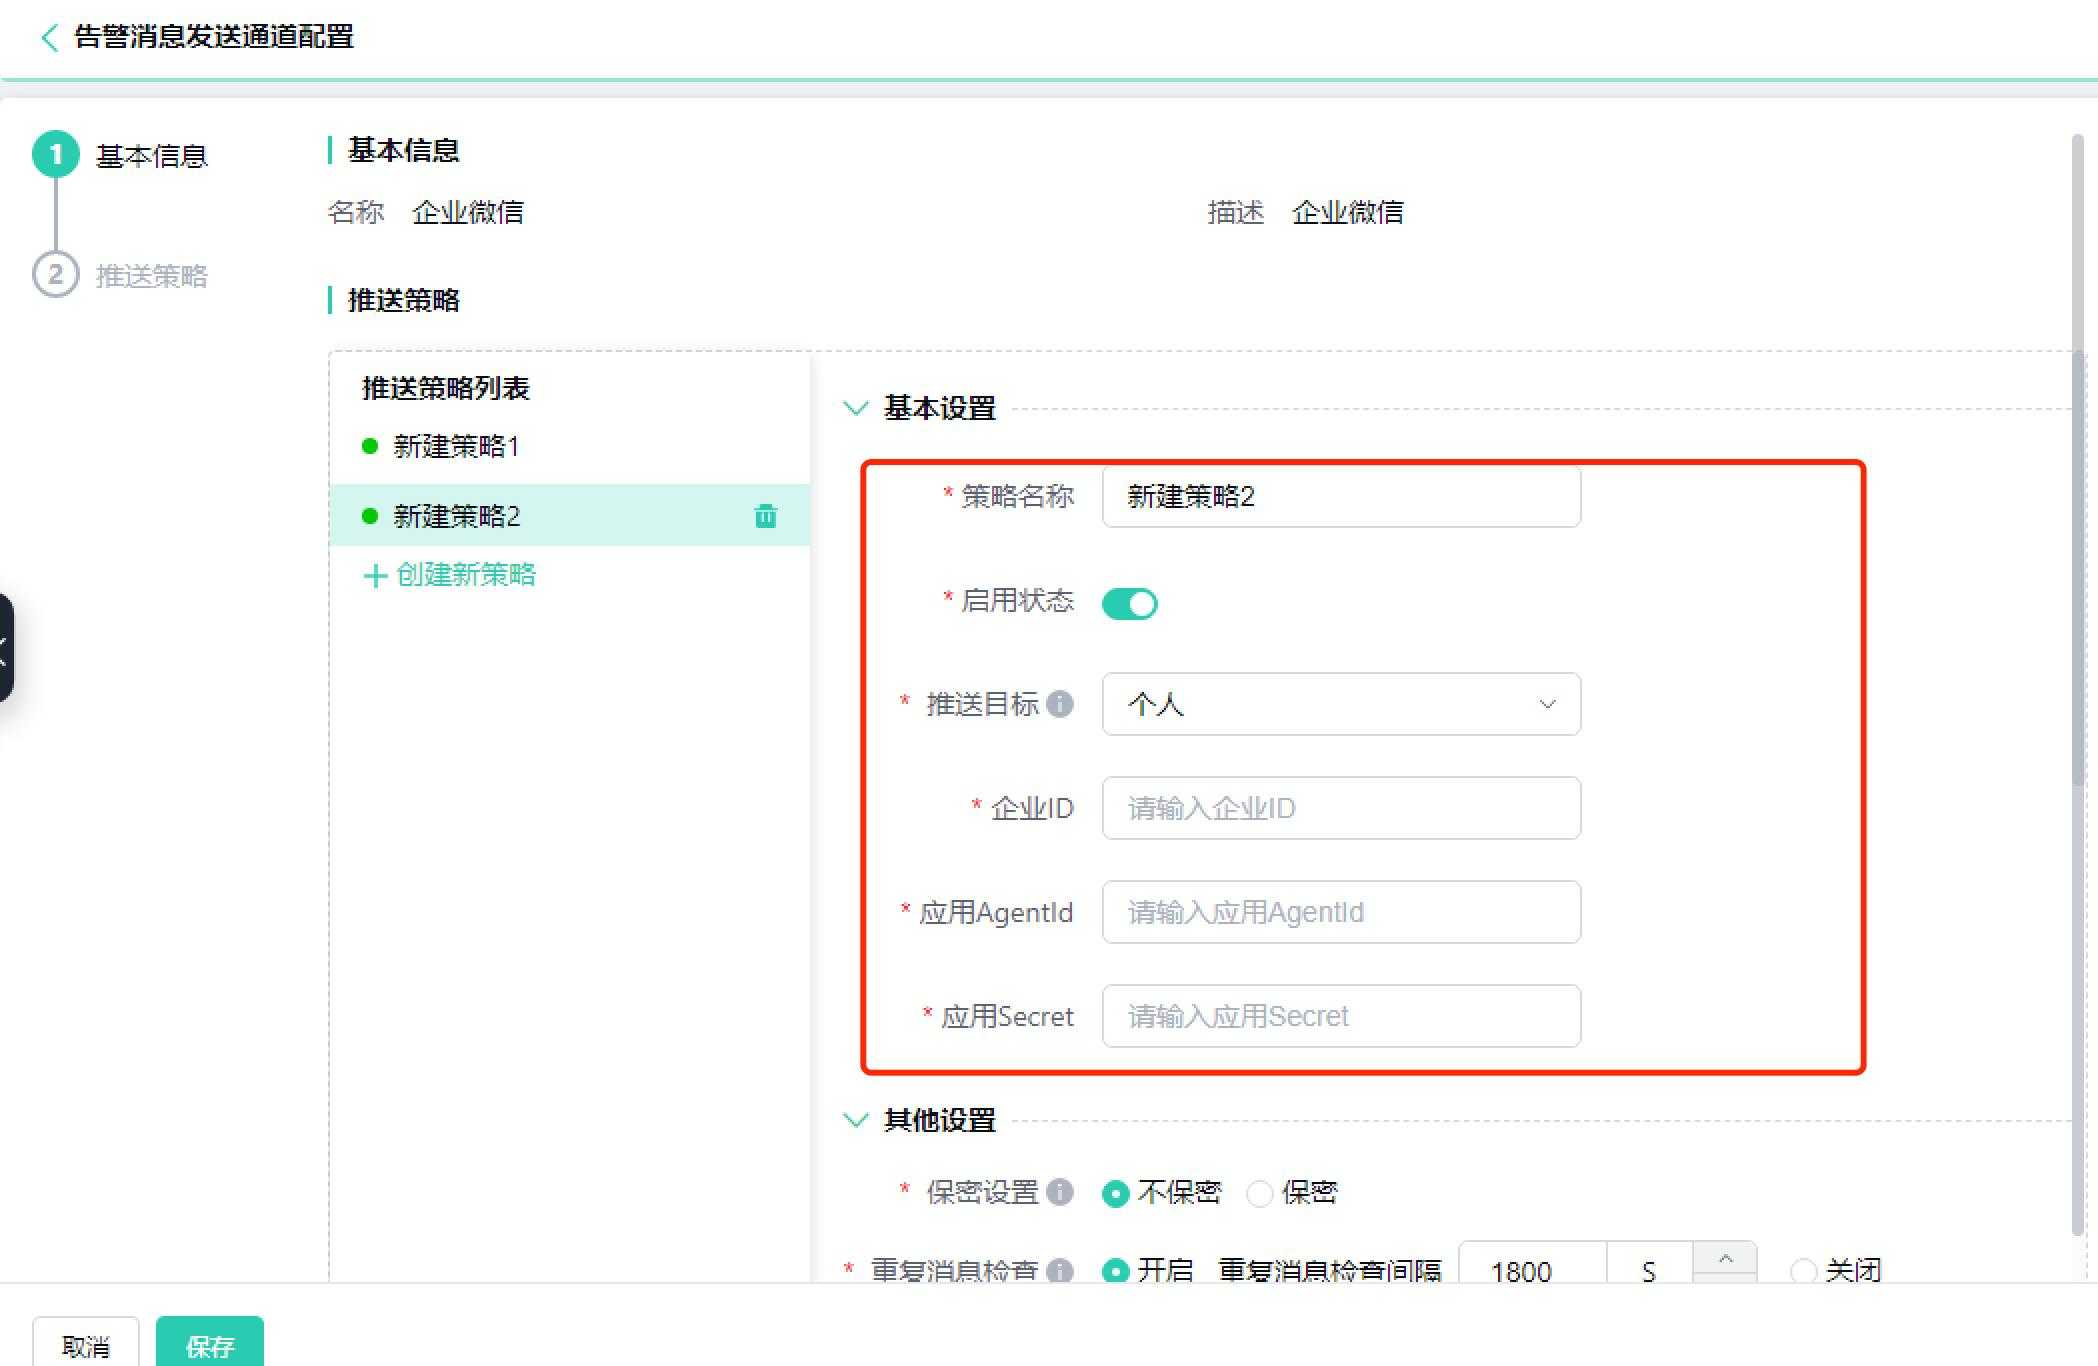
3.4. Set up confidentiality settings, including duplicate message checking.
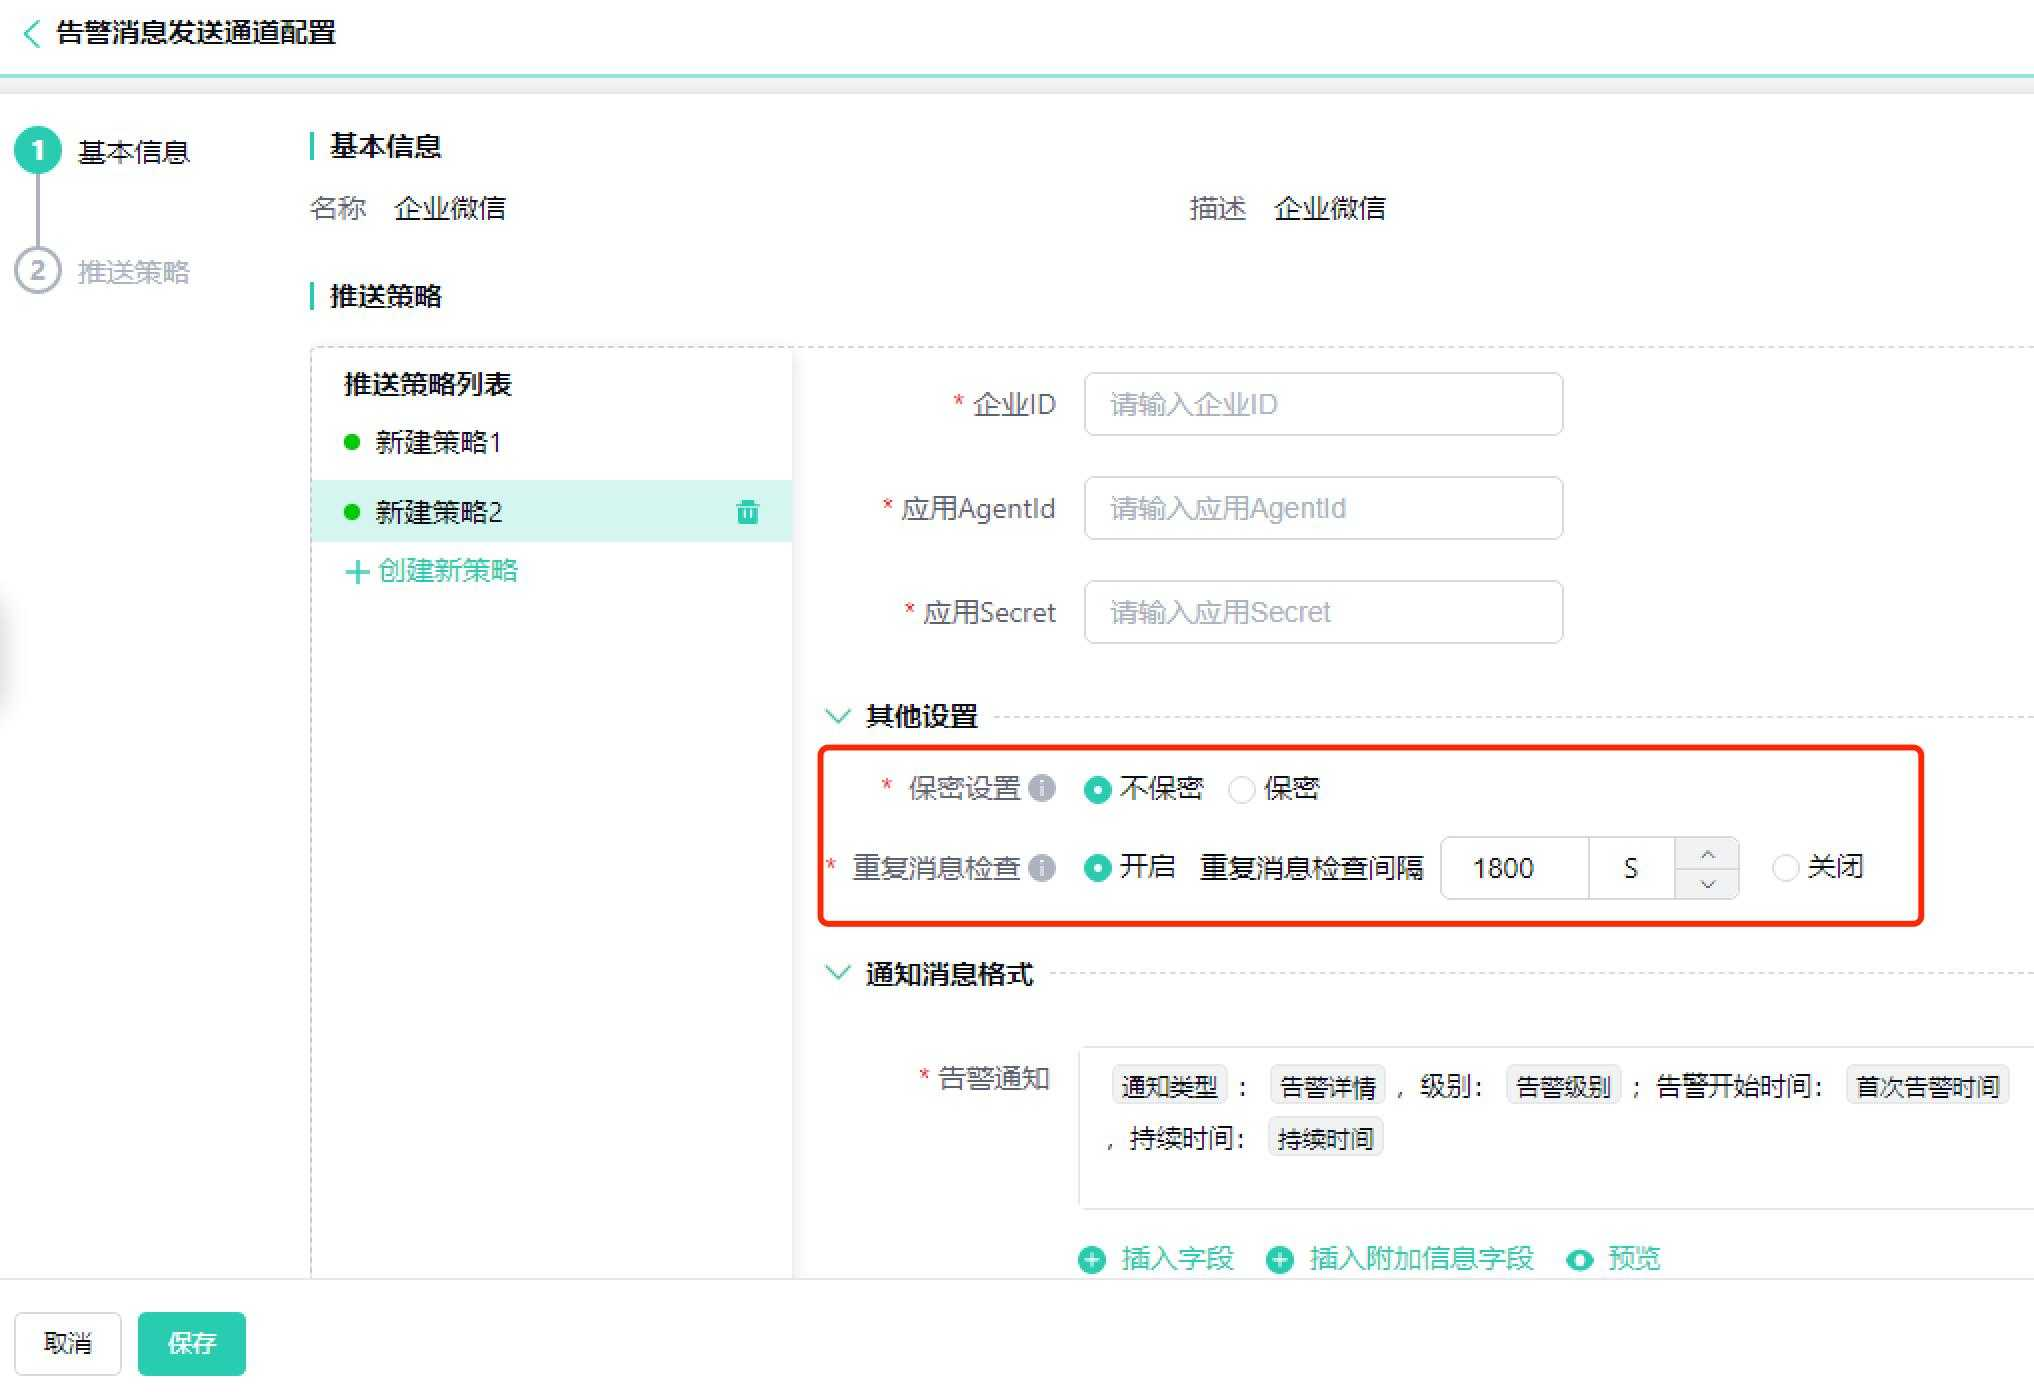
Select confidentiality settings: If you choose not to keep the messages confidential, the alert notification messages received by WeCom can be shared externally; If you select to keep the messages confidential, they cannot be shared, and the content will display a watermark.
Choose duplicate message checking: When enabled, you need to set an interval, with a default of 1800 seconds (30 minutes), and the maximum should not exceed 4 hours; When disabled, no interval is set.
3.5. The format of the notification message is the same as described in the Operating Instructions - Notification Message Format.
Group Message Alert
Step Overview:
On the Alert Contact Group page: Create an alert contact group of the WeCom group chat type. --> On the Alert Template page: Select the alert contact group of the WeCom group chat type. --> On the Alert Message Sending Channel page: Configure the strategy and choose the alert contact group of the WeCom group chat type.
Detailed Steps:
-
Create an alert contact group of the WeCom group chat type.
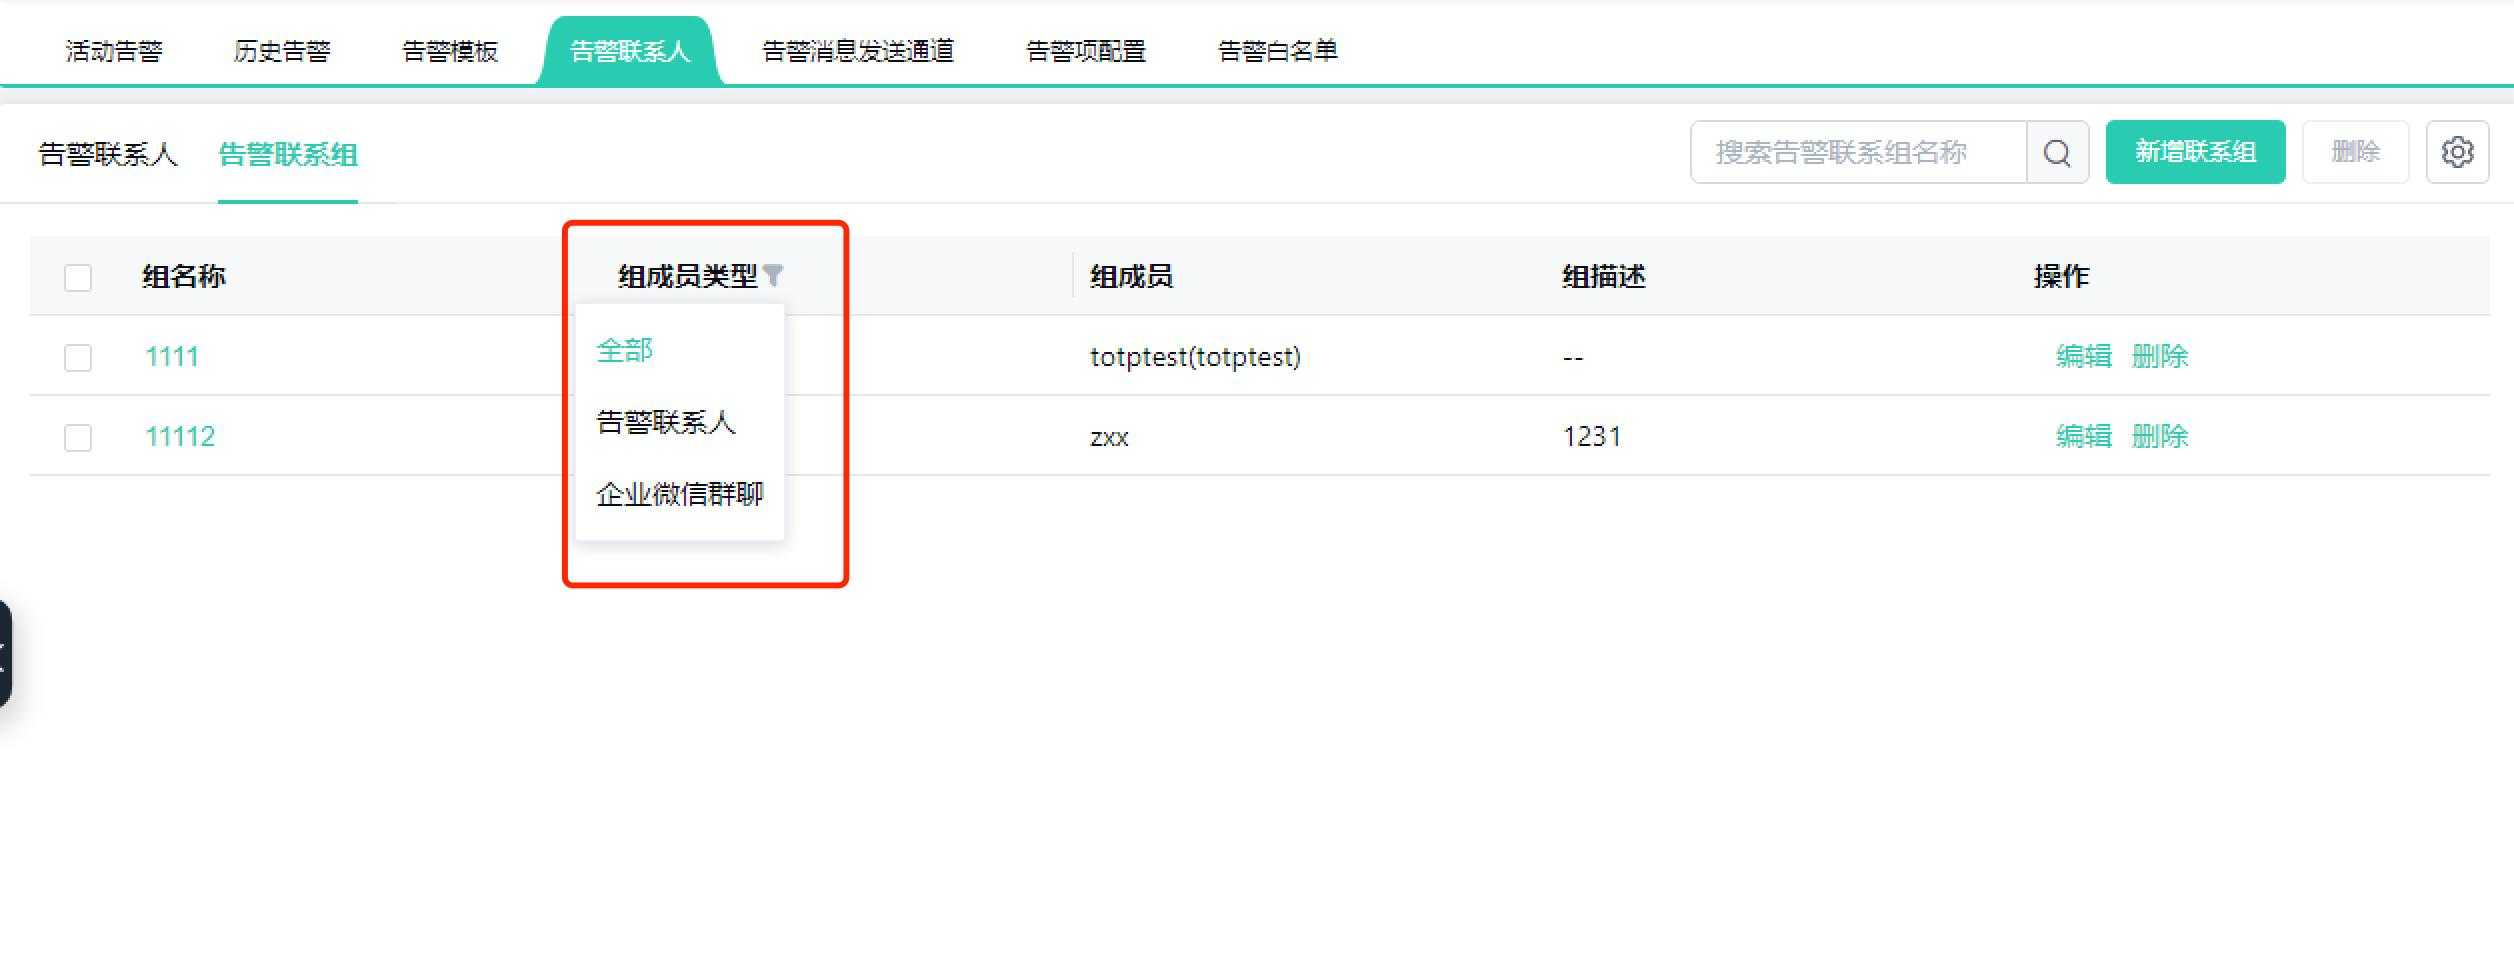
1.1. Click on Alert Center --> Alert Contacts --> Switch to Alert Contact Groups to navigate to the Alert Contact Groups page.
In the alert contact group list, the group member types are divided into: Alert Contacts, WeCom Group Chats; as shown in the following figure:
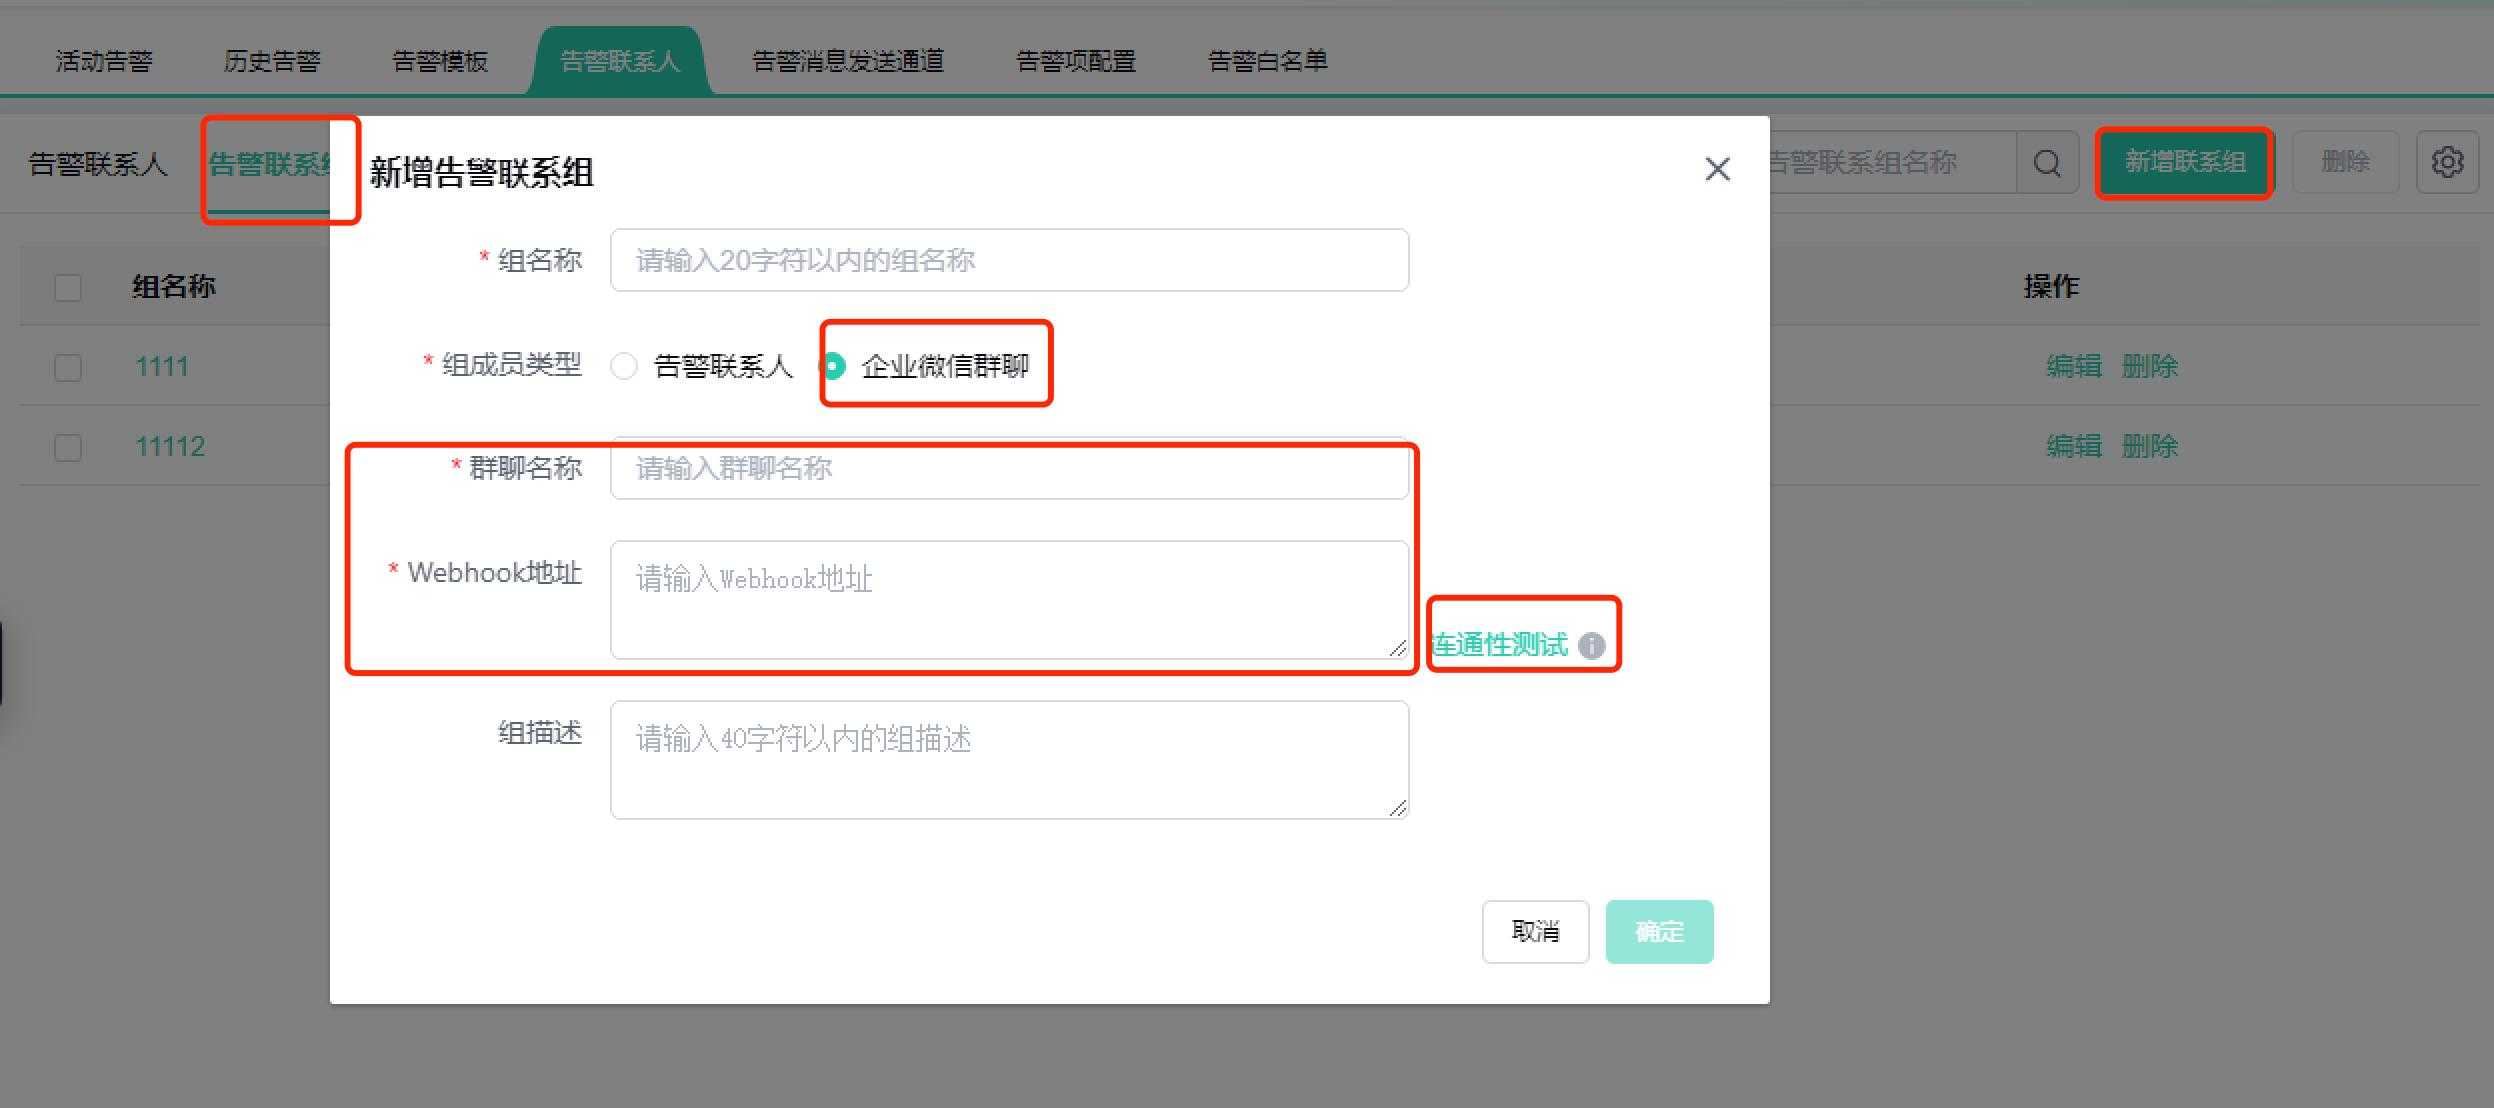
1.2. Click the [Add New Contact Group] button in the upper right corner:
Enter the alert contact group information and select the group member type as WeCom Group Chat:
For selecting WeCom Group Chat: Enter the group chat name and Webhook URL to perform a connectivity test. After passing the test, click Confirm;
After clicking Confirm, the group will be displayed in the alert contact group list.
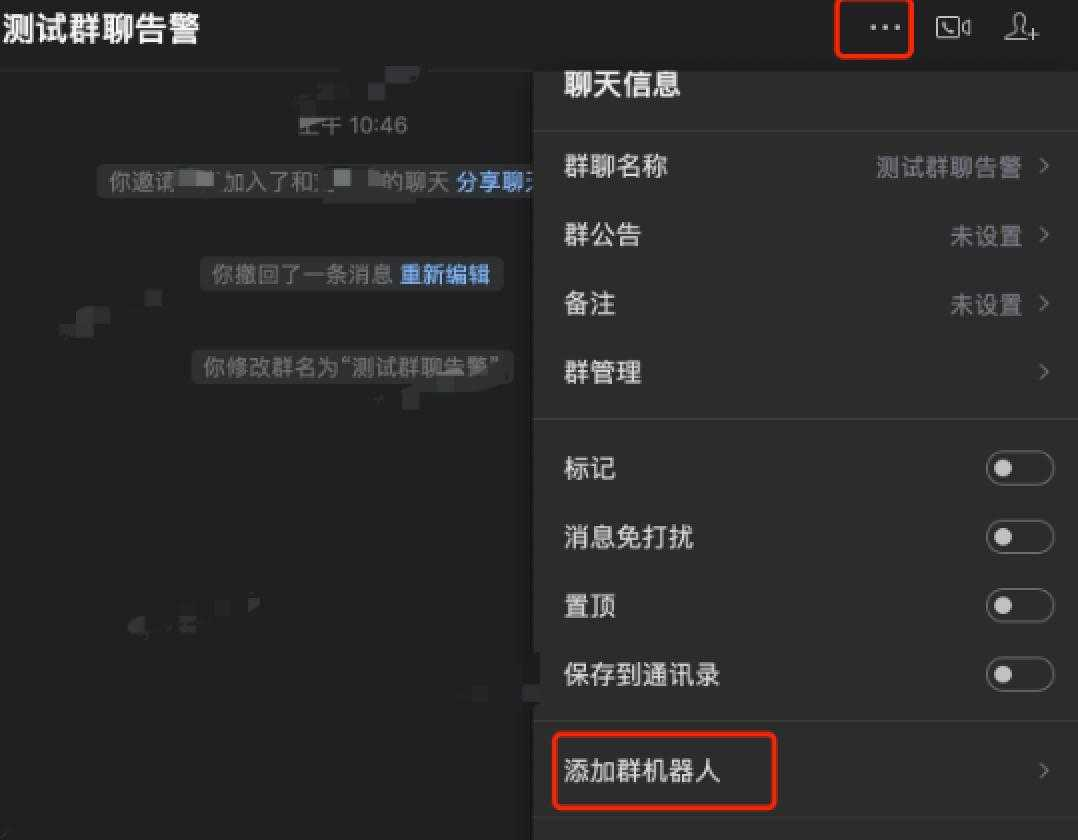
How to obtain the Webhook URL:
In the WeCom group chat, click the More icon in the upper right corner --> Select Add Group Robot. After adding, the Webhook URL will be displayed.
-
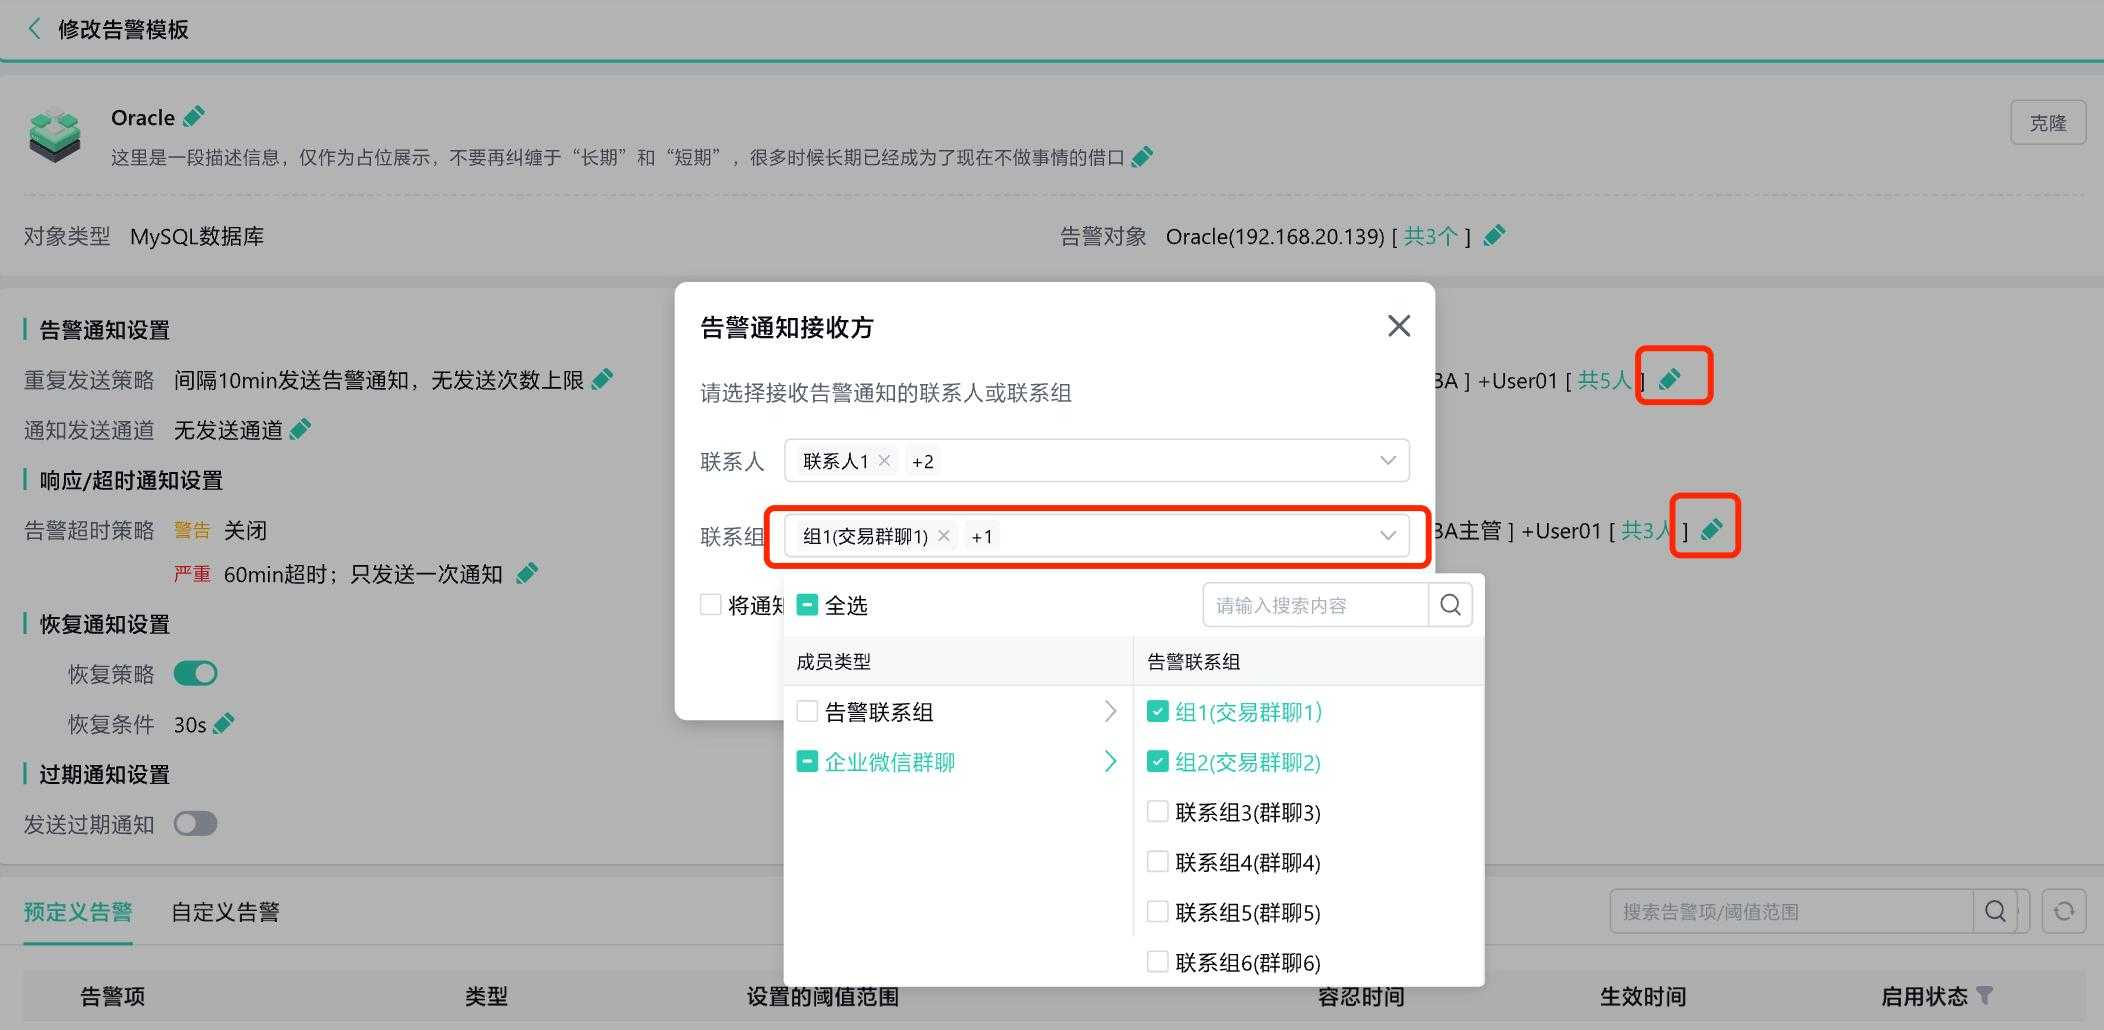
Selecting a WeCom Group Chat Type Alert Contact Group in the Alert Template:
2.1. After creating the template, click the edit button.
Click the edit icon to configure the alert notification recipients by selecting the alert contact group of the WeCom group chat type.
Click the edit icon again to modify the response/timeout notification recipients by selecting the alert contact group of the WeCom group chat type.
The alert contact group will be displayed as: Alert Contact Group Name (Group Chat Name).
-
To configure the WeCom channel to send messages to a group chat, follow these steps:
3.1. Click on Alert Center --> Alert Message Sending Channels --> Select the channel named "WeCom" --> Configure.
3.2. Click "Create New Strategy" to add a new strategy to the list; Select the push target as a group chat;
Select the alert contact group (WeCom group), which supports multi-selection and search.
When selecting the alert contact group, the same alert contact group cannot be added to multiple group chat strategies.
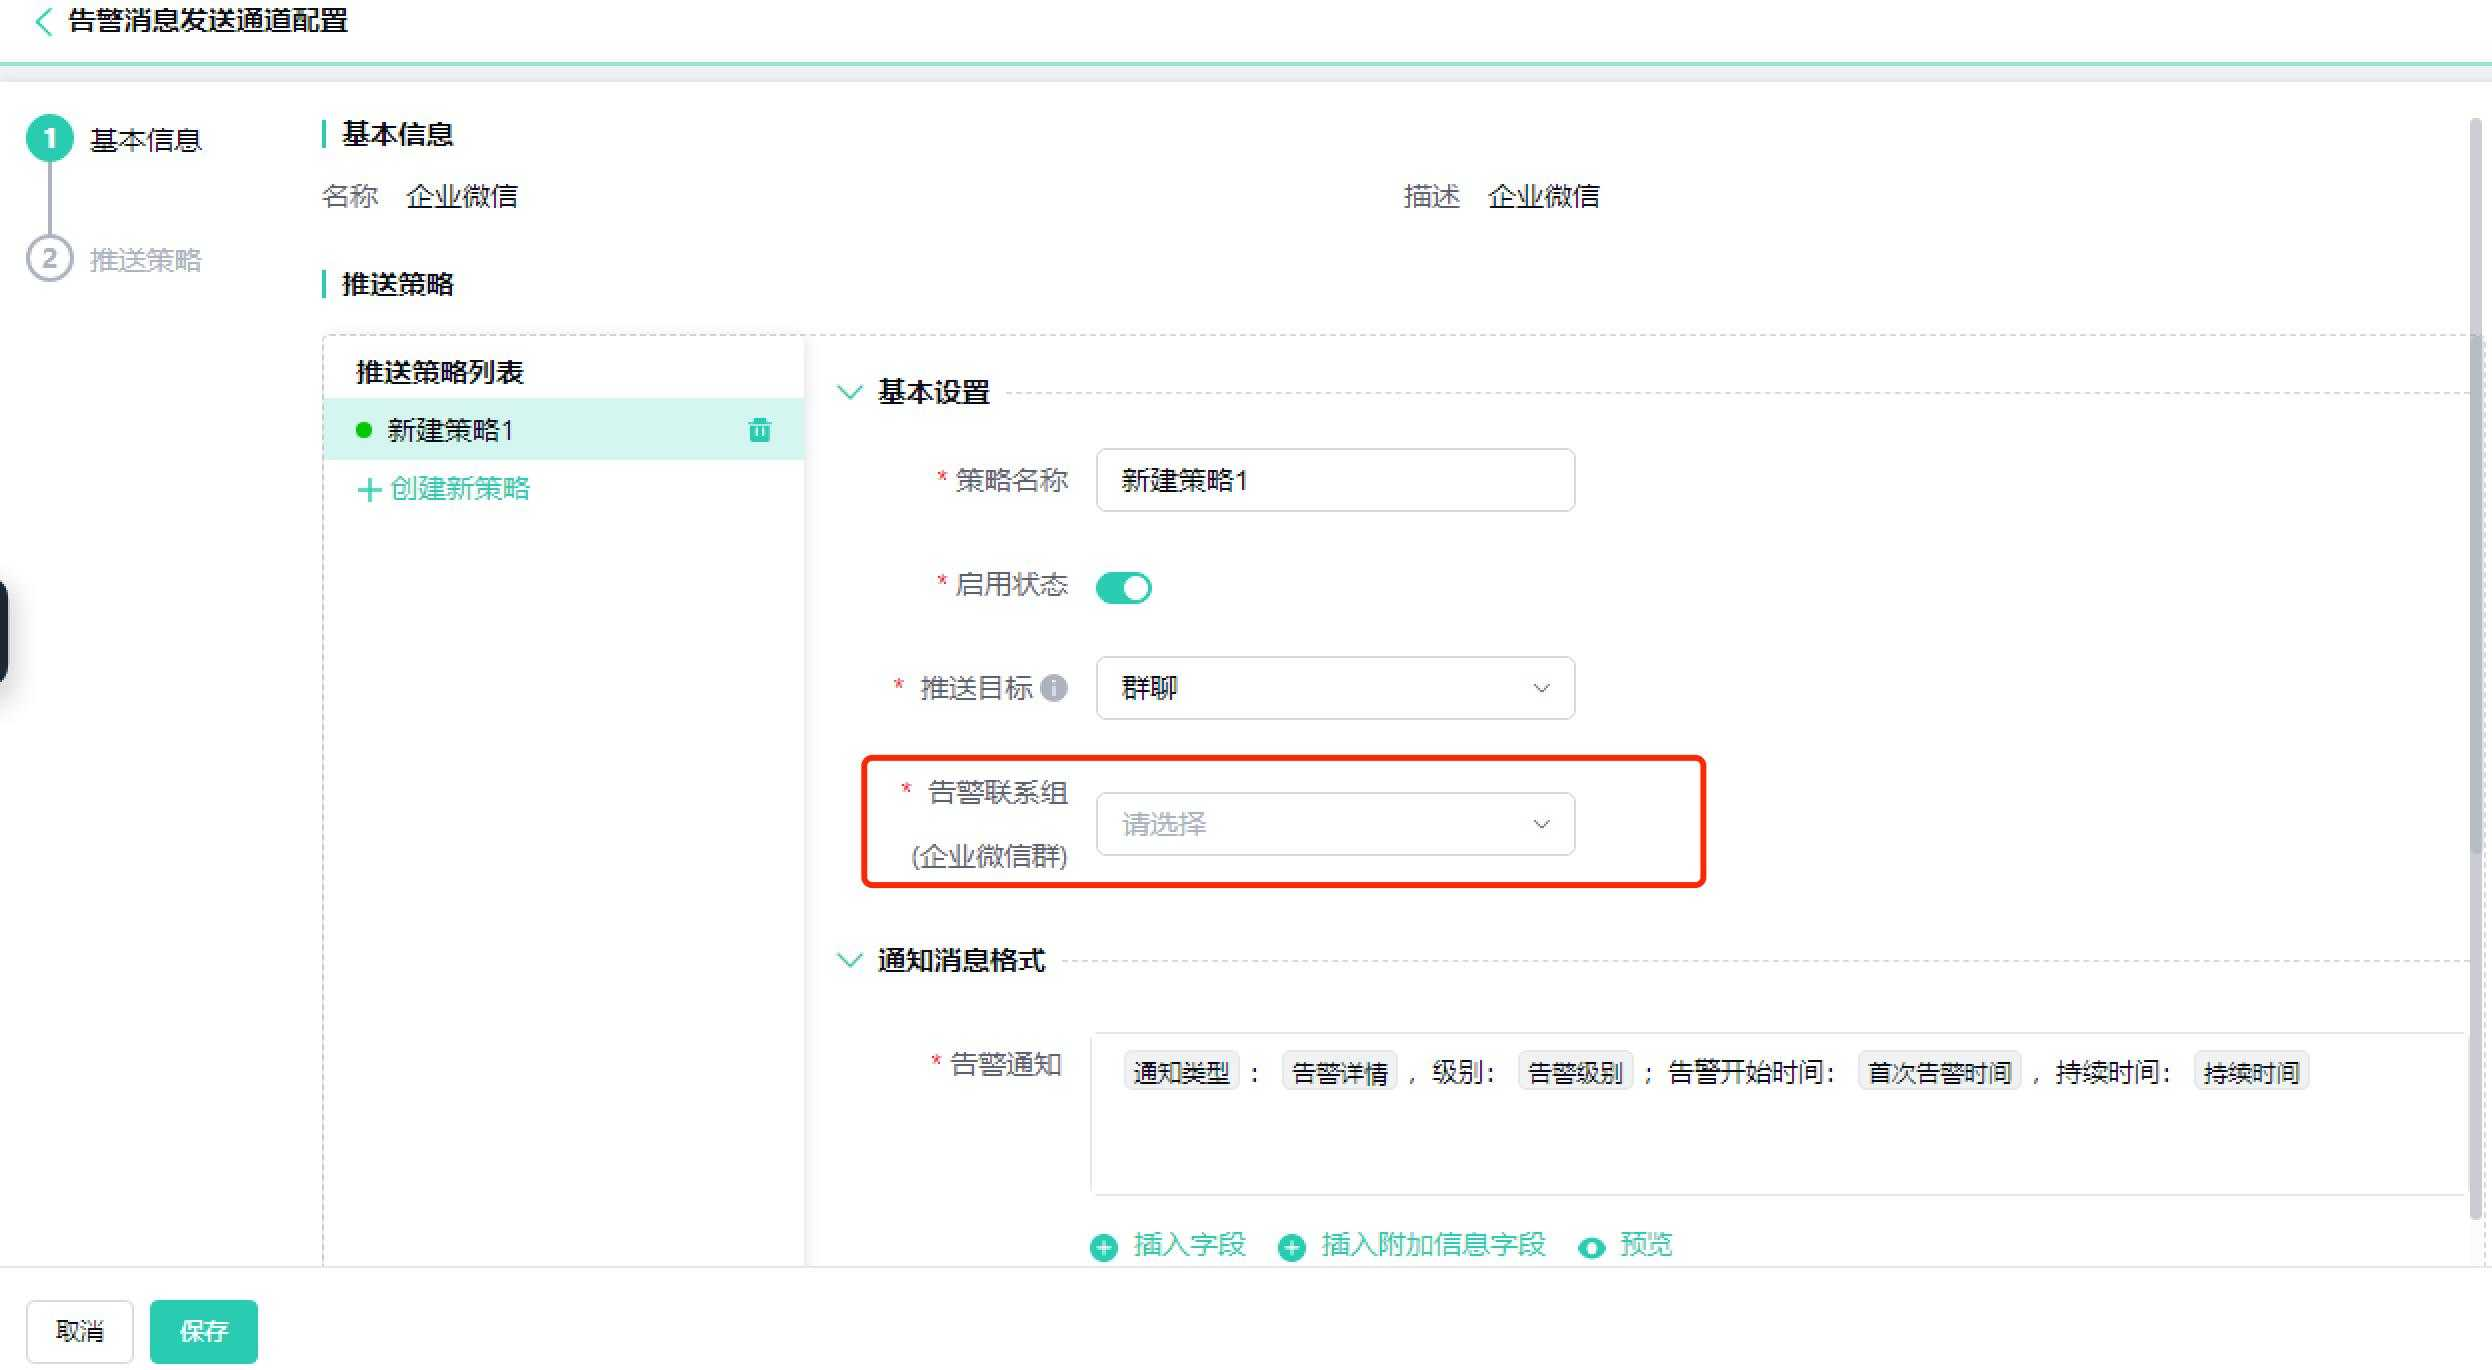
3.3. Set the notification message format, which should be the same as the format described in the Operating Instructions - Notification Message Format.
Save Strategy
Click the Save button to validate all strategies. If the validation is successful, you will be redirected to the alert message sending channels page.
If the validation fails, you will not be able to save, and a red icon will be displayed on the left side of the list. Hovering over the red icon will show the reason for the failure.