- About MogDB
- MogDB Introduction
- Comparison Between MogDB and openGauss
- MogDB Release Notes
- High Availability and Performance
- Open Source Components
- Usage Limitations
- Terms of Use
- Quick Start
- Installation Guide
- Container Installation
- Simplified Installation Process
- Standard Installation
- Manual Installation
- Administrator Guide
- Routine Maintenance
- Starting and Stopping MogDB
- Using the gsql Client for Connection
- Routine Maintenance
- Checking OS Parameters
- Checking MogDB Health Status
- Checking Database Performance
- Checking and Deleting Logs
- Checking Time Consistency
- Checking The Number of Application Connections
- Routinely Maintaining Tables
- Routinely Recreating an Index
- Data Security Maintenance Suggestions
- Log Reference
- Primary and Standby Management
- MOT Engine
- Introducing MOT
- Using MOT
- Concepts of MOT
- Appendix
- Column-store Tables Management
- Backup and Restoration
- Importing and Exporting Data
- Importing Data
- Exporting Data
- Upgrade Guide
- Common Fault Locating Cases
- Core Fault Locating
- When the TPC-C is running and a disk to be injected is full, the TPC-C stops responding
- Standby Node in the Need Repair (WAL) State
- Insufficient Memory
- Service Startup Failure
- "Error:No space left on device" Is Displayed
- After You Run the du Command to Query Data File Size In the XFS File System, the Query Result Is Greater than the Actual File Size
- File Is Damaged in the XFS File System
- Primary Node Is Hung in Demoting During a Switchover
- Disk Space Usage Reaches the Threshold and the Database Becomes Read-only
- Slow Response to a Query Statement
- Analyzing the Status of a Query Statement
- Forcibly Terminating a Session
- Analyzing Whether a Query Statement Is Blocked
- Low Query Efficiency
- "Lock wait timeout" Is Displayed When a User Executes an SQL Statement
- Table Size Does not Change After VACUUM FULL Is Executed on the Table
- An Error Is Reported When the Table Partition Is Modified
- Different Data Is Displayed for the Same Table Queried By Multiple Users
- When a User Specifies Only an Index Name to Modify the Index, A Message Indicating That the Index Does Not Exist Is Displayed
- Reindexing Fails
- An Error Occurs During Integer Conversion
- "too many clients already" Is Reported or Threads Failed To Be Created in High Concurrency Scenarios
- B-tree Index Faults
- Routine Maintenance
- Security Guide
- Database Security Management
- Performance Tuning
- System Optimization
- SQL Optimization
- WDR Snapshot Schema
- TPCC Performance Tuning Guide
- Developer Guide
- Application Development Guide
- Development Specifications
- Development Based on JDBC
- Overview
- JDBC Package, Driver Class, and Environment Class
- Development Process
- Loading the Driver
- Connecting to a Database
- Connecting to the Database (Using SSL)
- Running SQL Statements
- Processing Data in a Result Set
- Closing a Connection
- Example: Common Operations
- Example: Retrying SQL Queries for Applications
- Example: Importing and Exporting Data Through Local Files
- Example 2: Migrating Data from a MY Database to MogDB
- Example: Logic Replication Code
- JDBC API Reference
- java.sql.Connection
- java.sql.CallableStatement
- java.sql.DatabaseMetaData
- java.sql.Driver
- java.sql.PreparedStatement
- java.sql.ResultSet
- java.sql.ResultSetMetaData
- java.sql.Statement
- javax.sql.ConnectionPoolDataSource
- javax.sql.DataSource
- javax.sql.PooledConnection
- javax.naming.Context
- javax.naming.spi.InitialContextFactory
- CopyManager
- Development Based on ODBC
- Development Based on libpq
- Development Based on libpq
- libpq API Reference
- Database Connection Control Functions
- Database Statement Execution Functions
- Functions for Asynchronous Command Processing
- Functions for Canceling Queries in Progress
- Example
- Connection Characters
- Commissioning
- Appendices
- Stored Procedure
- User Defined Functions
- Autonomous Transaction
- Logical Replication
- Logical Decoding
- Foreign Data Wrapper
- Materialized View
- Materialized View Overview
- Full Materialized View
- Incremental Materialized View
- AI Features
- Overview
- Predictor: AI Query Time Forecasting
- X-Tuner: Parameter Optimization and Diagnosis
- SQLdiag: Slow SQL Discovery
- A-Detection: Status Monitoring
- Index-advisor: Index Recommendation
- DeepSQL
- Application Development Guide
- Reference Guide
- System Catalogs and System Views
- Overview of System Catalogs and System Views
- System Catalogs
- GS_AUDITING_POLICY
- GS_AUDITING_POLICY_ACCESS
- GS_AUDITING_POLICY_FILTERS
- GS_AUDITING_POLICY_PRIVILEGES
- GS_CLIENT_GLOBAL_KEYS
- GS_CLIENT_GLOBAL_KEYS_ARGS
- GS_COLUMN_KEYS
- GS_COLUMN_KEYS_ARGS
- GS_ENCRYPTED_COLUMNS
- GS_MASKING_POLICY
- GS_MASKING_POLICY_ACTIONS
- GS_MASKING_POLICY_FILTERS
- GS_MATVIEW
- GS_MATVIEW_DEPENDENCY
- GS_OPT_MODEL
- GS_POLICY_LABEL
- GS_WLM_INSTANCE_HISTORY
- GS_WLM_OPERATOR_INFO
- GS_WLM_PLAN_ENCODING_TABLE
- GS_WLM_PLAN_OPERATOR_INFO
- GS_WLM_USER_RESOURCE_HISTORY
- PG_AGGREGATE
- PG_AM
- PG_AMOP
- PG_AMPROC
- PG_APP_WORKLOADGROUP_MAPPING
- PG_ATTRDEF
- PG_ATTRIBUTE
- PG_AUTHID
- PG_AUTH_HISTORY
- PG_AUTH_MEMBERS
- PG_CAST
- PG_CLASS
- PG_COLLATION
- PG_CONSTRAINT
- PG_CONVERSION
- PG_DATABASE
- PG_DB_ROLE_SETTING
- PG_DEFAULT_ACL
- PG_DEPEND
- PG_DESCRIPTION
- PG_DIRECTORY
- PG_ENUM
- PG_EXTENSION
- PG_EXTENSION_DATA_SOURCE
- PG_FOREIGN_DATA_WRAPPER
- PG_FOREIGN_SERVER
- PG_FOREIGN_TABLE
- PG_INDEX
- PG_INHERITS
- PG_JOB
- PG_JOB_PROC
- PG_LANGUAGE
- PG_LARGEOBJECT
- PG_LARGEOBJECT_METADATA
- PG_NAMESPACE
- PG_OBJECT
- PG_OPCLASS
- PG_OPERATOR
- PG_OPFAMILY
- PG_PARTITION
- PG_PLTEMPLATE
- PG_PROC
- PG_RANGE
- PG_RESOURCE_POOL
- PG_REWRITE
- PG_RLSPOLICY
- PG_SECLABEL
- PG_SHDEPEND
- PG_SHDESCRIPTION
- PG_SHSECLABEL
- PG_STATISTIC
- PG_STATISTIC_EXT
- PG_SYNONYM
- PG_TABLESPACE
- PG_TRIGGER
- PG_TS_CONFIG
- PG_TS_CONFIG_MAP
- PG_TS_DICT
- PG_TS_PARSER
- PG_TS_TEMPLATE
- PG_TYPE
- PG_USER_MAPPING
- PG_USER_STATUS
- PG_WORKLOAD_GROUP
- PLAN_TABLE_DATA
- STATEMENT_HISTORY
- System Views
- GS_AUDITING
- GS_AUDITING_ACCESS
- GS_AUDITING_PRIVILEGE
- GS_CLUSTER_RESOURCE_INFO
- GS_INSTANCE_TIME
- GS_LABELS
- GS_MASKING
- GS_MATVIEWS
- GS_SESSION_MEMORY
- GS_SESSION_CPU_STATISTICS
- GS_SESSION_MEMORY_CONTEXT
- GS_SESSION_MEMORY_DETAIL
- GS_SESSION_MEMORY_STATISTICS
- GS_SQL_COUNT
- GS_WLM_CGROUP_INFO
- GS_WLM_PLAN_OPERATOR_HISTORY
- GS_WLM_REBUILD_USER_RESOURCE_POOL
- GS_WLM_RESOURCE_POOL
- GS_WLM_USER_INFO
- GS_STAT_SESSION_CU
- GS_TOTAL_MEMORY_DETAIL
- MPP_TABLES
- PG_AVAILABLE_EXTENSION_VERSIONS
- PG_AVAILABLE_EXTENSIONS
- PG_COMM_DELAY
- PG_COMM_RECV_STREAM
- PG_COMM_SEND_STREAM
- PG_COMM_STATUS
- PG_CONTROL_GROUP_CONFIG
- PG_CURSORS
- PG_EXT_STATS
- PG_GET_INVALID_BACKENDS
- PG_GET_SENDERS_CATCHUP_TIME
- PG_GROUP
- PG_GTT_RELSTATS
- PG_GTT_STATS
- PG_GTT_ATTACHED_PIDS
- PG_INDEXES
- PG_LOCKS
- PG_NODE_ENV
- PG_OS_THREADS
- PG_PREPARED_STATEMENTS
- PG_PREPARED_XACTS
- PG_REPLICATION_SLOTS
- PG_RLSPOLICIES
- PG_ROLES
- PG_RULES
- PG_SECLABELS
- PG_SETTINGS
- PG_SHADOW
- PG_STATS
- PG_STAT_ACTIVITY
- PG_STAT_ALL_INDEXES
- PG_STAT_ALL_TABLES
- PG_STAT_BAD_BLOCK
- PG_STAT_BGWRITER
- PG_STAT_DATABASE
- PG_STAT_DATABASE_CONFLICTS
- PG_STAT_USER_FUNCTIONS
- PG_STAT_USER_INDEXES
- PG_STAT_USER_TABLES
- PG_STAT_REPLICATION
- PG_STAT_SYS_INDEXES
- PG_STAT_SYS_TABLES
- PG_STAT_XACT_ALL_TABLES
- PG_STAT_XACT_SYS_TABLES
- PG_STAT_XACT_USER_FUNCTIONS
- PG_STAT_XACT_USER_TABLES
- PG_STATIO_ALL_INDEXES
- PG_STATIO_ALL_SEQUENCES
- PG_STATIO_ALL_TABLES
- PG_STATIO_SYS_INDEXES
- PG_STATIO_SYS_SEQUENCES
- PG_STATIO_SYS_TABLES
- PG_STATIO_USER_INDEXES
- PG_STATIO_USER_SEQUENCES
- PG_STATIO_USER_TABLES
- PG_TABLES
- PG_TDE_INFO
- PG_THREAD_WAIT_STATUS
- PG_TIMEZONE_ABBREVS
- PG_TIMEZONE_NAMES
- PG_TOTAL_MEMORY_DETAIL
- PG_TOTAL_USER_RESOURCE_INFO
- PG_TOTAL_USER_RESOURCE_INFO_OID
- PG_USER
- PG_USER_MAPPINGS
- PG_VARIABLE_INFO
- PG_VIEWS
- PLAN_TABLE
- GS_FILE_STAT
- GS_OS_RUN_INFO
- GS_REDO_STAT
- GS_SESSION_STAT
- GS_SESSION_TIME
- GS_THREAD_MEMORY_CONTEXT
- Functions and Operators
- Logical Operators
- Comparison Operators
- Character Processing Functions and Operators
- Binary String Functions and Operators
- Bit String Functions and Operators
- Mode Matching Operators
- Mathematical Functions and Operators
- Date and Time Processing Functions and Operators
- Type Conversion Functions
- Geometric Functions and Operators
- Network Address Functions and Operators
- Text Search Functions and Operators
- JSON Functions
- HLL Functions and Operators
- SEQUENCE Functions
- Array Functions and Operators
- Range Functions and Operators
- Aggregate Functions
- Window Functions
- Security Functions
- Encrypted Equality Functions
- Set Returning Functions
- Conditional Expression Functions
- System Information Functions
- System Administration Functions
- Statistics Information Functions
- Trigger Functions
- Global Temporary Table Functions
- AI Feature Functions
- Other System Functions
- Internal Functions
- Obsolete Functions
- Supported Data Types
- SQL Syntax
- ABORT
- ALTER AGGREGATE
- ALTER AUDIT POLICY
- ALTER DATABASE
- ALTER DATA SOURCE
- ALTER DEFAULT PRIVILEGES
- ALTER DIRECTORY
- ALTER EXTENSION
- ALTER FOREIGN TABLE
- ALTER FUNCTION
- ALTER GROUP
- ALTER INDEX
- ALTER LANGUAGE
- ALTER LARGE OBJECT
- ALTER MASKING POLICY
- ALTER MATERIALIZED VIEW
- ALTER OPERATOR
- ALTER RESOURCE LABEL
- ALTER ROLE
- ALTER ROW LEVEL SECURITY POLICY
- ALTER RULE
- ALTER SCHEMA
- ALTER SEQUENCE
- ALTER SERVER
- ALTER SESSION
- ALTER SYNONYM
- ALTER SYSTEM KILL SESSION
- ALTER SYSTEM SET
- ALTER TABLE
- ALTER TABLE PARTITION
- ALTER TABLESPACE
- ALTER TEXT SEARCH CONFIGURATION
- ALTER TEXT SEARCH DICTIONARY
- ALTER TRIGGER
- ALTER TYPE
- ALTER USER
- ALTER USER MAPPING
- ALTER VIEW
- ANALYZE | ANALYSE
- BEGIN
- CALL
- CHECKPOINT
- CLOSE
- CLUSTER
- COMMENT
- COMMIT | END
- COMMIT PREPARED
- COPY
- CREATE AGGREGATE
- CREATE AUDIT POLICY
- CREATE CAST
- CREATE CLIENT MASTER KEY
- CREATE COLUMN ENCRYPTION KEY
- CREATE DATABASE
- CREATE DATA SOURCE
- CREATE DIRECTORY
- CREATE EXTENSION
- CREATE FOREIGN TABLE
- CREATE FUNCTION
- CREATE GROUP
- CREATE INCREMENTAL MATERIALIZED VIEW
- CREATE INDEX
- CREATE LANGUAGE
- CREATE MASKING POLICY
- CREATE MATERIALIZED VIEW
- CREATE OPERATOR
- CREATE ROW LEVEL SECURITY POLICY
- CREATE PROCEDURE
- CREATE RESOURCE LABEL
- CREATE ROLE
- CREATE RULE
- CREATE SCHEMA
- CREATE SEQUENCE
- CREATE SERVER
- CREATE SYNONYM
- CREATE TABLE
- CREATE TABLE AS
- CREATE TABLE PARTITION
- CREATE TABLESPACE
- CREATE TEXT SEARCH CONFIGURATION
- CREATE TEXT SEARCH DICTIONARY
- CREATE TRIGGER
- CREATE TYPE
- CREATE USER
- CREATE USER MAPPING
- CREATE VIEW
- CURSOR
- DEALLOCATE
- DECLARE
- DELETE
- DO
- DROP AGGREGATE
- DROP AUDIT POLICY
- DROP CAST
- DROP CLIENT MASTER KEY
- DROP COLUMN ENCRYPTION KEY
- DROP DATABASE
- DROP DATA SOURCE
- DROP DIRECTORY
- DROP EXTENSION
- DROP FOREIGN TABLE
- DROP FUNCTION
- DROP GROUP
- DROP INDEX
- DROP LANGUAGE
- DROP MASKING POLICY
- DROP MATERIALIZED VIEW
- DROP OPERATOR
- DROP OWNED
- DROP RESOURCE LABEL
- DROP ROW LEVEL SECURITY POLICY
- DROP PROCEDURE
- DROP ROLE
- DROP RULE
- DROP SCHEMA
- DROP SEQUENCE
- DROP SERVER
- DROP SYNONYM
- DROP TABLE
- DROP TABLESPACE
- DROP TEXT SEARCH CONFIGURATION
- DROP TEXT SEARCH DICTIONARY
- DROP TRIGGER
- DROP TYPE
- DROP USER
- DROP USER MAPPING
- DROP VIEW
- EXECUTE
- EXPLAIN
- EXPLAIN PLAN
- FETCH
- GRANT
- INSERT
- LOCK
- MOVE
- MERGE INTO
- PREPARE
- PREPARE TRANSACTION
- REASSIGN OWNED
- REFRESH INCREMENTAL MATERIALIZED VIEW
- REFRESH MATERIALIZED VIEW
- REINDEX
- RELEASE SAVEPOINT
- RESET
- REVOKE
- ROLLBACK
- ROLLBACK PREPARED
- ROLLBACK TO SAVEPOINT
- SAVEPOINT
- SELECT
- SELECT INTO
- SET
- SET CONSTRAINTS
- SET ROLE
- SET SESSION AUTHORIZATION
- SET TRANSACTION
- SHOW
- SHUTDOWN
- START TRANSACTION
- TRUNCATE
- UPDATE
- VACUUM
- VALUES
- SQL Reference
- MogDB SQL
- Keywords
- Constant and Macro
- Expressions
- Type Conversion
- Full Text Search
- Introduction
- Tables and Indexes
- Controlling Text Search
- Additional Features
- Parser
- Dictionaries
- Configuration Examples
- Testing and Debugging Text Search
- Limitations
- System Operation
- Controlling Transactions
- DDL Syntax Overview
- DML Syntax Overview
- DCL Syntax Overview
- Appendix
- GUC Parameters
- GUC Parameter Usage
- File Location
- Connection and Authentication
- Resource Consumption
- Parallel Import
- Write Ahead Log
- HA Replication
- Memory Table
- Query Planning
- Error Reporting and Logging
- Alarm Detection
- Statistics During the Database Running
- Load Management
- Automatic Vacuuming
- Default Settings of Client Connection
- Lock Management
- Version and Platform Compatibility
- Faut Tolerance
- Connection Pool Parameters
- MogDB Transaction
- Developer Options
- Auditing
- Upgrade Parameters
- Miscellaneous Parameters
- Wait Events
- Query
- System Performance Snapshot
- Equality Query in a Fully-encrypted Database
- Global Temporary Table
- Scheduled Task
- Thread Pool
- Appendix
- Information Schema
- DBE_PERF
- DBE_PERF Overview
- OS
- Instance
- Memory
- File
- Object
- STAT_USER_TABLES
- SUMMARY_STAT_USER_TABLES
- GLOBAL_STAT_USER_TABLES
- STAT_USER_INDEXES
- SUMMARY_STAT_USER_INDEXES
- GLOBAL_STAT_USER_INDEXES
- STAT_SYS_TABLES
- SUMMARY_STAT_SYS_TABLES
- GLOBAL_STAT_SYS_TABLES
- STAT_SYS_INDEXES
- SUMMARY_STAT_SYS_INDEXES
- GLOBAL_STAT_SYS_INDEXES
- STAT_ALL_TABLES
- SUMMARY_STAT_ALL_TABLES
- GLOBAL_STAT_ALL_TABLES
- STAT_ALL_INDEXES
- SUMMARY_STAT_ALL_INDEXES
- GLOBAL_STAT_ALL_INDEXES
- STAT_DATABASE
- SUMMARY_STAT_DATABASE
- GLOBAL_STAT_DATABASE
- STAT_DATABASE_CONFLICTS
- SUMMARY_STAT_DATABASE_CONFLICTS
- GLOBAL_STAT_DATABASE_CONFLICTS
- STAT_XACT_ALL_TABLES
- SUMMARY_STAT_XACT_ALL_TABLES
- GLOBAL_STAT_XACT_ALL_TABLES
- STAT_XACT_SYS_TABLES
- SUMMARY_STAT_XACT_SYS_TABLES
- GLOBAL_STAT_XACT_SYS_TABLES
- STAT_XACT_USER_TABLES
- SUMMARY_STAT_XACT_USER_TABLES
- GLOBAL_STAT_XACT_USER_TABLES
- STAT_XACT_USER_FUNCTIONS
- SUMMARY_STAT_XACT_USER_FUNCTIONS
- GLOBAL_STAT_XACT_USER_FUNCTIONS
- STAT_BAD_BLOCK
- SUMMARY_STAT_BAD_BLOCK
- GLOBAL_STAT_BAD_BLOCK
- STAT_USER_FUNCTIONS
- SUMMARY_STAT_USER_FUNCTIONS
- GLOBAL_STAT_USER_FUNCTIONS
- Workload
- Session/Thread
- SESSION_STAT
- GLOBAL_SESSION_STAT
- SESSION_TIME
- GLOBAL_SESSION_TIME
- SESSION_MEMORY
- GLOBAL_SESSION_MEMORY
- SESSION_MEMORY_DETAIL
- GLOBAL_SESSION_MEMORY_DETAIL
- SESSION_STAT_ACTIVITY
- GLOBAL_SESSION_STAT_ACTIVITY
- THREAD_WAIT_STATUS
- GLOBAL_THREAD_WAIT_STATUS
- LOCAL_THREADPOOL_STATUS
- GLOBAL_THREADPOOL_STATUS
- SESSION_CPU_RUNTIME
- SESSION_MEMORY_RUNTIME
- STATEMENT_IOSTAT_COMPLEX_RUNTIME
- Transaction
- Query
- STATEMENT
- SUMMARY_STATEMENT
- STATEMENT_COUNT
- GLOBAL_STATEMENT_COUNT
- SUMMARY_STATEMENT_COUNT
- GLOBAL_STATEMENT_COMPLEX_HISTORY
- GLOBAL_STATEMENT_COMPLEX_HISTORY_TABLE
- GLOBAL_STATEMENT_COMPLEX_RUNTIME
- STATEMENT_RESPONSETIME_PERCENTILE
- STATEMENT_USER_COMPLEX_HISTORY
- STATEMENT_COMPLEX_RUNTIME
- STATEMENT_COMPLEX_HISTORY_TABLE
- STATEMENT_COMPLEX_HISTORY
- STATEMENT_WLMSTAT_COMPLEX_RUNTIME
- STATEMENT_HISTORY
- Cache/IO
- STATIO_USER_TABLES
- SUMMARY_STATIO_USER_TABLES
- GLOBAL_STATIO_USER_TABLES
- STATIO_USER_INDEXES
- SUMMARY_STATIO_USER_INDEXES
- GLOBAL_STATIO_USER_INDEXES
- STATIO_USER_SEQUENCES
- SUMMARY_STATIO_USER_SEQUENCES
- GLOBAL_STATIO_USER_SEQUENCES
- STATIO_SYS_TABLES
- SUMMARY_STATIO_SYS_TABLES
- GLOBAL_STATIO_SYS_TABLES
- STATIO_SYS_INDEXES
- SUMMARY_STATIO_SYS_INDEXES
- GLOBAL_STATIO_SYS_INDEXES
- STATIO_SYS_SEQUENCES
- SUMMARY_STATIO_SYS_SEQUENCES
- GLOBAL_STATIO_SYS_SEQUENCES
- STATIO_ALL_TABLES
- SUMMARY_STATIO_ALL_TABLES
- GLOBAL_STATIO_ALL_TABLES
- STATIO_ALL_INDEXES
- SUMMARY_STATIO_ALL_INDEXES
- GLOBAL_STATIO_ALL_INDEXES
- STATIO_ALL_SEQUENCES
- SUMMARY_STATIO_ALL_SEQUENCES
- GLOBAL_STATIO_ALL_SEQUENCES
- GLOBAL_STAT_DB_CU
- GLOBAL_STAT_SESSION_CU
- Utility
- REPLICATION_STAT
- GLOBAL_REPLICATION_STAT
- REPLICATION_SLOTS
- GLOBAL_REPLICATION_SLOTS
- BGWRITER_STAT
- GLOBAL_BGWRITER_STAT
- GLOBAL_CKPT_STATUS
- GLOBAL_DOUBLE_WRITE_STATUS
- GLOBAL_PAGEWRITER_STATUS
- GLOBAL_RECORD_RESET_TIME
- GLOBAL_REDO_STATUS
- GLOBAL_RECOVERY_STATUS
- CLASS_VITAL_INFO
- USER_LOGIN
- SUMMARY_USER_LOGIN
- GLOBAL_GET_BGWRITER_STATUS
- Lock
- Wait Events
- Configuration
- Operator
- Workload Manager
- Global Plancache
- Appendix
- Tool Reference
- Tool Overview
- Client Tool
- Server Tools
- Tools Used in the Internal System
- Error Code Reference
- Description of SQL Error Codes
- Third-Party Library Error Codes
- GAUSS-00001 - GAUSS-00100
- GAUSS-00101 - GAUSS-00200
- GAUSS 00201 - GAUSS 00300
- GAUSS 00301 - GAUSS 00400
- GAUSS 00401 - GAUSS 00500
- GAUSS 00501 - GAUSS 00600
- GAUSS 00601 - GAUSS 00700
- GAUSS 00701 - GAUSS 00800
- GAUSS 00801 - GAUSS 00900
- GAUSS 00901 - GAUSS 01000
- GAUSS 01001 - GAUSS 01100
- GAUSS 01101 - GAUSS 01200
- GAUSS 01201 - GAUSS 01300
- GAUSS 01301 - GAUSS 01400
- GAUSS 01401 - GAUSS 01500
- GAUSS 01501 - GAUSS 01600
- GAUSS 01601 - GAUSS 01700
- GAUSS 01701 - GAUSS 01800
- GAUSS 01801 - GAUSS 01900
- GAUSS 01901 - GAUSS 02000
- GAUSS 02001 - GAUSS 02100
- GAUSS 02101 - GAUSS 02200
- GAUSS 02201 - GAUSS 02300
- GAUSS 02301 - GAUSS 02400
- GAUSS 02401 - GAUSS 02500
- GAUSS 02501 - GAUSS 02600
- GAUSS 02601 - GAUSS 02700
- GAUSS 02701 - GAUSS 02800
- GAUSS 02801 - GAUSS 02900
- GAUSS 02901 - GAUSS 03000
- GAUSS 03001 - GAUSS 03100
- GAUSS 03101 - GAUSS 03200
- GAUSS 03201 - GAUSS 03300
- GAUSS 03301 - GAUSS 03400
- GAUSS 03401 - GAUSS 03500
- GAUSS 03501 - GAUSS 03600
- GAUSS 03601 - GAUSS 03700
- GAUSS 03701 - GAUSS 03800
- GAUSS 03801 - GAUSS 03900
- GAUSS 03901 - GAUSS 04000
- GAUSS 04001 - GAUSS 04100
- GAUSS 04101 - GAUSS 04200
- GAUSS 04201 - GAUSS 04300
- GAUSS 04301 - GAUSS 04400
- GAUSS 04401 - GAUSS 04500
- GAUSS 04501 - GAUSS 04600
- GAUSS 04601 - GAUSS 04700
- GAUSS 04701 - GAUSS 04800
- GAUSS 04801 - GAUSS 04900
- GAUSS 04901 - GAUSS 05000
- GAUSS 05001 - GAUSS 05100
- GAUSS 05101 - GAUSS 05200
- GAUSS 05201 - GAUSS 05300
- GAUSS 05301 - GAUSS 05400
- GAUSS 05401 - GAUSS 05500
- GAUSS 05501 - GAUSS 05600
- GAUSS 05601 - GAUSS 05700
- GAUSS 05701 - GAUSS 05800
- GAUSS 05801 - GAUSS 05900
- GAUSS 05901 - GAUSS 06000
- GAUSS 06001 - GAUSS 06100
- GAUSS 06101 - GAUSS 06200
- GAUSS 06201 - GAUSS 06300
- GAUSS 06301 - GAUSS 06400
- GAUSS 06401 - GAUSS 06500
- GAUSS 06501 - GAUSS 06600
- GAUSS 06601 - GAUSS 06700
- GAUSS 06701 - GAUSS 06800
- GAUSS 06801 - GAUSS 06900
- GAUSS 06901 - GAUSS 07000
- GAUSS 07001 - GAUSS 07100
- GAUSS 07101 - GAUSS 07200
- GAUSS 07201 - GAUSS 07300
- GAUSS 07301 - GAUSS 07400
- GAUSS 07401 - GAUSS 07480
- GAUSS 50000 - GAUSS 50999
- GAUSS 51000 - GAUSS 51999
- GAUSS 52000 - GAUSS 52999
- GAUSS 53000 - GAUSS 53699
- System Catalogs and System Views
- FAQs
- Glossary
Use GUI to Access MogDB
This document introduces how to access MogDB through the commonly used GUI.
Data Studio
1. Introduction
Data Studio is an Integrated Development Environment (IDE) that helps database developers build the application conveniently. It supports essential features of the database. This tool allows working with database objects with minimal programming knowledge. Data Studio provides you with various features, such as
- creating and managing database objects
- executing SQL statements or SQL scripts
- editing and executing PL/SQL statements
- viewing the execution plan and cost through the GUI
- exporting table data
The database objects that are created and managed include
- database
- schema
- function
- procedure
- table
- sequence
- index
- view
- tablespace
- synonym
It also provides SQL assistance for various queries/procedures/functions executed in the SQL Terminal and PL/SQL Viewer.
2. System Requirements
This section provides the minimum system requirements for using Data Studio.
Hardware Requirements
Table 1 Hardware Requirements for Data Studio
| Hardware Requirement | Configuration |
|---|---|
| CPU | x86 64-bit |
| Available RAM | A minimum of 1 GB memory |
| Available hard disk | A minimum of 1 GB space reserved for Data Studio installation directory and 100 MB space reserved for user's HOME directory. |
| Network requirements | Gigabit Ethernet |
Operating System Requirements
The supported versions of Microsoft Windows running on a universal x86 server include Windows 7 (64-bit), Windows 10 (64-bit), Windows 2012 (64-bit), and Windows 2016 (64-bit).
Software Requirements
Java 1.8.0_181 or later
Note:
- Please refer to java.com to set the Java Home path.
- To ensure the optimal experience, the recommended minimum screen resolution is 1080 x 768. Below this resolution, the interface will be abnormal.
3. Download and Installation
The download address of Data Studio is as follows: https://opengauss.org/en/download/
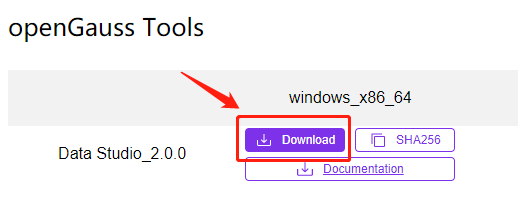
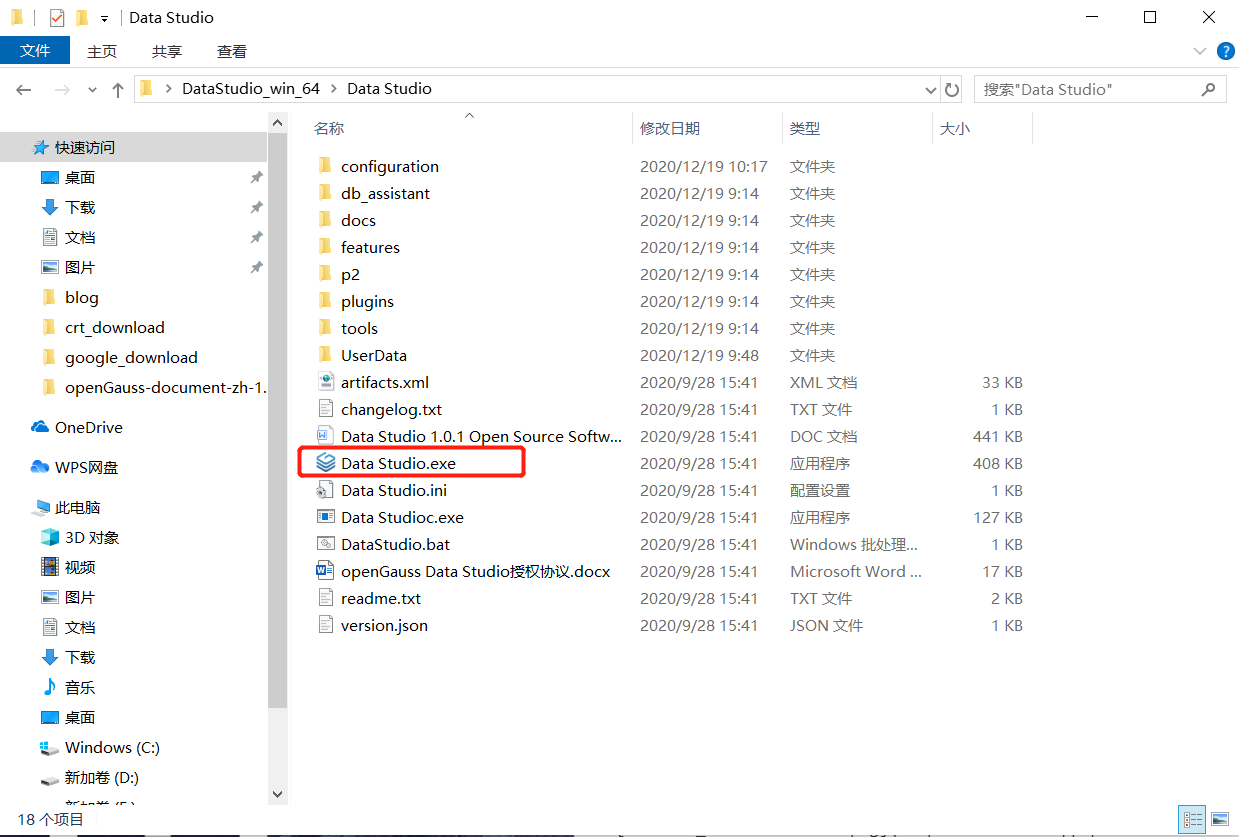
After downloading, unzip the installation package and double-click Data Studio.exe to run the software.
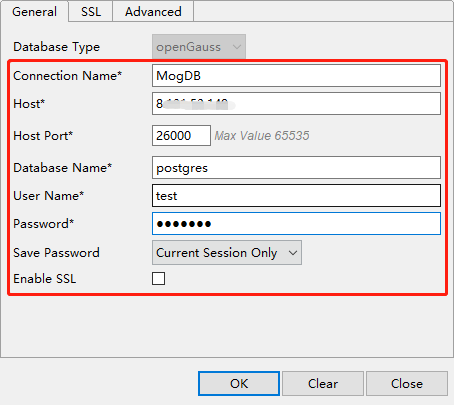
4. Connection String Configuration
When the software is opened for the first time, the New Database Connection window will pop up, as shown in the figure below.
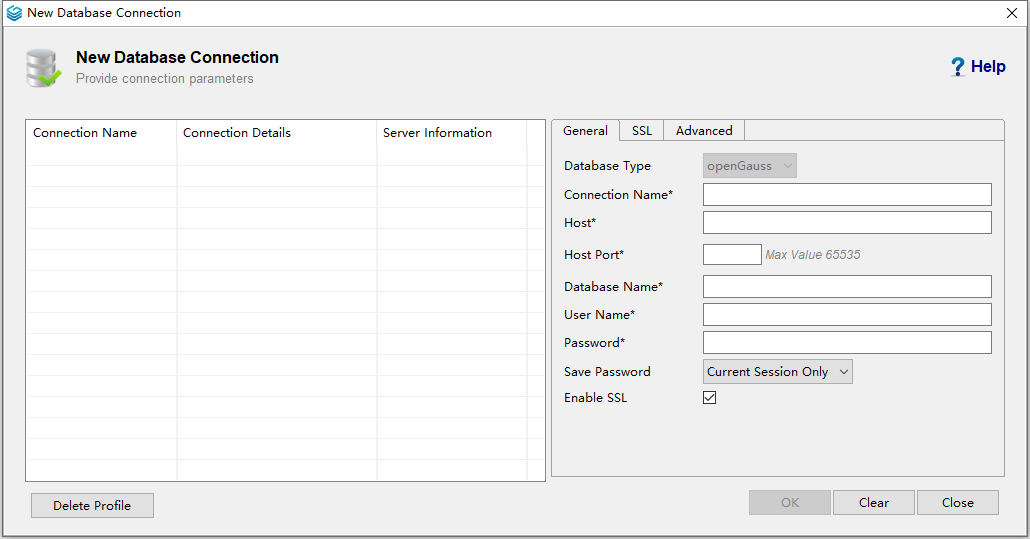
You can also choose File > New Connection to open this window.

Fill in the information on the General tab, and click OK to establish a database connection.
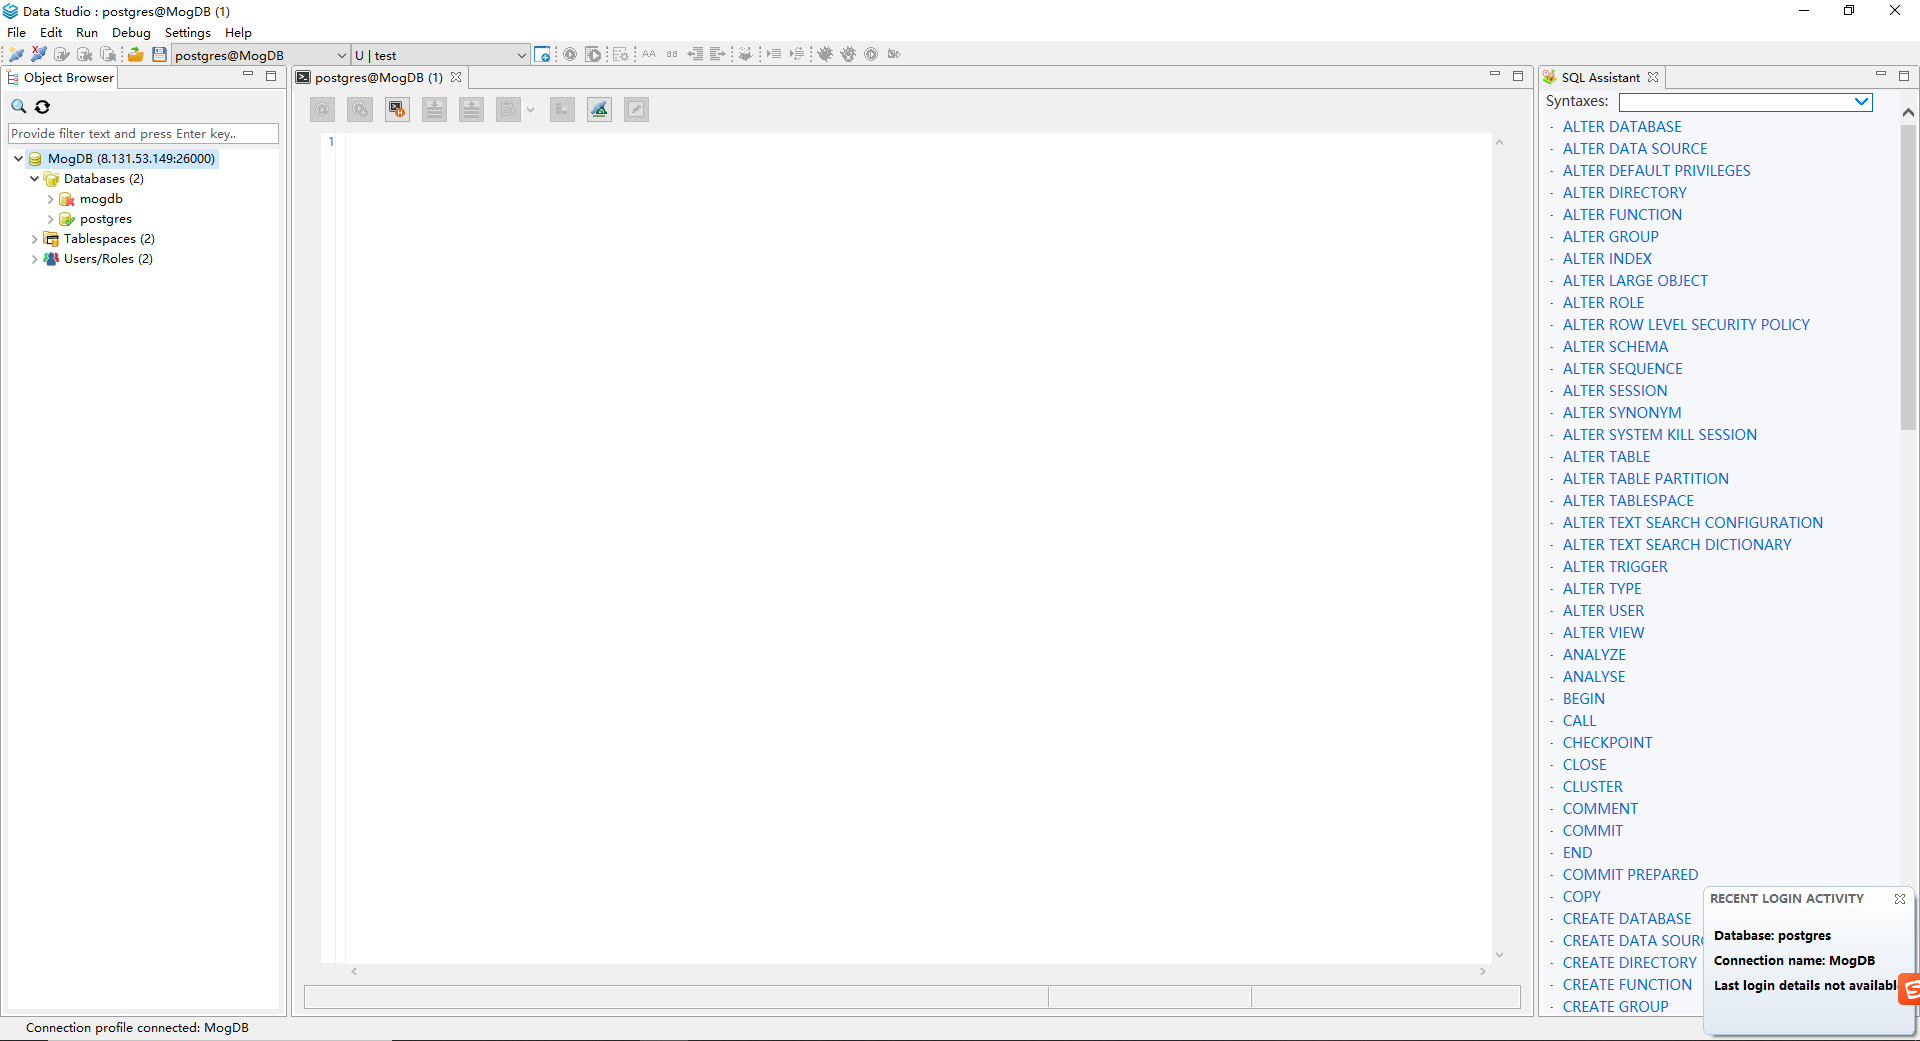
5. Interface Display
After a successful connection, the software interface is shown below, with examples of syntax and operation lists on the right.
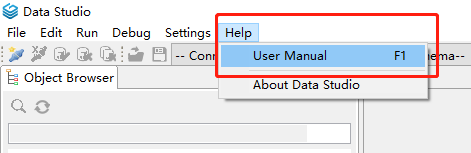
6. Follow-Up Procedure
If you want to learn more about the usage instructions of Data Studio, please choose Help > User Manual, or visit the following page to browse the official documents online: Data Studio User Manual.
DBeaver
1. Introduction
Dbeaver is a cross-platform database developer tool, including SQL programming, database management and analysis. It supports any database system that adapts to the JDBC driver. At the same time, the tool also supports some non-JDBC data sources, such as MongoDB, Cassandra, Redis, DynamoDB, etc.
- This tool provides many powerful features, such as metadata editor, SQL editor, rich text data editor, ERD, data import/export/migration, SQL execution plan, etc.
- The tool is developed based on the eclipse platform.
- Adapted databases include MySQL/MariaDB, PostgreSQL, Greenplum, Oracle, DB2 LUW, Exasol, SQL Server, Sybase/SAP ASE, SQLite, Firebird, H2, HSQLDB, Derby, Teradata, Vertica, Netezza, Informix, etc.
2. Download and Installation
Dbeaver is an open source software with the download address as follows: https://dbeaver.io/download/
Select and download the appropriate installation package according to your operating system, and double-click the package to install it after the download is complete.
3. Connection String Configuration
When the software is opened for the first time, the Connect to a database window will pop up, as shown in the figure below.
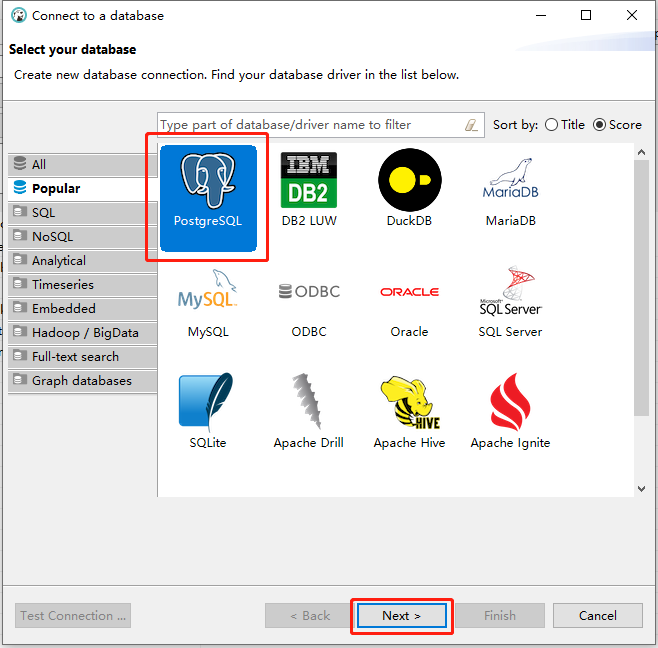
You can also choose Database > New Database Connection to open this window.
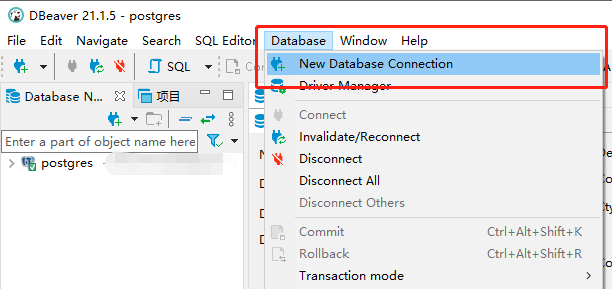
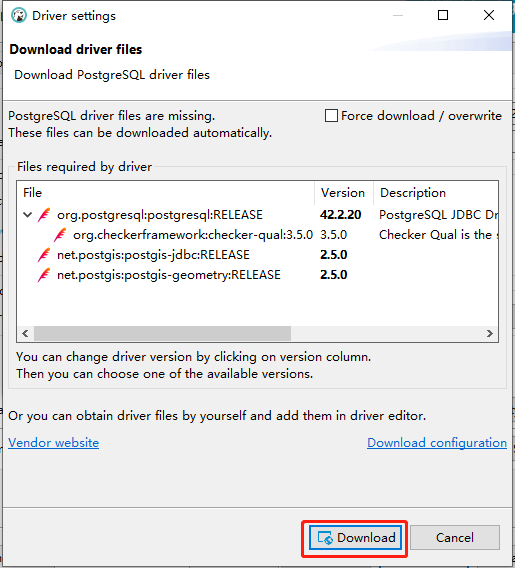
Choose Popular > PostgreSQL, click Next, and download the PostgreSQL driver file on the pop-up page.
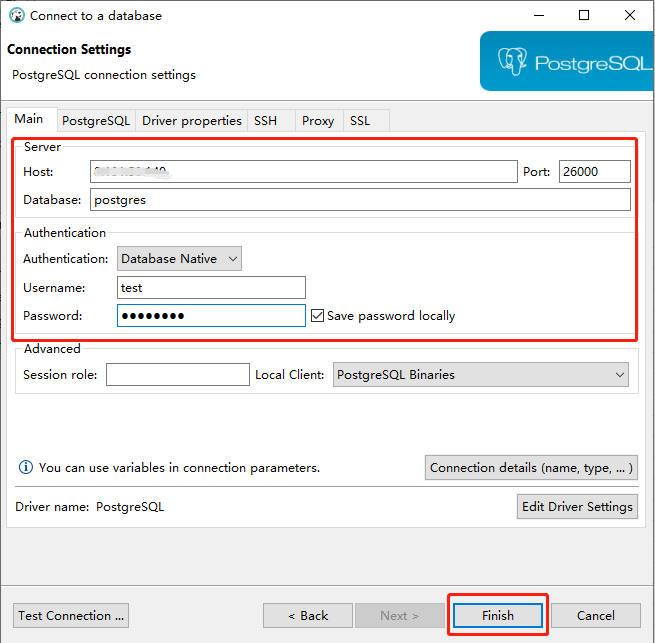
After the download is complete, the Connect a database window will pop up, fill in the database information in this window, and then click Finish to establish a database connection.
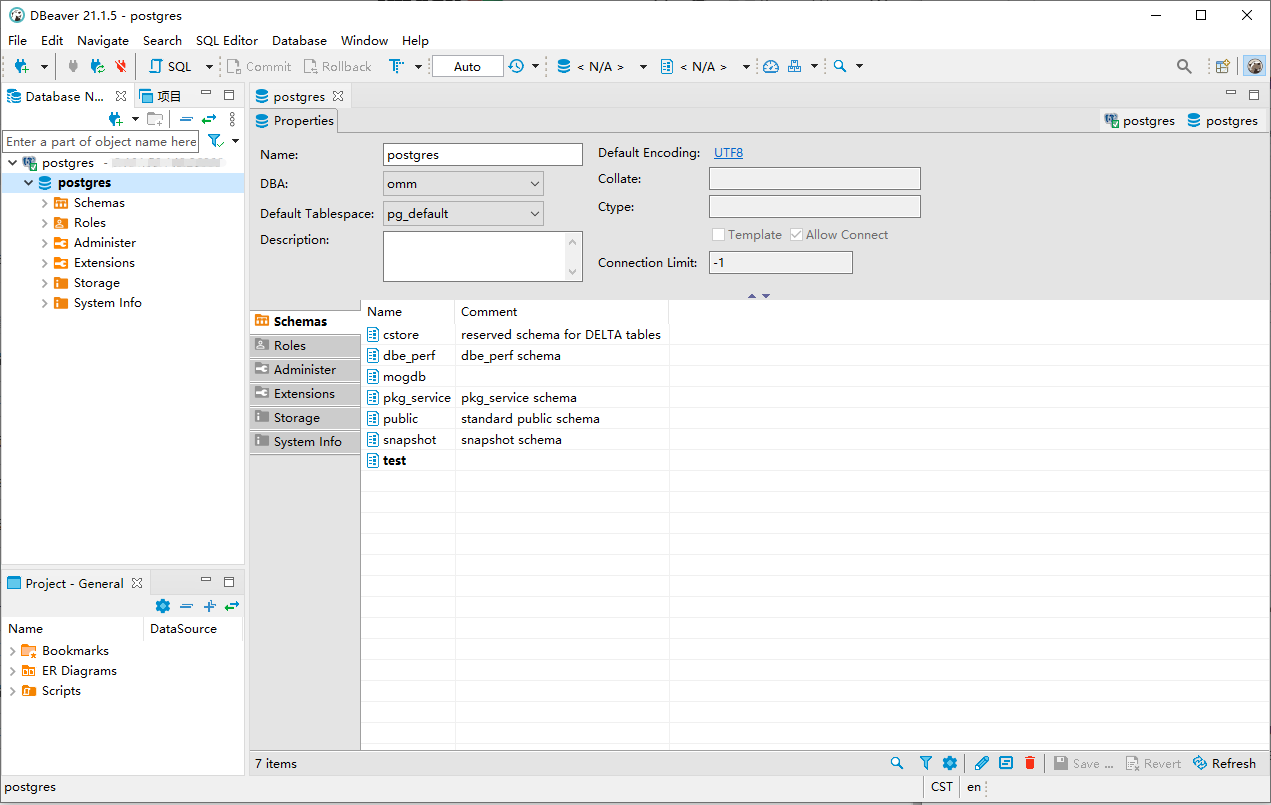
4. Interface Display
After a successful connection, the software interface is shown below.
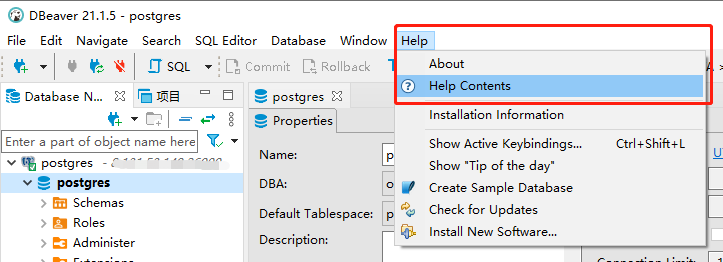
5. Follow-Up Procedure
If you want to learn more about the usage instructions of DBeaver, please choose Help > Help Contents, or visit the following page to browse the official documents online: https://dbeaver.com/docs/wiki/.